A friend of mine and I have been talking about orchids lately. The dendrobium papilo comes from a relatively cool growing area in the Phillipines. What that means is it probably is happy at typical household temperatures during Canadian winters, slightly warmer during the day, and a cool drop at night. What it is not so happy about is the humidity. Some quick googling suggests that 70-80% RH would be appropriate for this plant in its natural habitat. Naturally, this is impractical to maintain in a home and good practice would be to support the plants needs by keeping it regularly watered and preventing the growing media from growing out. But what if we could bump up the humidity even a little bit? Surely 50% RH is better than 30%? My friend wondered if putting a pebble tray beneath the plant might do any good.
Here’s where the sketchy science comes in. At 21C, 30% RH gives us an absolute humidity of 5.5 g/m3 (https://www.ready.noaa.gov/READYmoistcal.php). To get it up to 50% RH, we would need 9.1 g/m3, with the inrease required being 3.6 g/m3, that doesn’t seem too much. Let’s pretend we’re in the bathroom in the average US home of 40 square feet, with a height of 10 ft. That gives us 11.3 m3 and would require about 40.7 g of water added into the air. This is readily done by taking a shower. However, hopefully shower users have noticed their bathrooms drying out over time. The turnover rate of air in a house starts around once every 3 hours. For convenience, let’s consider that 1/3 of the air is replaced every hour. At the start of the hour, we’ve added the 40.7 g. We lose a third of this if the air (TWC: 102.8 g) is well-mixed (-34.3 g) and it is replaced with the 30% RH air (+20.7). To maintain the 50% RH, we need to make up for the difference and add 13.6 g. Since we’re no longer runing the shower, how long does it take to add 13.6 g into the air passively via evaporation?
Let’s use an airflow rate of 20 m/s (72 km/h) if the pebble tray is sitting right in front of the vent. For a 3 inch saucer, that’s about182 cm2 of surface area. Let’s say 300 cm2 (0.03 m2) if you add lots of porous pebbles. Under the most efficient evaporation rate (when the RH is 30%), the evaporation rate is 131.7 g/hour, or 131.7 mL/hour. That’s pretty darned good! All you need to do now is add 3 kg of water a day. The tray is probably at most 3 cm deep by the way, so it can hold just under 550 cm3 of water, or 550 mL. So you only need to top off every 3-4 hours really.
The problem is, none of what I’ve posed above is realistic. First, the air being exchanged in is probably close to 0. Currently where I am, it’s 80% RH outside. From -10 C outside to 21 C indoors, we would have just under 10% RH air coming in. So instead of adding 20.7 g, into the air with the exchange, we’re adding about 6.4 g of water. Which means we need to make up for an additional 14.3 g, double what we had earlier for a total of 27.9g. Our plants usually don’t sit right by the vent, and I had used the *main* duct velocity. According to this reddit post (https://www.reddit.com/r/AskEngineers/comments/t5yfj0/how_to_calculate_air_velocity_after_it_exits/), the plants need at least 0.5 m/s for good airflow (which I pointed out might be a concern with resting your plant right on top of a tray if it covers up the entire surface). Let’s say the airflow is 5 m/s right out of the vent, which is about the upper realistic value for a low pressure duct. It is likely much lower elsewhere, but let’s call it 5 m/s anyhow. Now we’re at an evaporation rate of 390.0 g/hour (https://www.omnicalculator.com/physics/evaporation-rate#google_vignette). At 0.5 m/s, this is reduced to 112.1 g/hour. Still, about 3 times the replacement rate that we needed. Right now we’re assuming that the cooler, higher humidity air from above the tray is mixing into the overall bathroom and the airflow is directly passing over the surface.
At this point, the bathroom is looking like a pretty good spot. There are some unrealistic assumptions I’ve made, like the hourly time step, but overall it might be possible to maintain 50% RH in the bathroom!
Now let’s think about the living space. Let us increase the size of the space and call it 50 m3. The water content at 50%RH in this room is 455 g, and the water loss from the 3x turn over is -151.7 g + 29.3 g = 122.4 g. The same saucer is placed somewhere with good airflow, and evaporates at 112.1 g/hour. This is now less than our target 50%RH. If you run this forward by 24 hours with continual water top-ups, you end up with 455 g – (122.4 g – 112.1 g) x24 = 455 g – 247.2 g = 207.8 g of water. That’s 4.15 g/m3 and about 23%RH (note that evaporation will of course increase once you hit below by previous threshold of 30% RH).
Here’s the real practical test. Spill about 100 g of water in a relatively small room that still has airflow. Measures the relative humidity every few minutes in the room. How long does it actually take to evaporate? If you start at 30% RH, what do you end up with after a few minutes? (For reference, I add about 1.5 kg of water into my ~ 20-30 m3 room each day just topping up plants and fish tanks, my room sits between 45 – 50%RH. The water loss is mostly via transpiration through plants, and dehydration of the extremely high surface area of spaghnum moss topping most my plants, not the fish tank! The surface area of the tank is a bit under a square meter, but it’s a shallow tank where the humidity is partially trapped by a plexiglass pane so it does not mix readily into the rest of the room.)
September has been…a month. Conference! Travel! 15 meetings in a week! TA squabbles! Getting towed home for the first time! and wrapping it up with a good dose of houseplants and paper and proposal submissions.
We’ve been using the following format on a shared Google Slides document in the PVL group meetings for the past few months, and it’s been working quite well! It goes: list one accomplishment and one challenge you’ve experience since the last group meeting, and put down your goal to complete by next meeting. Most folks end up putting more than one item, and it functions as a quick status update for everyone. Occasionally we linger longer on certain slides to discuss a figure someone has chosen to represent their week, or we chime in to help out with the challenge or offer support for the goal. My list is rather long since it’s been a while.
Accomplishment(s):
finished putting together animated slides for a presentation I gave at EPSC-DPS! I think the audience enjoyed it
Met a potential postdoc supervisor or two (networking things)
conducted two health and safety inspections (and described 150+ photos as part of the recommendations)
Convinced people to help me with 3 separate Global Climate Models! Yay data!
Stayed a few extra days to get to know Finland a little better, meet some friends, and trek around the country! Figures 1 and 2 highlight a couple of easily accessible landscapes
Figure 1. A photo of the southern side of Suomenlinna, the Fortress Island a 15 minute ferry ride south of a Helsinki port. This island has seen three different sets of wartime preparations. The southern coast has numerous cannons, a King’s Gate, and really slippery rocks! Towards the north it looks more like a park. Figure 2. Slightly more inland photo of Suomenlinna. Here you can see the smoothed out rocky features that likely experienced glaciers moving over them. You can also see how different the weather was! Finnish clouds move fast, though we were told this year was abnormally humid at this time of year.
Challenge(s):
Time. It’s always time. I managed to schedule 3 weeks worth of meetings into one week on my return. Ouch.
I might also be feeling a little bit sick!
Goal(s):
Clean up my inbox. There are at least 10 emails I should really get around to responding!
Send in three papery things. A revised manuscript (done!), a fellowship application, and a travel grant. Maybe another fellowship application if time permits
Upload my code already. Xml the pidgeon has thoughts (Fig. 3)
Figure 3. Xml! The judgey pidgeon from the PDS looking at you for not formatting to standard.
Normally I’d be all like, I need to take the weekend and do more work! Squeeze in some extra hours! When I’ve done this in the past, what it really means is I lounge about and feel guilty about not typing away. This time around, I had a few scheduled social events already in my calendar and I simply didn’t have the time to do too much weekend work because I was busy sleeping to have energy to do social things!
Looking Forward into October
Things have relaxed a bit since the hectic go go go upon my immediate return. I’ve pushed back my optimistic (and slightly unrealistic) goal of defending my dissertation super early since all the postdoc positions I’m applying to have a tentative start date in September 2026. Sleep has been caught up on. And I’ve received some excellent feedback on the structure and delivery of some of the proposals and statements I was working on. I did commit to several boardgame and table top RPG sessions this month, so we’ll see if packing in social events bites me in the butt in October.
Personal Updates
Accomplishment(s):
plants are growing! Here’s a list of highlights on blooms
Hoya linearis – these peduncles have been around for months. Will they ever expand? Only time will tell
Hoya decipulae – I bought this plant for the blooms, and it looks like I might have two soon! (Fig. 4)
Oncidium cheirophorum- already in bloom, I caught these opening up right before I left the country, so the first stalk has been around for just under a month and the blossoms are starting to dry up. These smell… for lack of better words, clean floral. There’s a faint herbaceousness to it, and damp, but that could be the terrarium it lives in. Figure 5 shows the blooms on the day I got back!
90% unpacked from the previous trip
successfully purchased things at the african violet show for a remote friend! Example in Figure 6 of a plant we’re going to split
Figure 4. Hoya decipulae peduncle and flowers on the way! They’re supposed to look like eggbeaters…Figure 5. Oncidium cheirophorum. I bought this in bloom last year as a gift, took a small setion as a backup, and here we are today! It lives in a terrarium mounted in dried sphagnum moss next to a NoID bromeliad, philodendron micans trying to craw over everything, and a philodendron florida ghost casually flopped over it.Figure 6. LE Erika! We’re both excited for this one. It’s a trailing type african violet that seems to be difficult to grow. The white variegation blushes pink with enough light, and it should self-propagate given enough horizontal space to grow into.
Challenge(s):
anthuriums are starting to rot and look uphappy left and right!
Froggy still hasn’t received her upgraded tank
getting towed home was a thing, but this was a surprisingly quick situation to deal with. The major consequence is my wallet being $250 lighter (tire change and then some) and getting bruised on my knee for hauling aroud my previously oversized tires. See Figure 7 for the culprit.
ruined two pairs of pants! I dropped candle wax all over my favourite sweat pants, and had a ballpoint explode on another pair of pants (this one is partially addressed, but still hanging on a rack for me to deal with)
Time, of course
Figure 7. Check out the thickness of that tire post deflation.
Goal(s):
build or find a stand for the custom tank (Figure 8 is an image of the future resident!)
This leads to finally clearing my floor of all the plant propagations I have stacked in bins meant to fill said tank
fully unpack from last trip
finish writing the draft for an RPG module that I wanted to use as an outreach tool (and fun times) that I was hoping to get done in Summer!
take a look at all the moss photos I took in Finland and distribute them as need be!
Figure 8. Frogfoot Meteor awaits her upgrade patiently and not at all threateningly.
Truthfully, my personal life usually is about this chaotic, if not more so. Things are always in motion and mechanical items have limited lifespans. Having hobbies that involve living things also means that sometimes things happen outside of my control. One thing that’s been weighing on my mind is how to pass along all my plants if I move out of the country. Or what to do with my geckos if I move to a place where they aren’t allowed pets. A problem for a future me I suppose.
Figure 9. A realistic representation of me in my daily life.
I’ve been encouraged to write freely this week, so here we are! At first I wanted to discuss travelling in the current climate since I just went down to Baltimore, MD for a workshop (delightful, ended up with some strange plots and more questions than I went with!). I’ve been travelling internationally alone for the last decade or so, and it hasn’t always gone smoothly. Typically my travel related posts have to do with taking care of plants while I’m gone, this time is no different. Except it has a few additional critters in the mix (Exhibit A: Figure 1).
Figure 1. Gecko! Xavion has a little spinal kink from prior to my acquisition, but he’s a delightful gaming companion when he isn’t trying to interact with my touch screens. I got Xavion as a young adult, so his growth will be extremely slow in comparison to the others.
Shortly after I returned from my trip in South Korea, I decided to acquire a single crested gecko. I had some time to dial in the terrarium that I had built for my plants to survive my time away, and build a second one just in case I got a very small gecko. There’s no real compelling reason to put a very small gecko in a smaller enclosure, but I figured it would be better for me to keep an eye on the health of a very young animal in an easier to scan through enclosure for a while before upgrading it as it grew larger. In the back of my mind, I was looking for a high-contrast gecko with long, fluttery lashes. On an aesthetic level, I was looking for a red and white pattern. After quite a bit of research however, I concluded that all crested geckos were cute (except for the ones with genetic problems from bad breeding, looking at those is somewhat distressing) and I’d be happy with a patternless one as well. My goal was to have a happy and friendly gecko that was not opposed to being held from time to time (Figure 2 is an example of an endlessly smiling gecko that is very relaxed when hanging out. So relaxed that he tends to go to the bathroom on people once settled in).
Figure 2. A Spicy Cream Cheese Wonton. Spicy enjoys hanging off my plants and prefers his food to be a day old at least. I got Spicy fairly young, and he’s expected to pack on quite a bit more weight in the next couple of years!
Anyhow, I ended up with two after visiting a local breeder (Xavion – 32.7 g to 38.6 g, and Spicy Cream Cheese Wonton – 13.5 g to 23.7 g, respectively, see Figures 1 and 2). Not too long after, I acquired a gargoyle gecko in relatively poor health (Frogfoot Meteor, 11.9 g to 30.1 g, Fig. 3). She was somewhat underfed, and terrified of humans. I’m happy to report that she’s doing much better now and lives in a far larger enclosure than what the breeder insisted was her “upgrade”. She’s put on a healthy amount of weight and is significantly less skittish than before.
Figure 3. There’s a Froggy in here, promise!
Here she is! She’s short a few toes and has been steadily moving towards adulthood (the tummy is normal for gargoyle geckos). She has the most robust appetite of all the geckos and I expect her to hit full adult size before Spicy does.
A few months later, I helped out with some folks who were undergoing a legal dispute over their housing situation by rehoming a few of their mourning geckos (Katana and Wheelbarrow, Fig. 4). At this point, there are 5 additional animals to take care of. Perhaps surprisingly to the reader, this takes about 3 – 5 minutes of my day most days. I would also argue that it can’t take much less, since fresh water is a necessity and its important to have a bowl of water readily available all the time. This can’t quite be replaced by an auto-mister unless I also add in a way to sterilize the water bowls. A “self-cleaning” water system wouldn’t work either, as it would have to be large enough that its presence would present a drowning risk or required some form of UV sterilization (impractical). Feeding has mostly moved from once every 2 days to once every 3 days for all but Spicy.
Figure 4. This one is most likely Wheelbarrow. I tell them apart by their tail thicknesses. She’s halfway to her maximum size!
Why am I listing all of this down? Mostly I think they’re cute, but I also wanted to note the care requirements. That is, they need to be interacted with ideally every 24 hours, with 48 hours somewhat pushing it.
I listed all these details to make the point of: Do not acquire pets that require regular care unless you have a solution for their care when you are gone. For the less than 72 hours I was away, I had someone spray down the enclosures and change out the water bowls daily (Fig. 5). They were fed once during this time with food I had pre-made. The animals are well taken care of, and the chances that they are overfed or go without critical needs is negligible.
Figure 5. A cryptic list of instructions. The crabs are another story.
This was quite unlike my plants, which I left no instructions for other than to optionally water my carnivorous plant bowl with rain water if so desired, it is quite important to leave detailed care instructions and run them through the caretaker prior to departure.
The Circle of Life
Okay so, I mentioned feeding and watering, but what about bedding changes? and cleaning?
The short answer is, there is none to do! While there may be quite a few water stains that are unsightly, the enclosures are self-cleaning for the most part. During the daily watering and spray down, excess food and waste are washed to the base of the enclosure, where my secondary pets live. I have a full cleanup crew in each of the gecko enclosures. They breakdown waste to be further decomposed and eventually converted into fertilizer, and the plants in the enclosure take up the nutrients to keep growing. The more complex and the more layers and redundancies added to this cycle, the less something is likely to go drastically wrong in a short amount of time.
I use the same principle for my aquariums. Generally, I’ve set everything to be reasonably self-sustaining, with plants uptaking waste that might otherwise be toxic, and critters at the bottom level that break down food and waste into ammonia. Periodically, I check for signs of nutrient imbalance and correct them before the living standards decline. For my fish tanks, this might be as simple as a water change and removing some mulm from places that do not get a lot of water flow. If I were running more high-tech tanks, this might also mean dialling in the CO2 flow and light levels. As it is, I skip the use of aqua soils and opt for either an organic mix that is then topped heavily by sand to minimize leaching into the water, or a highly porous substrate mixed with sand. The denizens at the bottom of the tanks snuffle about looking for food, and push the small waste particles into the sand until they eventually breakdown further and get added to the base level. I have algae eaters to pick at spots that get a little too much light or have low water flow.
For terrariums, they operate similarly. There is a drainage layer that stays consistently damp so that plants have theoretically unlimited access to water should they need it. The substrate is designed to hold plants, moisture, and maintain some void space for oxygen. Isopods roam the lands, breaking up leaf litter and chunks of waste that make it to them. Springtails scrub up inaccessible corners to prevent mold from growing in high humidity and low airflow environments. The things I check in on are how often I spray the tank and water the plants directly, how much airflow the tank gets, and where things are placed with respect to lighting (and gecko trampling). Periodically I may need to supplement the soil layer with more organics and airy components to prevent it from compacting (which the isopods delay when they burrow).
There is an old adage that goes, “the bigger the better”. This is generally true to an extent. For example, I would go no smaller than 10 gallons for a fish tank as a “first fish tank” unless you are doing an exceptionally niche project such as caring for brackish shrimp or raising scuds and have quite a lot of time to commit to doing water changes as the tank stabilizes. For a terrarium that is meant to house an animal, 12x12x18 (inches, barbaric, I know) is the smallest I would consider if I want to have the full cycle of cleanup running, and only if the animal is very small and doesn’t move much in nature.
If you are just considering raising plants in either scenario, 1.5 gallons for a tank is excellent for plants, though you may need to manually remove a lot of algae and a fast growing plant will require a lot of trimming. Alternatively, go up a bit larger and you can include a few snails to help break the surface tension and get some movement into the tank to prevent stagnant sections. Similarly, for a terrestrial based terrarium, you can go much smaller, though you’ll ideally include a culture of spring tails to prevent mold, and ensure that you can give it periodic airflow. You will also likely want your plant looking nice, so that may mean quite a bit of light and heat. Less condensation will block your view if you do allow for airflow, which means finding the minimum size enclosure to maintain moisture in the system as well. I’d recommend at least a 2 L container for your first time if you want it to last a long time.
It’s still on my to-do list to put up a guide to set up a terrarium. But here’s a short version for now!
Beginner’s guide to a sub-tropical to tropical terrarium
Materials:
container, at least the minimum size for what you plan on housing.. Should have a lid with ventilation
mesh/drainage barrier. I like weed blocking fabric, but any synthetic material that will not decompose or rust when wet will work
drainage layer. LECA is my recommendation. Lightweight, relatively cheap, lots of surface area
growing media. Mix of peat OR coco coir, orchiata OR coco husk, spaghnum moss (dried, shredded), activated charcoal chips, perlite OR pumice OR vermiculite OR LECA OR your preferred highly porous, rocky material. Bark and husk are to provide aeration, but they degrade over time to your cleanup crew. Due to the elongated shape, they also provide some irregular sturcture in the media, unlike the more sperical inorganic components. Inorganic porous material also gives aeration, but can very in weight and expense. Perlite is also very ugly because it is a very bright white and tends to “float” towards the top with how light it is. Charcoal acts as a filter for smells, growing media for spring tails, and also acts as aeration. Spaghnum moss (dried, shredded) adds humidity to the mixture without being soaking. Lastly, leaf litter may or may not be optional depending on what you are planning on housing. Rainwater or distilled if you plan on misting the enclosure and don’t like water marks
lighting. Optional but highly useful if you can control the lighting since the enclosure walls will filter out most of the usable light spectrum as is
circulation. Can be a fan, regularly opening the enclosure, or built in fentilation. Remember that it is unlikely you will perfect the gas exchange processes in one shot, and plants produce carbon dioxide at night, so let fresh air in
slim pipette. Scale up depending on the size of the terrarium and how much water the drainage layer can hold.
Set up your drainage layer. 1 in minimum is a safe amount
Cover it with your drainage barrier
Place your growing media overtop to a thickness of at least 1 inch (likely want more depending on the growth pattern of your plants)
Plant in your plants!
Add springtails
Gently water in
Set in a place with light and provide air flow and top up water as needed. The growing media should not be sodden, and excess water should drain into the drainage layer. Under warm conditions, some of the water should recirculate upwards and never be entirely flooded. If it does become flooded, use the pipette to pull out some of the water from the bottom layer
If you are opting for a more designed terrarium, add in a step 3b. Include hardscape that builds a story using either natural (e.g. rocks, wood, bones) or man made materials that will take a long time to degrade to create a framework. This can build up height and mounting places for plants. This can also create shaded areas that might allow for lower light plants to stay compact with minimal growth (and trimming). If you’re anything like me, the building many worlds process can kind of run away from you (Fig. 6), but eventually you’ll work out a good balance for the time you have and the commitment you can make to care for things.
Figure 6. A set of instructions back when I was gone for 8 days. This is the most complex care schedule I’ve ever had to give someone. I’ve since consolidated a lot of things and streamlined the process both for myself, and those taking care of things when I’m gone for more than 2 days at a time.
Some time ago last year, I wrote up a blogpost on how to increase the likelihood of having your plants mostly survive when you’re out of town for an extended period of time. Whether that’s conferences, or field work. Things have changed a little since then, and my environment is now different. The room where my plants mostly reside is hot, very hot during summer months. This means watering some of my plants nearly every day to keep up with their requirements and the methods I had come up with in the past wouldn’t quite cut it. If I was gone for more than a week, I was sure to have casualties with the way things were currently set up. What was the solution?
Figure 1. My grand plan for where all my plants would go, with some hopeful new plants to add in!
Rising Action
Apparently, it was to purchase a large glass box and build a terrarium. I also wanted to make it bio-active, with little critters eating all the mold and decay that was sure to happen in a partly enclosed, high humidity environment. Some of the materials I had already, which is why I felt it was perfectly reasonable to go ahead with the idea with a little over a week to spare. I was able to put together all the components together in a couple of hours, and the next day after the silicone had cured, I dumped in my drainage layer, added some weed blocking fabric, sprinkled some charcoal, and topped it all off with the weirdest soil mix I have ever put together. It didn’t actually work out exactly this way, as I vaguely remember digging up parts and trying to stuff in more drainage a few days later after purchasing some additional parts after I had already set up part of it (see Figs. 2 and 3).
Figure 2. A quick test run to see how humidity would hold up. I was about to start dumping soil in when I decided that I didn’t have enough of a drainage layer. This was addressed by a trip to Provision Garden Supply, a store that sells lightweight expandable clay aggregate (LECA) in bulk, and has a huge variety of soil bases available.
After the structure and soil had been put in, it was time to add some “hardscape” (Fig. 3). That is what “scapers” refer to as the chunky elements that guide the overall composition of a scene (scape). In this case, I had a pile of miscellaneous rocks I had collected over several years, and some corkbark flats that I had purchased by the pound. Then I stuck in all the plants and fussed over their placement in proximity to the light source and soil depth over the next few days while figuring out precisely how frequently they needed to be watered.
Figure 3. Build progression over a few days after I aquired the materials. This PVC pipe was taken from my previous aquarium living wall. In retrospect, I didn’t need one that spanned the whole length and out of the exit hole in the top of the frame. I later found that it also impeded opening of the top frame because it was a hinged mechanism.
Things were going well, I knew the watering schedule, and I knew that there would be family members who could check in fairly regularly rather than leaving everything in darkness for 2 weeks.
Climax
I came back and… not too bad. There were only a few casualties, a spider mite boom, and some very happy isopod colonies. I spent my first full day back cleaning and inspecting the plants in between unpacking and seeing what I had missed while I had been gone.
Figure 4. You may be able to spot a very yellowed alocasia black velvet kicking around in the back there. Also my attempt at fungas gnat control with carnivorous plants did not take. Fortunately this hasn’t been a real issue. In the foreground is a mix of scattered dead leaves and some algae from my fish tanks that act as food sources for the little critters when I’m not feeding them something fancier.
Falling Action
Life moved on, I had work to catch up on, and I was happy that most of my plants were stable. It was highly convenient to be able to water the vast majority of them all at once! Naturally, I also purchased some terrarium specific plants to add in once I saw that everything had been established and was growing in (Appendix, section B). I felt like things were about wrapping up in this terrarium, and as time progressed, I relocated some of my remaining shelf plants into the terrarium.
Then, just this weekend, I went to a plant swap in Toronto. The event has been on my radar for the last couple of months, and I even had a hopeful wishlist of things I would love to find. I brought 8 plants with me to give away, and took home 10 or so. While I did side-eye the health of a few of the plants, I gave everything an intense blast with water and stripped most of them down to the root. No obvious pests. So… I recklessly placed some of them inside as well (Fig. 5). I was feeling pretty comfortable about the whole situation.
Figure 5. New plants acquired and added! The big red one is a cryptanthus that I actually purchased, The extra branch was something I picked up on my way back as well. You may notice some popsicle sticks added in, those are for support in case I get a sudden tumbling of material from all the new added weight. The second image shows my usual view when I swing around my desk chair looking for a distraction.
Denouement
Is the plant care optimization and acquisition adventure over? Probably not. I’m planning on going to a Plant Expo later this year, so chances are I may come across something that I fancy. I might also be able to harvest some of the alyssum seeds out of my potted plant container from outside and see how they fare indoors. This also means, I probably need to look into building more enclosures. The current set up is almost a little too easy to take care of, and its been taking out some of the fun and enjoyment out of plant care and maintenance. I’ll be looking into building an automated watering system, which sounds like it could be the next big adventure. Depending on how things progress, I may also need to look into adding some mini fans to help circulate air and dry out the terrarium faster.
Reflections Upon Return
Despite some losses while I was away, having a main set up has definitely a time saver when it comes to watering and general care. I’d argue that I’ve already earned back the time spent sourcing parts and constructing the entire enclosure. Plus its nice to see all the plants placed so closely together, in comparison to pots dotted about.
While I still like watering my potted plants at weird intervals, daily spraying is a far easier task. It usually ranges between 70 – 90% humidity in there if I’m watering twice a day (trying to get into the habit in case I go forward with the plan of acquiring a gecko, though I would open up the ventilation more for it to drop quite a bit before adding more water!). I also happen to have a pressure sprayer that holds 4 L of water from a whiles back when I was doing preventative spray downs of my plants so watering is extremely quick. I’ve been filling it up with rain water and using it for just about everything.
Mind you, it’s not just watering I have to do. Since it’s a bio-active setup, I still have to feed the critters from time to time. They get any of the following: crushed egg shells for extra calcium, special Soilent Green from Repashy, select dried leaves from elsewhere in my room, and piles of algae and duckweed from my aquariums. So much duckweed. I don’t think they’re big fans to be honest, but it is very nutritious, so they’ll just have to deal. Definitely one of the more fun projects for the summer though. As for the other “worlds”, I’m waiting on them to establish well enough to share any successes and failures.
Figure 6. A little spoiler of the new occupant in this world! He’ll be joining a squad of springtails and isopods. Depending on his activity levels and whether he continues sizing up, this may only be a temporary home while I set up something a little more suitable for him. Only time will tell.
Appendix!
A – Initial Setup
Approximate cost breakdown of the terrarium (initial setup) in CAD:
$100 tank (second hand, 18”x18”x24”)
$20 cork bark (by the pound)
$11 wood
$15 silicone (caulking gun was borrowed)
$10 spring tails (culture from much earlier in the year)
$15 isopods (dairy cow isopods on sale, it’s possible to get them for cheaper and much more)
$0/$50 weed fabric barrier (from a previous project)
$2/$60 spaghnum moss (I’ve been using the same bale for nearly 2 years! I’m finally running out)
$10 lamp (this is the cost of the LED bulb, the lampshade came as part of a store display set)
$10 peat moss/perlite mix (wrong choice by the way, I later topped this off with $5 of coco coir bits)
$3/14 biochar
$5/$60 LECA
$3/$15 mineral magic (pon-like blend)
$5 perlite
Plants that I jammed in there (some of these were added much later when I returned though!):
plant species (personal):
alocasia black velvet (melted away, this sucked since my backup plant dried out while I was gone)
anthurium forgetii
anthurium dorayaki
begonia lynda dawn
cissus discolor (pinky leaves! Though most of it melted away)
davallia fajeensis (rabbit’s foot fern)
ficus pumila green (dried to a crisp!)
hoya crassipetiolata
hoya GPS 7240
hoya mathilde
hoya retusa (finally growing!)
pepperomia bando
phalenopsis (of some spotted leaf variety)
philodendron florida ghost
philodendron micans
pothos manjula
Added after I got back:
begonia fannie moser
begonia escargot
hoya burtoniae aff
hoya coroniae (red)
hoya fitchii
hoya memoria
hoya polyneura
hoya rebecca
hoya sigillatis
maranta var
philodendron white princess (ish)
pothos global green
B – Additions to the Terrarium
Plant species (purchased for terrarium):
begonia burkilii
biophytum sensitivum (I don’t recommend purchasing this one, it seems to just pop up on its own if you purchase other terrarium plants!)
cryptanthus (very pink!)
ficus pumila quercifolia
selaginella sp “Pachitea Dark” (I’m not sure if this is alive and growing or totally dried out)
selaginella uncinata (sold as peacock club moss)
Plant species (plant swap/gifted):
ludisia discolor var. nigrescens (jewel orchid)
monstera lechleriana
syngonium pink spot
hoya nova ghost
dischidia hirsuta (?)
Crested gecko:
2 year old male crested gecko with minor spinal deformity
C – Reviews
Provision Garden Supply – I went to the one in Newmarket and have gone a few times in the past. Usually I’m looking for something specific, like fertilizer or a soil replacement. This time I was looking for a few types of soil, biochar, and LECA. The staff was really helpful in narrowing down the best base “soil” for a terarrium that might one day host a live creature. He pointed me to Lamberts since they had a claim about being entirely organic, though wasn’t convinced it meant all that much. I appreciate the candor though!
JOMO Plant Studio – I’ve shopped from JOMO a few times in the past, and attended one previous plant swap event. It is a store that targets people interested in plants for aesthetic, but has been slowly moving into trendy plants that are often priced pretty high in comparison to their older pricing that was mostly scaled on the size of the plant. The swap event itself was fairly well organized, with drinks and 3D printed freebies as well. It also stayed remarkably on schedule. I have mixed thoughts on the health of their plants, but I have never once seen pests upon arrival. I seem to have bad luck with the few things I’ve gotten from them though.
Understory Enterprises – the source of my terrarium plants (and an ill-advised decision on fruit flies, my fault, not theirs). They were quick to email back on an inquiry for local pickup, it was easy to organize, and the plants were healthy. All are still doing well at this moment!
The Gecko Hub – April at The Gecko Hub responded to my immensely sketchy Instagram message with a lot of grace and let me visit her residence to interview the geckos. She selected 5 based on what she thought I was looking for, and also let me look around the breeding room while chatting about general gecko care and husbandry (and pointing out other geckos that I might be interested in! She was right). I was pretty impressed by her professionalism and knowledge base, as well as her firmness on which animals would be “pet only” due to concerns over passing on unhealthy traits.
A hoya blooming to completion for me was a first! I’m not typically one for blooming plants, but this one promised dark purple flowers, and so I was intrigued. The plant was acquired with two sets of leaves back in 2023, and has since put out another 3 sets of leaves in the intervening time. That’s something like 150% growth! More importantly, during early May, a peduncle started forming. This signifies the potential the plant is starting to push out a cluster of flowers if it doesn’t “blast” off, like my linearis did last year. I was pretty excited to see these “black” blooms, but wasn’t holding my breath. Over the span of another two weeks, the blooms slowly got larger and showed their “waxiness”. I missed the moment where they unfurled, but I came back one day to full on flowers (Figs. 1 and 2).
Apr 21, 2024Apr 27, 2024Apr 28, 2024Figure 1. Left to Right, progression of hoya blooms over a week.
Figure 2. The flowers all open! Picture taken Apr 30, 2024. Also check out that cute olive jar it lives in. Surprisingly hasn’t shown any signs of needing a larger vessel yet! Yellowing is almost certainly from getting too much light.
Flower and Plant Review
The bloomed didn’t smell particularly strong, but there was a faint sweetness if I got very close. Admittedly, I didn’t think through the fact that this plant lived on a shelf, and the blooms were well below my face height while sitting. So to see the blooms, I had to either jam my face in at an awkward angle, or pull out the plant to admire. Anyhow, the plant bloomed, I was happy, but not entirely convinced it was worth the wait. The leaves aren’t particularly charming, and unless it’ll be regularly in bloom, it doesn’t do much as a décor piece. It also made a mess after the pollination, leaving behind nectar blobs that had dripped off onto the shelf. A minor amount of drippiness can be seen in Figure 4.
Figure 3. Hoya blooms early in the morning on May 2, 2024 at 5:09 AM. The nectar can be seem in where the fuzzy petals are slightly darker.
The Response
With that in mind (the plant being rather boring), I tried to go to bed. At some absurd hour, I decided that it might be worthwhile pulling out the information I had on trying to pollinate the plant. I vaguely recalled that I had downloaded a few articles on the procedure, but being in bed, it was easiest to pull out my phone. Here are the two sites I landed on:
I also found a less than useful, but often looked at YouTube resource for pollination and a Reddit thread wishing the poster luck: https://www.reddit.com/r/hoyas/comments/ghng1f/pollinating_hoya_blooms/. The main issue I found was somewhat low resolution images and unclear arrow directions in the diagrams. Even though everything was labelled, looking up the respective parts of the hoya flower across different flower types was quite difficult. Here are the steps with the best interpretation I could make.
Identify the respective components. Hoya blooms tend to be in clusters, though some form single blooms. The flowers are typically 5 sided, forming star patterns. To pollinate, the parts of interest are near the center of the flower, where activity takes place
Pick your weapon
Pull out the pollina by sliding along the surface slit, gently pushing down, hooking the dark joint (corpusculum), and lifting it out. The pollina consists of two pollinium attached by a corpusculum
Identify your target and hold your breath
Slide the pollina into and through the “stigmatic lock”, also known as the ”staminal slit”. The goal is to get the pollen in the pollina to contact the inner walls of the lock
Repeat
I reluctantly rolled out of bed after realizing I wouldn’t be able to sleep unless I tried the pollination out myself. From what I could tell, the goal is simply to readjust the location of the pollen source further up.I took some photos for reference (Fig. 4), then decided to also take the internet’s advice on repeated trials. I balanced juggling my phone, trying to read instructions, while trying to perform the procedure on a single cut flower (Fig. 5). If I could pollinate while it was stably fixed in place, then maybe I’d have an alright shot trying to balance a wobbling plant too.
Figure 4. May 5, 2024. Detailing on the flowers, they are quite dark! Also a fun back shot for more detail. The leaves have cute pink speckling.Figure 5. The test bloom. Isolated and slotted into the base of a terracota pot since that’s what I had on hand.
Procedure
There are “optimal” times for pollination, and I’m not sure the crack of dawn was it. I found it fairly difficult to get the insertion correct, despite this flower having a very simple and accessible structure. This could have been because it was 4:30 am and I was all bleary eyed, or I didn’t have the right tools. The internet recommends a cat whisker (I left mine behind), but I only had a horse hair on hand. I decided to stick with the fresh X-ACTO knife blade gave me the best balance between control and width after the horse hair proved itself too difficult to be used. (Figs. 6 and 7) Note, if you use a utility knife like I did, you’ll find that the flower also bleeds sap!
Horse hairX-ACTO bladeFigure 6. The weapons of choicePicking out the pollinaPost insertionFigure 7. Some snippets of the action.
The Result
In the end, I managed to repeat the procedure at least 3 times across most of the remaining flowers that were still attached to the main stem. One of the biggest issues I had were the pollinarium not wanting to remain in the lock. They would poke out a bit and I was reasonably confident that the probability for fertilization would be just about zero. Trying to insert things in also caused a lot of damage to both the receptive and insertion components of the flower. Nontheless, I was hopeful.
I waited a few more weeks but the flowers all dropped and dried out. A fun experiment, and one I’ll likely try out again if I get the chance. Preferably at a different hour.
Figure 8. Dried up flowers a month later. You can see how plump the flowers used to be! This may be worth dissecting later to see whether or not the pollina vanished.
I’ve also made my own reference diagram I can look at and contribute!
Figure 9. Abstracted diagram for hoya pollination procedure. Find one pollina, remove via corpusculum, insert corpusculum in first through the stigmatic lock, push until pollium contact the inside of the lock. (It is entire possible I got the insertion direction wrong, but I can’t imagine it matters so long as contact is made!)
Next Steps
I might try to invert the shape of the pollina next time in case the pollen is on the inside of the wings rather than the outside edge. For this specific plant, it may also be worth waiting an extra day or two to pollinate, since the flowers lasted for quite a while, and I feel like they would naturally be more receptive when the nectar is more actively being produced.
Regrettably, I can’t validate the procedure I detailed because I’m writing this a month later, long after the flowers have dried and dropped off with absolutely no seed pod production. Maybe the sudden increased production in nectar caused the pollina to slide out? Maybe I should harvest some insect legs to try pollinating? Or perhaps self-seeding rates are simply very low to begin with?
Figure 10. A hopeful Hoya linearis bloom on the way? Check back in a month or so!
Things can’t be that bad. I counted 17 baby shrimp!
– Elisa, February 2024
Prelude
Three-ish months ago (Nov 17, 2023), I set out on an adventure to build a living wall. I had just moved home, and I was thinking of ways to decorate my room and now office space. As it turns out, picture frames for 3 foot long posters are not as readily available at a budget price, even when shopping second hand. I opted for a project I had been wanting to try for a while, putting up my plants on wall. The rational was multi-fold.
Firstly, it has been a life long dream to have a living wall in my own space, with my preferred selection of plants. No fake moss. Secondly, it would take up space on the wall, and should be much cheaper than frames. Thirdly, if I could rig up an automated watering system, this would alleviate the need for leaving my plants unwatered and uncared for during long periods away, or asking someone else to take care of them. All of this sounded entirely sensible to me.
Act I: Making a Watering Wall
So, I sized it out. I knew I needed a waterproof support frame, and some sort of water permeable fabric. I wanted to add a watering system, so I decided to build the frame from PVC pipes, drill holes at the top, and pump water through one end. Dimensions were constrained by the largest garden/landscaping fabric I could find at a reasonable price, 3 feet across. I had been hoping for 5 by 5 feet, as I really wanted it to fill up the space in Zoom calls, but we do what we can. I estimated the maximum head a pump would need to be able to push up to the top of the frame, and multiplied it out by the internal PVC dimensions (I went back and forth inner dimensions, and decided that ½ in pipe would be sturdy enough if I built a central cross feature in the frame). Some quick googling later, I figured I would need a pump that could allegedly do at least 10 ft of head from the main ½ in outlet. I came up with a few configurations, and decided it would make sense to pipe the water out bottom side of the frame.
My shopping list looked something like this:
2 10’ lengths of ½ in PVC pipe
5 T-joins
1 cross join
3 elbows
3’ width fabric, roll of
40 gph pump
Flexible hosing (to link the pump and frame) and connectors
PVC cement
Something to store water in, at least 3’ + a few inches wide to accommodate for the pump connector
I already had a saw and drill with various bits. I purchased the pump a day in advance to look at the outlets and what was needed to join the pump to the frame. Now it was off to Home Hardware. They didn’t have enough T-joins for ½ in pipe. Next step, Home Depot. The folks there were kind enough to ask what kind of project it was. As it turns out, white PVC pipes are necessary when dealing with potable water. For my use case though? Electrical conduit would do just fine at half the cost. Great! They were out of conduit in the dimensions I wanted, so I picked up the PVC connectors before heading on over to the RONA down the street. I finally found the conduit, ½ ‘’ ID and 3’ in length. I purchased 2 10’ lengths and wedged them cautiously into the car. At some point, a trip had been made to Canadian Tire to pick up a giant Rubbermaid tote. It was a ROUGHNECK, and claimed it wouldn’t crack in winter conditions. I had been hoping for a flat bottomed box or planter, but an internet search had revealed that most nicely formed boxes were capped at around 48 inches or less. No matter. I could figure it out later.
One night of staying up working on impromptu projects wasn’t enough (I had built a Corsi-Rosenthal box the previous night and spent far too long perfecting the box fan coverage around the corners). I sawed the pipes to length, using a 30 cm ruler as a guide, sanded the edges down with a rasp, and finished the edges with a coarse grit sand paper. I gingerly put all the pieces together with the connectors and flexed the frame. I felt like it would hold. I cemented the pieces together and let it cure outside. At this point, night had fallen and I took a break for dinner.
The cement had cured by the time I was done, so it was time to do a water test. Holes were drilled and the connectors added. At this point, I realized that the connection point to the frame sat belowthe frame, and not to the side like I had planned. But it was already cemented in. I figured it wasn’t a big deal. We filled a bucket with water, dropped the pump in, and turned it on. It worked! The disbelief on our faces belayed the lack of faith in my online water head calculation. But the drill spacing and flow rate worked perfectly to lift the water to the top of the frame, and distribute the outflow across the drill holes. Naturally, I had to move on to the next step, seeing if the flow would be enough to saturate the garden fabric.
I lugged the frame and the roll of fabric outside and started wrapping it tightly on the frame. I was doing this unsupervised and alone at this hour, and naturally ended up making some impromptu decisions in the dimming light. I decided to make the fabric wall by wrapping around the frame three times. After folding the frame in, I punched some holes through the fabric with the tip of a pair of scissors right by the top of the frame, and zip-tied it in with some spare zip-ties I had found in my bag after some field work. I tested again with water. Slowly but surely, the compressed fabric against the outlet holes of the frame began to take up water. Holding the frame perpendicular to the ground, water dripped through the fabric instead of the air space between the front and back.
I chucked the whole thing into the Rubbermaid tote (Fig. 1). Job well done, I thought.
Figure 1. Garden fabric wound around a PVC frame, then chucked into a tote.
Intermission: Watering Wall to Living Wall
I lack some clarity on the timeline for the next few parts, but I eventually stitched a few pockets made of cut rectangles from the fabric using fishing line to the “front” side of the wall. I stuffed the pockets with a lower layer of LECA, placed some plant cuttings in, and secured them with more LECA. The tote had been hauled up to my room and propped up against a wall. It had been filled with well over 20 gallons of water, enough to avoid running the pump dry. Over the next few days, I would plug in the pump to “water” my plants (Fig. 2). One issue I knew I would be running into was the stability of the frame. I wanted it to be vertical. With it leaned up against a real wall, there were certain to be mold issues and water damage.
Figure 2. Putting plants on the “wall”. Darkened areas are saturated with water. Notice that the tote’s lid is behind the wall, this was preventing the wet plant wall from contacting the drywall.
I tried a few different configurations, including filling the tote with 1 gal bottles to brace it (and limit the total water volume in case the tote cracked), and propping it up on an overturned planted when the awkward angle from the pump connector started really bothering me (Fig. 3). I was hoping that eventually I could get some 3D printed supports in.
Figure 3. With some added lighting, hanging plants, and sneaking gallon bottles propping up the wall.
Act II: Water Quality and the Clean-up Crew
A week later, I discovered that the water in the tote was… unpleasant. It was time to cycle it out. I ran into my first issue here. The frame was now waterlogged and quite unwieldy. Hauling a flexible plastic tote filled with ~80 L of water was also not quite practical (Fig. 4). This resulted in a very silly, slow water drain by repeatedly filling gallon bottles and dumping them out into the bathroom while the frame had been lugged into a bathtub while this was happening. This would not do.
Figure 4. A messy room with plants, and a rubbermaid tote full of water and gallon bottles. Those are rock samples in the ziploc bags…
I mulled it over for the next week or so. The second time I had to do the tote lugging and gallon bottle juggling, I decided that I was over it. Either I could disassemble the wall for a later date, or get something to clean up my water. The plants were doing great though, and I didn’t want to disturb them. So I thought, shrimp! Shrimp would be my solution.
Some quick googling later, I found that Amano shrimp were great algae eaters and detritivores, quickly breaking down plant matter. I had decaying leaves in the tote already, and a filter in the pump. Surely it would work out! (For those who do not know, ammonia is a product of decaying matter, and is highly toxic to various organisms. Denitrifying bacteria convert ammonia to nitrite – also toxic, and then to nitrate – less toxic). Just in case though, I would throw in some extra dead leaves and wait another week. The time line becomes even more blurred here. Did I buy the freshwater test kit then? Or did I wait until I first got my shrimp?
I recall being excited to find an aquatics shop in London when I was visiting. We made a quick stop. I asked for 3 Amano shrimp, a marimo moss ball, water wisteria, some pellet fish food in case there wasn’t anything to eat for the shrimp, as I didn’t have any algal issues. I was very tempted to get a few guppies, as I recalled them to be easy to take care of based on a few conversations I had had with a friend, but I decided to take it slow.
I brought the shrimp home, added a mesh beg to my pump to block the inflow of water, and I slowly released them into the tank, thinking that any beneficial bacteria that road along in the water might help. Over the next few days, the shrimp chomped away at the debris building up on the moss ball, and hid under various 3D printed benchys (Fig. 5) scattered throughout the water. All was good (Fig. 6).
Figure 5. Example of a Benchy – The jolly 3D printing tortune test. Did you know that benchys are top heavy? All of them flipped in the water. The shrimp enjoyed hiding underneath them until duckweed and other aquatic plants got introduced.Figure 6. Amano hanging out on an upside down benchy next to some floating plants.
I instantly fell in love with the little shrimp clomping around, and decided perhaps I could get a few more. After all, amanos were nearly clear in colour, and I could never find them in the tub. I went and visited a shop I had originally wanted to go to (they were closed for unknown reasons), and explained my situation. They confirmed that I wasn’t really planning on breeding, so amanos, plus whatever fun coloured shrimp I wanted would probably work. This time I ended up with 3 amanos, 3 painted fire reds (neocaridina), and 3 guppies.The red shrimp were on sale, so that made the decision fairly easy for me. The guppies were selected at a ratio of 2:1 female to male, to distribute the male attention between the fish.
This is around the time when things started going wrong. The new shrimp seemed to be fine, but the old ones were listless and would curl up at the bottom of the tub. That was odd. I started doing 30% water changes each day, despite the lugging back and forth. I was testing the water parameters at this time, and saw a clear increase in…nitrite. This happened during a particularly busy time, and I let it run on for far too long. Two shrimp had passed away by the time I did my research on how to address the problems I was seeing. I purchased SeaChem Prime, Stability, and API’s QuickStart after trying to figure out which PetSmarts had both Prime and Stability. I later found out cheaper ways to access these products, but in the meantime, I was following instructions for dosing each day, while doing water changes. Things seemed to be improving other than the loss of 2 of the original shrimp. I chalked it up to the failure to acclimate.
Intermission: A Rescue Mission
Things were going well, so I finally decided it was time to rescue some of the lake minnows in the garage. I kept them separately in another tub for a couple of weeks before adding them into the large tote (Fig. 7).
Figure 7. Quarantine tub! The golden pothos is likely doing most of the work keeping the water clean.
Act III: Upgrading the Living Wall
The only issue I was having now, was the plant wall itself. With all the time I spent worrying about the living critters in the tote, I had neglected to figure out a solution for adjusting the wall so that it would stand up straight. I had to check on it daily to make sure it was stable, and was knocking around all sorts of things in the tub to do so. Now that things were stable-ish, it was time to upgrade. I had been regularly keeping an eye on aquariums for sale, both from major online retailers and second hand. The prices of a new aquarium were eye watering.
While searching for a reasonably priced aquarium, I also purchased an air pump and sponge filters. I had a feeling the fabric in the frame likely wasn’t doing as much filtration and supporting denitrifying bacteria like I had expected. This way I would have some additional oxygenation and an extra place for bacteria to grow, just in case the filter in the pump wasn’t doing the trick. I also added an additional piece of filter media into my water circulation pump to provide a far denser spongey material and prevent sucking up any shrimp.
Some weeks later… I got it! An aquarium! With a stand! (Did you know how expensive new aquarium stands are? I was looking at tool shelves as an alternative). It was a whopping 72 gallons. Since it was a second hand purchase, bringing it home was its own adventure. It was also immediately determined that it was far too big and would hold far too much water for any of us to feel comfortable with it on the second floor where I had the current setup. Rip my office living wall.
I set it up dry, gave the interior a good wipe down, and took a look at the top of the tank. Yep, as I expected, I would need to elevate the plant wall ABOVE the tank. As it turns out, all tanks with dimensions greater than 48 inches all come with a supporting brace across the top of the tank, presumably to relieve pressure on the glass outwards somehow. I had originally been planning on a support frame anyways, but this meant building a pretty high one, with significant pressure downwards on the glass.
I built the frame (Fig. 8). I’ll bypass the complications here, but it turns out there are multiple brand options when it comes to PVC pipe connectors that inset at different depths. I purchased some weight diffusing egg-crate. I boiled some gravel leftover from a backyard project and weighed it down. I wedged the frame support under the brace and onto the egg crate. I added water. I also purchased some Eco-Complete to weigh it down when it went on sale. There was a questionable trip that involved the back of a warehouse for that one.
Figure 8. Somewhat of a preview. Bits and bobs leftover from the frame building. It took two iterations to get the light on safely. The tank is a mess of random things. Fear not! I took the java fern out eventually.
I let it sit for a while, then transferred all the fish and shrimp over.
The End: Grand Plans
I had grand dreams of building an urban scape filled with miscellaneous ceramic houses from the thrift shops and letting them overgrow with moss, and a mesh “highway” that the shrimp could use to cross the tank, with a giant mountain on the other end. I knew it would take some time to find all the pieces if I wasn’t going to get anything new, or make the parts myself.
The End?
Everything worked like a dream. My shrimp were happily picking away at the substrate and the walls. My fish were swimming around and constantly looking for food. There were little algal growths happening, copepods were showing up, and my fish were starting to get white specks on their bodies.
Wait.
…my fish were starting to get white specks on their bodies???
The Next Adventure
Wherein several tank diseases rip through the aquarium, I acquire multiple tank syndrome, I find several other vendors, the plants start to settle in on the wall, my “budget” plant wall defies the budget, the fungas gnats return, the baby shrimp make their appearance, and I find a local aquatic plant dealer.
I had the opportunity to do some field work for an extended period of time this summer. Logistics of field work, travel, insurance, and other field related prep work aside, I also had a large number of plants that needed to be taken care of. I had to make plans for said plants.
What ended up happening was roping in a few people to check in on my plants during my absence, and distributing them so no one person was saddled with watering 50 + plants with very particular needs. Instructions were, water when the soil looks and feels dry, approximately once every 10 days or so for the larger plants, and once a week for the smaller ones.
Had I been a little more prepared and had more time to plan, here are the things I would have done. The following information has been compiled from my past experience with leaving plants with roommates for just under 2 weeks, and typically being entirely absent during the holiday season. The good news is, we can test out these ideas soon! I’ve put off this post for so long that it aligns with my departure for 2 weeks, perfect to test out some of my ideas and rescue any plants that did not fare well in between. Its worth noting that there are some complicating factors that I didn’t account for, such as the change in seasonality, living in a drier environment than before, use of artificial lighting, plantlets recently released from their humid propagation boxes, blooms on the way, etc. And I might have pests. Woohoo.
Tl;dr
get plants in semi-hydroponics used to a higher water reservoir as to maximize fill before departure
stick plants in soil over large jar of water (without touching) as to provide moisture
Let’s talk about why I came up with these points. Plants require a few things to live (and grow). Water, light (also heat), and nutrients. Of these, water and light (Fig. 1) are the critical ones for indoor plants when it is not the growing season. Additionally, the balance between water and light is very important and ideally mimics the plant’s native environment or initial growing conditions. Nutrients are not considered for shorter term absences.
Figure 1. “Full spectrum light” as shown in the barrina T5 listing. x-axis shows wavelength, y-axis shows..a fraction of? Irradiance? Note the blue and red peaks, these are generally considered the important wavelengths for plant health and growth. Compare this to https://en.wikipedia.org/wiki/Sunlight#/media/File:Solar_spectrum_en.svg
Bottom humidity – fancy bottom watering
Watering without being present sounds like an easy thing to do. Just stick a bulb in or set up a drip system. This might work for some plants, but in my case, I predominantly have aroids and semi-succulents. These plants typically want to be watered in cycles of being fully soaked and then subsequently dried out until the next watering cycle. Nonetheless, most of my plants enjoy more moisture than the internet leads me to believe and typically live in a slightly more moisture rich environment in lieu of full desiccation. Thus, to maintain access to water without the ability to drench it from time to time (typically around 1 week’s time) can be a little difficult.
My solution is to stick all of my small pots over clean Classico mason jars after I use up all the sauce. The jars are filled about half way, and I pop the small nursery pots into the jar lid a couple of days after watering, so it maintains some moisture and will not fully dry out due to the nearly enclosed environment. This only works for my plants in pots of 2.5” diameter or smaller. For larger plants, self-watering pots are also an option, though I have typically found they are very finicky and require some calibration to prevent oversaturation of the base soil layer.
Hydroponics
Alternatively, I can provide endless amounts of water instead. This would be putting my plants into water directly, with or without additional media, but definitely not with soil. This method requires far more time to set up, but it is certainly doable. There are a few benefits of doing this. A deep water reservoir, precise control over nutrients, minimal pests… The trick is that it doesn’t work for every plant and it takes some time for plants previously living in soil to switch into water. Some I have cuttings fully growing out in just water, and some I have supported in a soil-less medium that wicks up water with strong root growth (this also adds aeration, very important to prevent a hypoxic environment!). The biggest complication with this method is cost – time and dollars. The second is that not all plants survive the transition, and it requires careful maintenance during that time.
For larger plants, transitioning into semi-hydro and filling up the jars as much as possible is ideal. If that is not an option, then the plant will simply not be watered during my absence. Plants in large containers tend to have more established root systems and reservoirs for instances of drought. Tropicals will not love this, but succulents will do just fine if they are large enough.
No sun or little sun
For the plants where I can’t set up water access via a large pool beneath the pot, I remove the water entirely. This leads to the plant missing a key ingredient for growth. In which case, perhaps the plant should not grow at all.
If there is no light, then there is no strong reason for water uptake. Most of my plants are suitable for “bright, indirect” sunlight. This is a cryptic statement that many a plant owner struggles with. What it tends to translate to is, most of my plants prefer as much sunlight as I can give them, so long as I bump them slowly into the sun. On the flip side, limiting sunlight will limit and slow growth. Less growth also means less water uptake and might set it off on a hibernation mode. Which is perfect if you can’t water your plants.
Grouping
Why group plants together? For context, my groupings are roughly: semi-succulent, semi-epiphytic, problem plants, and one-offs. These groupings are by water/light requirement, and care. The semi-succulents will need next to no care while I am gone. The semi-epiphytic plants and aroids would like some care. The problem plants need to be regularly checked on (these have pests, and I am not opposed to having them die-off entirely). And the one-offs are those that need to be watered, or left alone entirely. This just makes positioning my plants and making sure none get left out if there is someone checking in on them easier.
Survival of the fittest
Naturally, the plants might still be unhappy or die off while I’m gone. So what survives, survives. That’s a useful indicator for future trips what kinds of plants will do okay. In the chance I have to leave for an extended period of time again, then I’m all set with what did alright last time. Alternatively, if I really want plants around, cheap and robust plants are the way to go.
3+ weeks of travel
Things that actually happened during the field season: I split up some plants to pass along to others to take care of. At least one was on death’s door (it shriveled up, and the other similarly sad looking plant now has 1.5 leaves). I had a pet pass away during this time as well, I have no real thoughts on how to improve this situation for extended periods away other than living with someone else that is equally bonded to the animals. The rest of the plants are doing alright, though upon return, they did acquire some unwanted critters that were slowly killing them off.
Post field season thoughts: So that’s plants. What about the person travelling? I’ve been left with some thoughts after the last round of field work, and having just returned from a conference last week. One. Showers are nice. Two. I should start setting up a “recovery” station for myself when I return, especially if there is a big change in climate. Three. I want to find some time for myself to mull over what it means to be attached to various possessions, and how that affects me when I am absent or when I return after an extended period.
NEW: 2 week trial
Prepping for 2 weeks away, I’d like to avoid throwing my plants into hibernation. Stopping the growth of the young plants would simply lead to their death, or a tricky care situation on my return. Just about all of my smaller plants are in hydroponics or still suitable for a humid container. These will be under timed grow lights to compensate for the loss of sunlight with the change of seasons. The larger plants not in a reservoir will be going entirely unwatered, with two exceptions that are newer to my grouping of plants. Two smaller plants will also need to be watered during my absence, one is in the middle of slowly putting out flowers and requires the dry/wet cycle, and the other is entirely epiphytic in nature and does not possess functional roots. I have a few rooted cuttings, some will be staying in water, and some are being transitioned to semi-hydro and need to be topped off until the roots extend further. I was vaguely aware of needing to prepare them for my departure if I wanted healthy plants about 10 days pre-departure. During those 10 days, I purchased multiple grow lights and automatic timers, pulled out all the plants from propagation (except for one experimental box), informed my brother how to take care of my carnivorous plant (keep it flooded with rain water), and scattered hopefully live nematodes over all my potentially thrippy plants. I do still have some plants on campus, where they will be watered once during my absence. I may have written an entire spreadsheet with watering instructions and tips.
Expectations: All plants will be alive, and either slightly underwatered or overwatered when I get back. My calathea ornate (has spider mites currently and previously died down to a singular leaf) will likely go back to having one leaf. The corm only state oxalis may return from their hibernation and start putting out new leaves. The anthurium forgetii might be crispy. The propagations will not have made significant progress rooting. I will lose the hoya blooms on my linearis. If there are to be any casualties, I expect them to be amongst the newly propagated and the hoya I have had for weeks that have shown zero signs of growth (I think they had root rot before they even made it to my hands). Lastly, I might have aphids. I really hope this is not the case, but I have been side eyeing some of the leaf damage on my anthurium, and it is not looking promising.
Setup:
X2 barrina T5s – “full spectrum”
X1 barrina T5 – “full spectrum”
X1 sansi 15 W bulb – “full spectrum”
X1 barrina T5 (not shown)
X2 GE automatic timers with two outlets set to turn on from 7:30 am to 10:30 pm ET (not shown)
X3 misc coolermaster laptop fans (not shown)
4L of rainwater (not shown)
I purchased noma bulbs (8 W) sometime last year and also purchased a clamp lamp holder for it. I’ve been using it for nearly a year as a regular light bulb as well, and it has generally been focused on my carnivorous plants. I purchased the sansi bulb as an experiment when I moved home, with the intent of hanging them via pendant lamp bulb holders (since returned due to overheating). It now lives in the clamp lamp. All noma bulbs are currently inactive. They provided the lowest intensity light and had a tendency to heat up more than I would have liked. Once I find holders that are better at dissipating heat, they will likely make it back into regular use. I later purchased a set of 8 barrina T5s (yellow).
In the meantime, I have a vertical plant stand next to a window (Fig. 2). The plants on the stand above the window sill receive no additional artificial lighting other than those under the sansi bulb. There is one plant at a lower level that has heavy leaves, so it’s on the ground in case it topples. That one receives an off axis barrina light since it does not need high light intensity. These two are linked to one timer.
Figure 2. Light sources include the window, sansi light bulb (clamped onto plant stand), and barrina T5 (attached to the plant stand and standing vertically, LED lights are facing parallel to the stand, not towards the plant). Sampling of spectra were taken for the sansi light from the closest platform, from the “base” – flush to the platform, and incrementally upwards from the locations marked with an “x”. Sampling for the barrina T5 was done at a diagonal by placing a ruler on the plant pot and away from the light. Sampling for the window stool plants was taken behind the stool, ~3 inches above the stool. Sampling of spectra for the stingray plant was taken at the base of the plant.
There are two barrinas linked together in the “closet” area, with the lights generally facing downwards about 5 – 20 inches away from the plant tops (Fig. 3). Another one is linked to the same timer and is focused on my previously “bathroom” plants (not shown in images). There are three fans in the closet, since I spotted some fluffy mold growing in the three days I had been gone. Ew. That’s probably what I get for no airflow and using rain water that has been sitting in a bucket of decaying leaves.
Figure 3. Light sources include the window, and two barrina T5s hooked onto closet bars facing downwards. Not shown (and not relevant) is another barrina T5 closer to the ground. The forgetii sampling is marked by a downwards facing teardrop, with samples starting at the base of the pot moving upwards. The hoya linearis is in a hanging pot and is much closer to the barrina T5. Sampling started from the top of the pot upwards. The hoya cluster is indicated by a group of 6 pots and is quite a ways from both artificial and natural light (> 1 m). The window sill plants receive natural light.
Various other plants are scattered about, in the hopes that natural lighting and overflow from growlights will be sufficient. To get a baseline, I decided to borrow – with permission! – a couple of spectrometers from the lab covering the UV and NIR range, and a cosine corrector. Samples were taken between 2:40 pm to 3:15 pm ET at 100 ms per sample and averaging over 10 samples. What I should be expecting to see is a curve similar to that provided by the barrina T5 listing (Fig. 1).
It looks like the Sansi bulb is doing a lot of heavy lifting, even on the far side of the stand. The “full spectrum”-ness seems to be covered reasonably well, though it certainly is not a smooth slope as otherwise shown in the images. The “oneoffs” show the light coming in from a window on a cloudy day. Both the stingray alocasia and hoya cluster are quite far from the window (~2m and 1m respectively), but the hoya cluster may additionally be receiving some light from the barrinas in the closet. That said, you can see the fall off from the barrina lights if they are not angled correctly from the dragonscale alocasia readings. The window stool may also be receiving some light from the sansi bulb, and is located about 40 cm away from the window sill. Even at this distance, the light intensity falls off quite a bit in comparison to spectra taken at the window sill.
The spectra looks as it should, based on the marketing images for the barrina lights. Though it is worth pointing out the apparent fall off around the 570 nm wavelength may be a function of the spectrometer rather than a lack of light in that wavelength. We can say that the sansi light bulb did a better job of outputting in the relevant spectrum than the natural light right by the window sill. It also does not have the red wavelength “peak”, and is more focused towards the blue light. Natural light coming in from the windows falls off very quickly, but the results might be different had it been a sunny day outside.
Tis the season, to hopefully take a quick break from work and research! As the term ends, I’m busy wrapping up my TA duties, studying for exams, and prepping to meet with my supervisors to see where things are headed for the next term. A few other things have happened since drafting up these thoughts. Herein also wraps up my first month or so of living alone on purpose.
It’s also the season of reduced sunlight and impulse buys. Instead of talking about the silly things I purchased during the Black Friday/Cyber Monday sales, let’s address my increasing plant collection. I’ve been trying to purchase things more locally (which is quite easy when you live on the fringes of the largest city in the country). I swung by a plant studio to pick up a discounted snake plant (people really love quoting that one NASA study about air purification, but I assure you this baby plant does nothing to enhance my air quality) and a request plant (variegated string of hearts)! I was beyond delighted that the staff were willing to pull out various plants they had sold (and were in the midst of packing) when I started I mentioned that there rare plants that I had wanted to see in person before dropping several double digits. Also, I may have acquired a dragon-scale plant in questionable conditions from the Superstore (I haven’t stepped into one for years, I had no idea things were so pricy!) while buying basic home things like measuring cups (Fig. 1). I had previously purchased a very lovely plant from the same distributor die within a couple of weeks, so my expectations are low (string of turtles at half price, very sad). So far, so good though. The leaves are yellowed, and it seemed that it had been over watered for quite some time.
Figure 1. A giant dragon-scale leaf, leaf for scale. Some yellow tinges visible in dramatic lighting.
In roughly the same time frame, I remembered that Toronto was hosting a week long One of a Kind exhibit of sorts. Instead of swinging by to check out handmade pottery and buying art, as I was greatly tempted to do, I pulled out some of my ancient art assignments from highschool and stuck it on the walls. Now I have arty walls, very satisfying. The next thing is to deal with the generic looking, rather scratchy furniture that seem to be required fixtures in the apartment. I’d like a comfy, cozy chair. I think I have the perfect IKEA lounge chair now that there’s some room after cleaning up a few boxes off of the floor. Chances are that it’ll become the requisite “laundry chair”, where the “not dirty but not clean” clothes will go. I also think it’s time to look for a slim shoe tray thingy with the change of the season and the potential for the snow to start sticking around. I’d also love some more lighting fixtures or alternatives to the fluorescents for my main lighting. Bah. Fluorescent lights. Still. While I’d love to make the place a little nicer, I’ve more or less avoided bringing in anything new into my life in terms of decor and furniture.
Figure 2. Some old art on the walls. Non-optional couch that came with the apartment. Dragon scale alocasia sitting up looking pretty. If you wonder why my laptop and drink are on the couch, it’s because I often sit on the yoga mat on the floor next to the couch. :’)
Was I a sensible consumer during all of this? Not necessarily. There was some shopping I did in the lead up to the “big” sales, primarily because I wanted to avoid the feeling of being rushed. Some things that genuinely seem useful and have long term value include – a small cushion that can be heated, a desk lamp to hold UV spectrum LED lights for my plants (and for myself to have yellow lighting), and a giant – Costco sized bottle of concentrated dish detergent. It’s one of my life’s greatest banes to have to repurchase small bottles of expensive dish detergent every couple of months. On top of that, instead of taking advantage of the sales to replace my wireless headphones (slowly on their way out), my major electronics purpose was an e-reader (to replace the one I lost several years ago on a plane). Oh, and a new microphone since I spend a lot of time speaking online in comparison to pre-pandemic conditions. Overall an interesting mash-up of things I was interested in this year.
To side step again from the frenzied shopping season that takes place right around the US Thanksgiving and a lead up into the holiday season, here are some things I’ve been thankful for and am looking forward to: family that sends me food, a hand held coffee grinder, a holiday season full of cats and cat-sitting, and being on commission for a piece of art because someone decided they liked my style.
So here we are at the end of the term. I’ve mostly moved in and set up. Classes are just about done and I didn’t end of overshooting my allocated TA hours. Work is ongoing and I have finally made progress on my pet electronic project. I have found that my office neighbour is into plants and is willing to take care of them when I’m out. I’m generally pleased with how things are going despite the dim, dark days ahead.
I’ve been prompted to discuss some of the recent issues I’ve been having. There’s been a slight delay on some issues popping up, but as projects rise and fall, changes to my computer set up are required. Also I just moved. Again. We’re now counting 9 moves since I’ve started graduate studies. Let’s chat.
Projects and Pathing
What feels like a common silly thing to wrestle with which each new code package is the installation of specific dependencies and setting up folders and paths in a particular fashion to allow the use of said new fancy code package. Without going into detail, I’m astonished that I was able to follow some specific set of instructions to install GDAL (notorious for being tricky to set up since a number of dependencies need to be upgraded and downgraded at various steps in the installation). However, I’m at a loss when it comes to the more cryptic error messages (Figs. 1 and 2).
Usually what I do is Google and check various forums for days on end, find some workaround and install something completely different instead. This time it’s looking like I really might have to figure out the issue. On a related note, speaking with my labmates did help out for another software problem I was having. Thank you!
Figure 1. A screenshot of Anaconda. I cracked open my “clusters” environment and got a series of messages that I have no recollection of setting up. Here I was just trying to reproduce the weird error that I get when I try to import a python package! More to solve I suppose. I should start documenting what I do to set up my environments.Figure 2. The actual issue. The log has nothing useful in it by the way.
Housing
Wow, what a problem. This is a nation-wide issue of course. There’s the actual cost of housing that means I get to spend something like 80% of my income and have 20% leftover for groceries and any sort of enjoyment in life outside of work, then there’s bad housing. Let’s document my housing experiences briefly.
Location zero: never even moved in. I got a last minute notification that the place I had originally planned was not going to work out.
Location one: Landlord insisted on meeting up in a different city. Played games with the offer (stating there was another tenant they preferred). Entered premises without notice. Did not resolve issues. Gave me keys to everyone’s bedroom and asked me to keep it a secret (I refused) because they didn’t have a property manager and didn’t want to drive in to unlock the doors for people. Refused to address the issue of a surprise pet someone had been hiding in their room (and causing allergic reactions) despite this being a condo with no pet rules. Failing to notify the condo association of the tenants and associated vehicle licenses. Gaslighting and yelling. It goes on.
Location two: Landlord lived in the house. When viewing the place, they indicated that kitchen and pool were for common use. Linens were provided. Moved in. Got yelled at for cooking and having “food scents”. Insisted that people in the past just ate take out every day. Threatened to call the police on me. Put something questionable in my room that caused it to smell. Lied about the passcode for the entrance. I didn’t even last the two weeks I had paid for.
Location three: Just a crash pad at a friend’s place while avoiding Location two and figuring out where to go.
Location four: Perfectly fine! The place was a little small and out of the way. This was a non-issue until the pandemic rolled around and I was stuck indoors all the time due to a wasp problem in the backyard.
Location five: Pretty great. Minus the extreme heat (no AC) and roommates that had weird sleeping hours that resulted in a lot of stomping overhead. The folks were great, but the random footsteps overhead really got to me after a while. I was all set for the rest of my degree. Until I wasn’t.
Location six: Turns out it’s really hard to find housing when the university suddenly declares in person classes again. After 60+ calls and messages, and several in person visits where people were making offers on the spot, I finally found a place reasonably priced and close enough to bus. Only issue is that the landlord hated onions. Okay. I could deal with that for a bit.
It turns out that it was a lot more than that. There was a lot of random sudden sniffs outside my door, and loud music being played all the time from upstairs, and a lot of guests (guess what we weren’t allowed to have?). The heat would also get randomly turned off and she demanded our windows be opened for hours to air out. Eventually me and my law school roommate decided to look into the legality of our living conditions and decided that we were indeed protected by the Residential Tenancies Act and our lease was nonsense. Over the holidays our landlord someone developed some terrible illness wherein her doctor insisted that no scented things were allowed in the house. Of course, they felt welcome to inspect our quarters. Somehow my roommate spilled an entire bottle of perfume that the landlord didn’t notice, but my diffuser that had water in it for over a month was a problem. No wonder I didn’t submit my thesis in time to work from home the next term.
Location seven: Great! Lovely roommate, reasonably nice location. Wasps in the house and mice in the walls. Can’t win ’em all. Those issues never got resolved properly. There was also incredibly poor heat distribution in the house and a gap in our entry door, so we often had a space heater on. Oh, and the house down the street was regularly broken into and we had a couple fires in the five months I was there. I wouldn’t have enjoyed living there much longer.
Location eight (skipping over living from home and living at a remote campsite for three weeks): Okay. Housing in Toronto is rough. A family friend let me stay for a bit while I was waiting on residence to let me in. It was a lot of being treated like a surrogate daughter though. Not the most comfortable, but alright.
Location nine: Finally! I have arrived! I applied way back when I received my original acceptance and followed up after the response date had passed. I was on the wait list. Cool. Then I got in and picked a date. Great! I emailed closer to the move in date asking where the lease was. I was informed it was in the works. It showed up in my inbox a week before move-in with some additional information. For example, there was a link that informed me I would receive a move-in time via email and I should confirm this worked for me. The email never arrived despite reaching out several times and getting a response for elevator booking on the Friday before move-in. No one seems to work on the weekends.
Move-in day. I waited until around 10 that morning, calling in several times to see if I could get a hold of someone. I even got transferred once. To no avail. Anyhow, I show up and it’s all good. Then I get into the apartment. Fairly quickly, I notice it is not all good. There are several issues with the apartment, most of which are cleanliness and electrical related. I have a quick chat with the office that gave me keys, and they assure me that I can submit a maintenance request and most issues will be addressed between 24 and 48 hours.
Surprise! I am unable to fill out the maintenance form. To that point, I am also unable to complete the arrival inventory (where I can state the condition of things where I found them). I email IT and someone fixes this a day later citing a mysterious issue and I have now have access. Alright then. I fill out the form and make 3 specific maintenance requests, and within a day, I see notice that my requests have been updated and are in various stages of progress. I come back after going to a workshop out of town and see a notice indicating that one request is a non-issue, and another has been confirmed as an issue. A nice little notice informs me that they will be coming back. Cleanliness issues have not been addressed.
A week passes, and I check with the front desk how to escalate. They are surprised to hear that my issue is ongoing. I follow the information I was given to reach out to another group to figure out what has been going on. Another 48+ hours passes, and I hear nothing. I email again, requesting an update. 48+ hours go by. Nothing.
This morning, I ask the front desk to escalate. They are surprised to see me again, and apologize once more, this time promising to reach out to the custodial staff directly. I come back mid-day to address my rumbling stomach, and find my door open and people inside my apartment. Weird. Someone just emailed me confirming they would come by tomorrow morning to take photos. After extensive discussion and several phone calls (from the staff in my apartment), I am assured that their superiors have contracted someone to come by tomorrow. We shall see if this happens. It is evident that there are some communication issues within the Maintenance group themselves. At first, no one was addressing my issue. Now there are at least 4 other people involved. Apparently people had been trying to knock on my door for the last 2 days instead of simply emailing me back.
Lessons (RE)Learned
Being a student with limited financial resources can be rough. No doubt about it. I spoke with a few others who had been living in residence and they made it clear that they had ongoing issues that had never been resolved or required escalating several times and external intervention to address. I have absolutely paid my way out of bad housing situations in the past, but this isn’t a viable solution for everyone all the time. Being persistent in resolving issues is the only way they move forward, and it takes more time than I would like to spend. It would be wonderful if the people I had to interact with were competent, especially when I am reliant on them or pay for a service. To quote roughly the individual I spoke with the first time around regarding cleanliness, “It’s because they’re part-timers. I don’t get it. They should work hard until they’re full-time, then they can slack off on the job.” Admittedly, I bit my tongue when I heard that from what appeared to be one of the full-time staff. I think I may have responded with, “Right, so 24-48 hours?”
Pile of Projects, Solutions?
I’d love to be able to compartmentalize my life so that I can focus on one thing at a time. Research, TA duties, housing, a semblance of financial security, and my personal life. It doesn’t quite work out that way though. So instead, I write myself a small to-do list for each “project” in my life and see how much bandwidth I have that day or week. This doesn’t always work out (I still have what is hopefully an hour long task to wrap up a short project), but it seems to help. I will eventually find some time to work on my pet projects, such as in Figure 3. Electroforming and shampoo making, here I come!
Figure 3. Not all is bad. I finally picked up an LED lamp that mimics part of the spectrum necessary for happy plant growth. It also provides a warm light instead of the fluorescents everywhere else in the apartment!


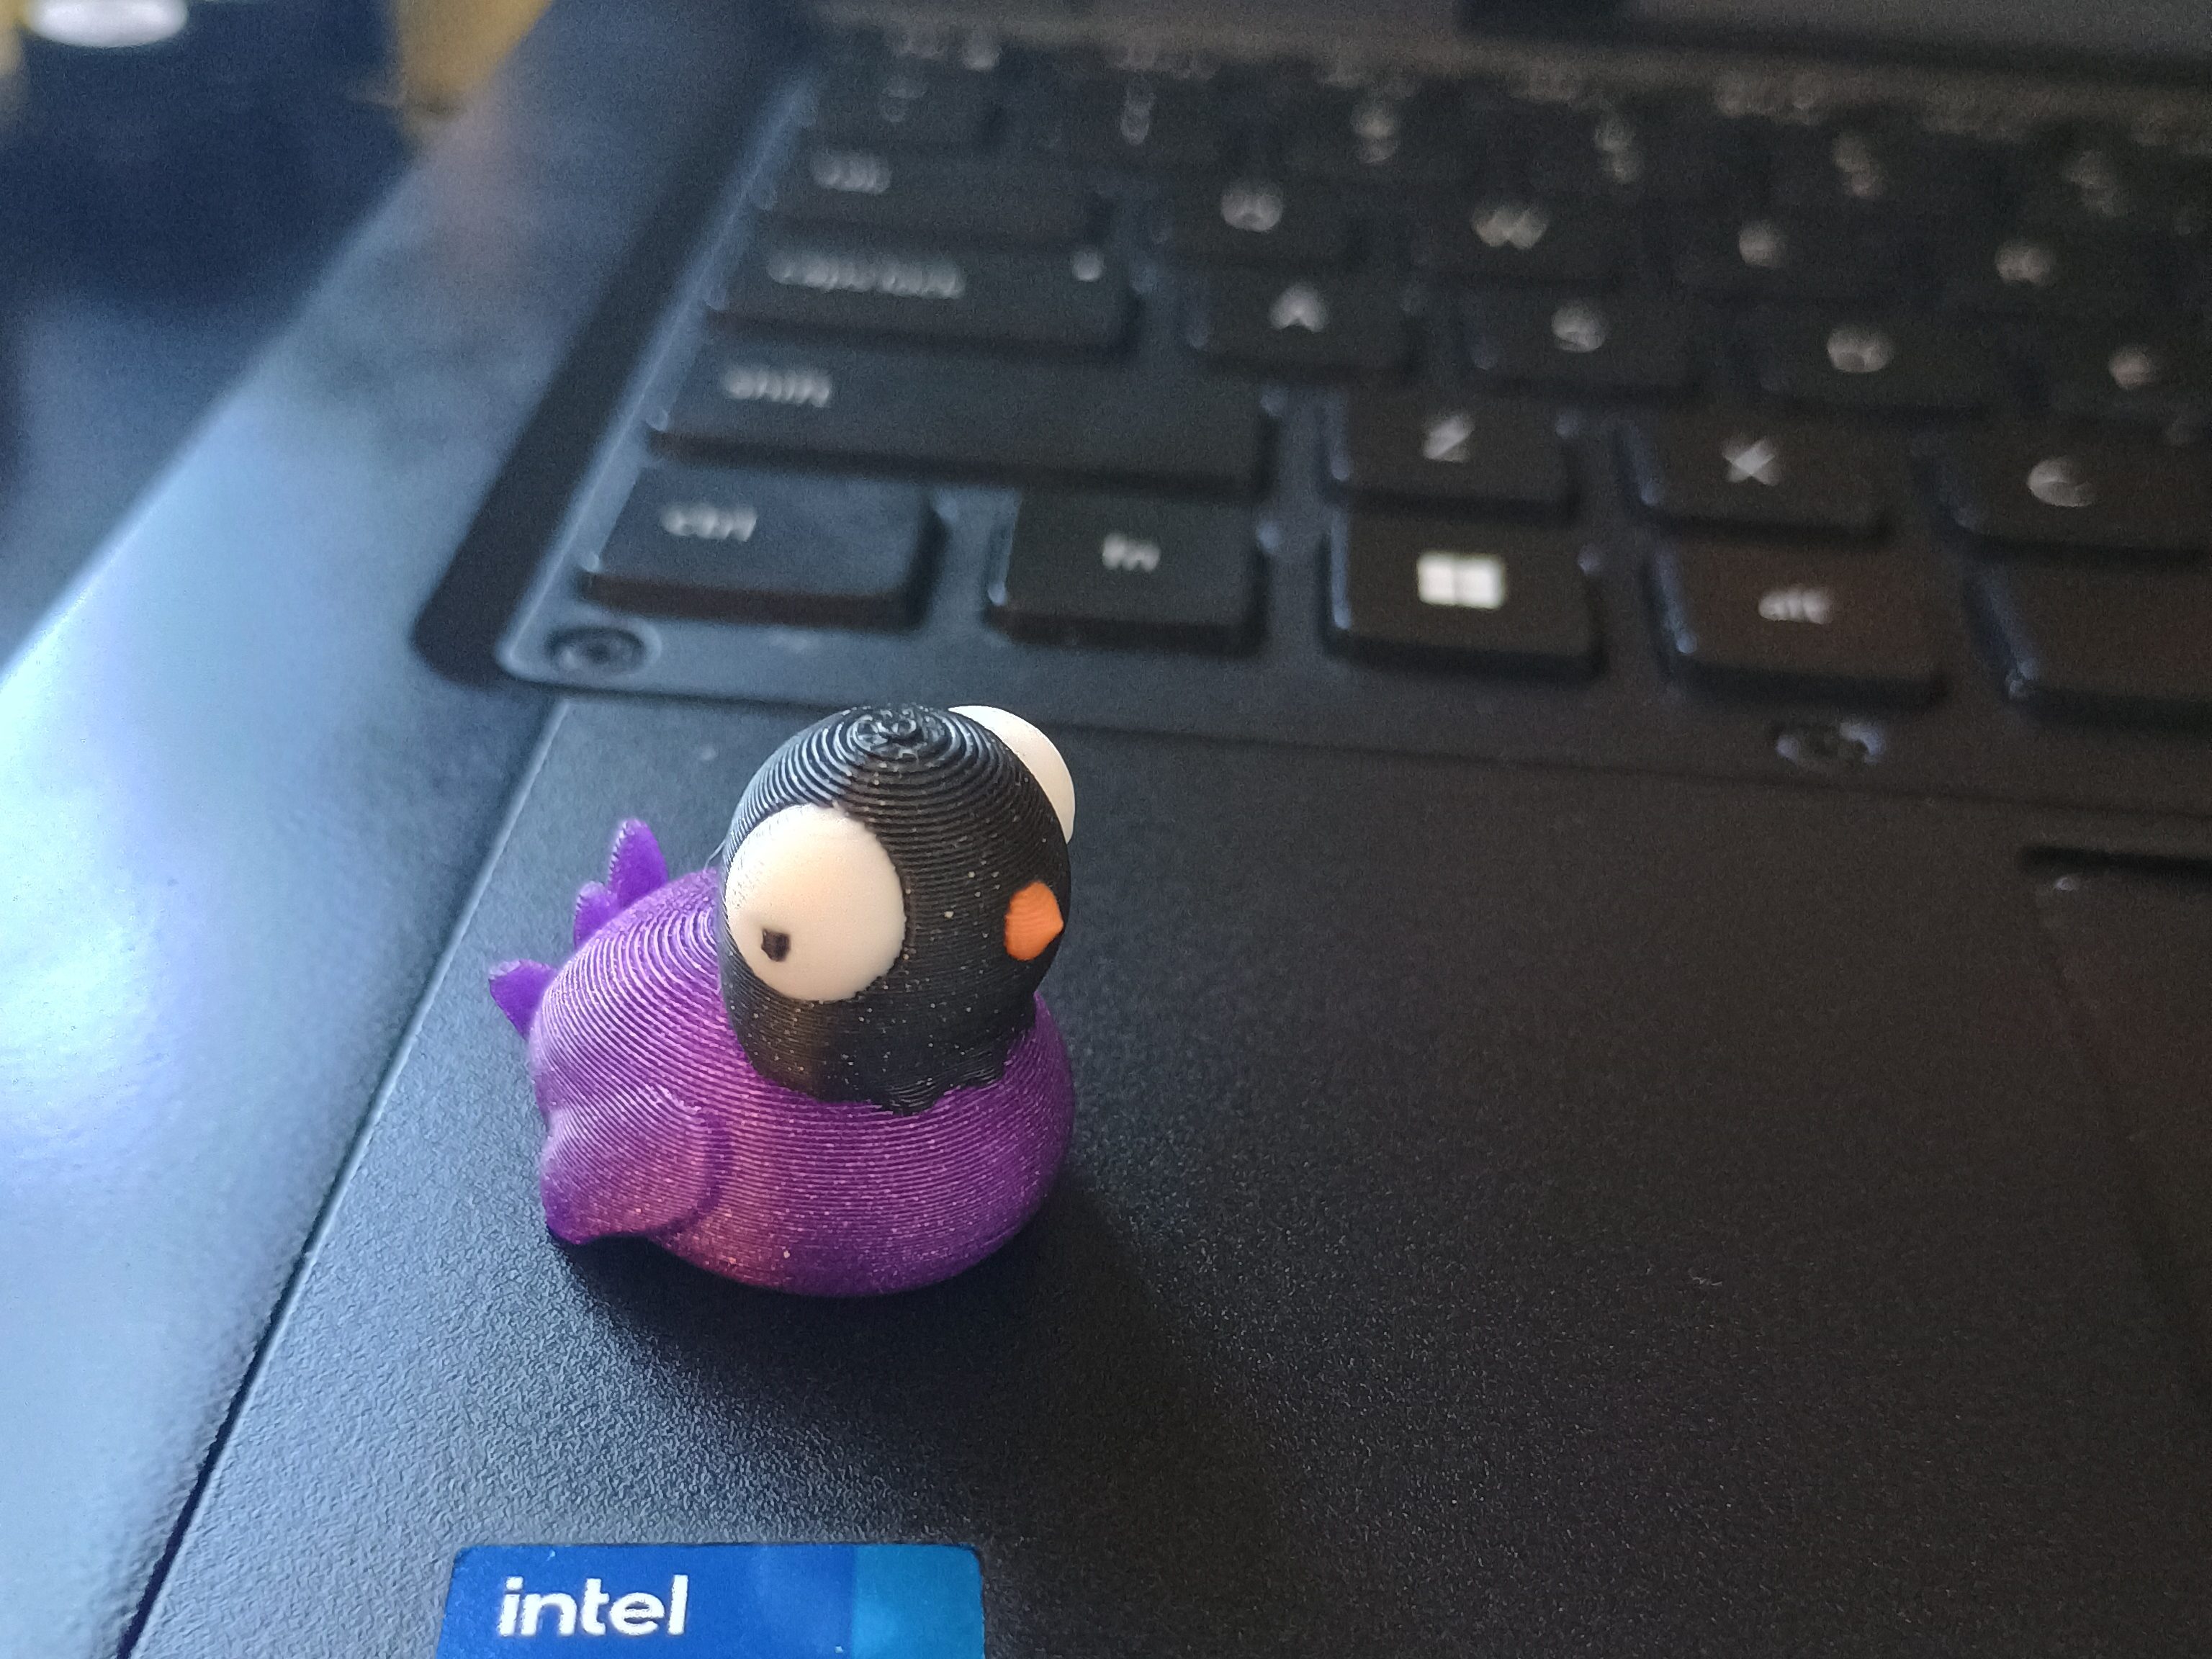
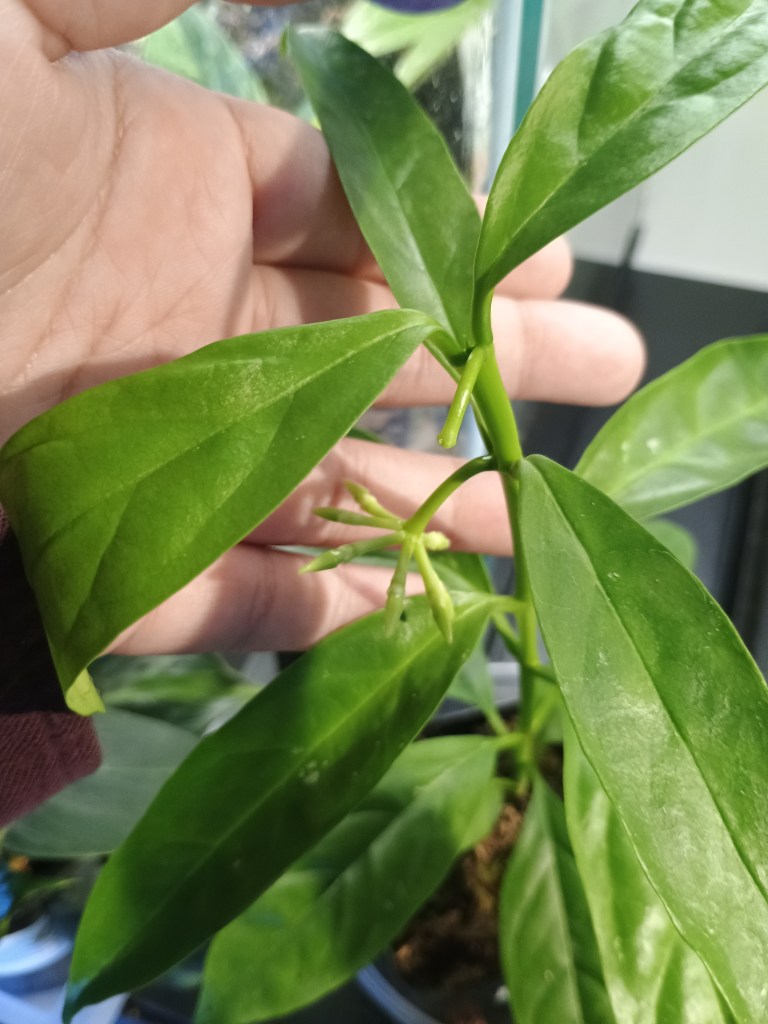

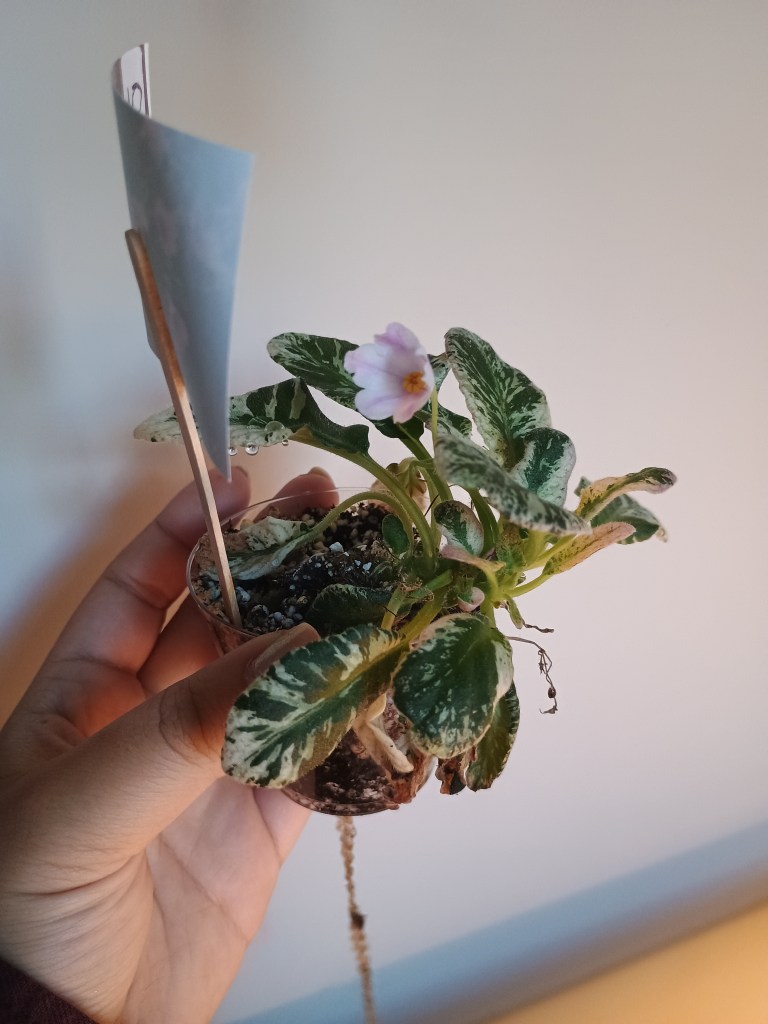
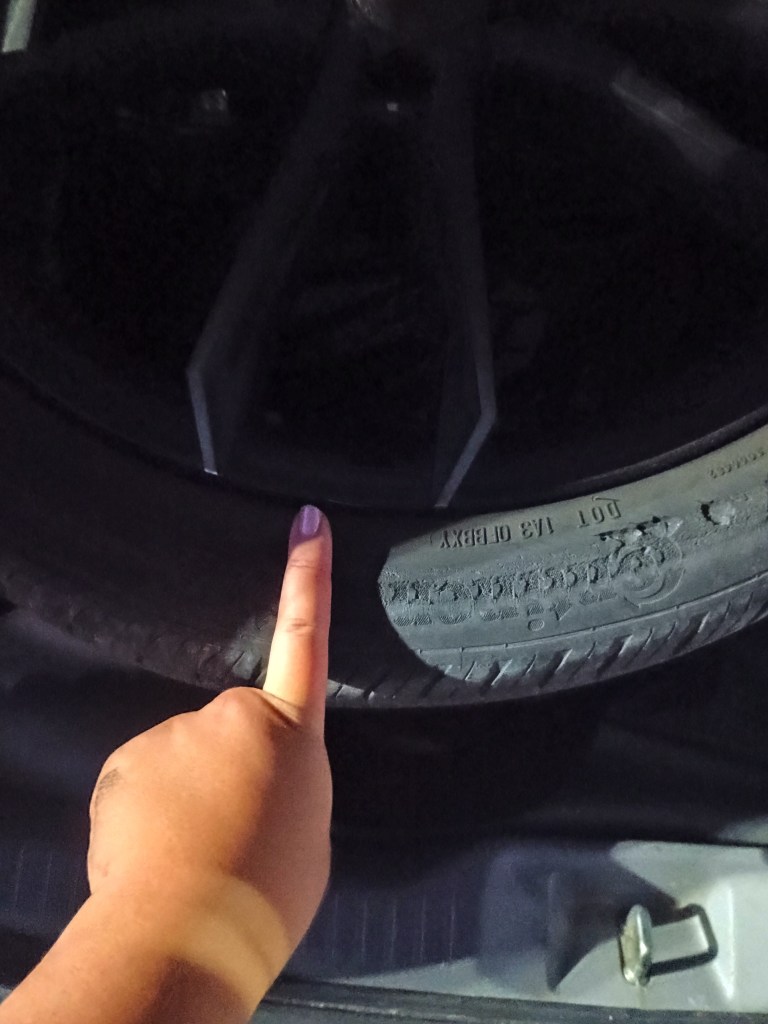
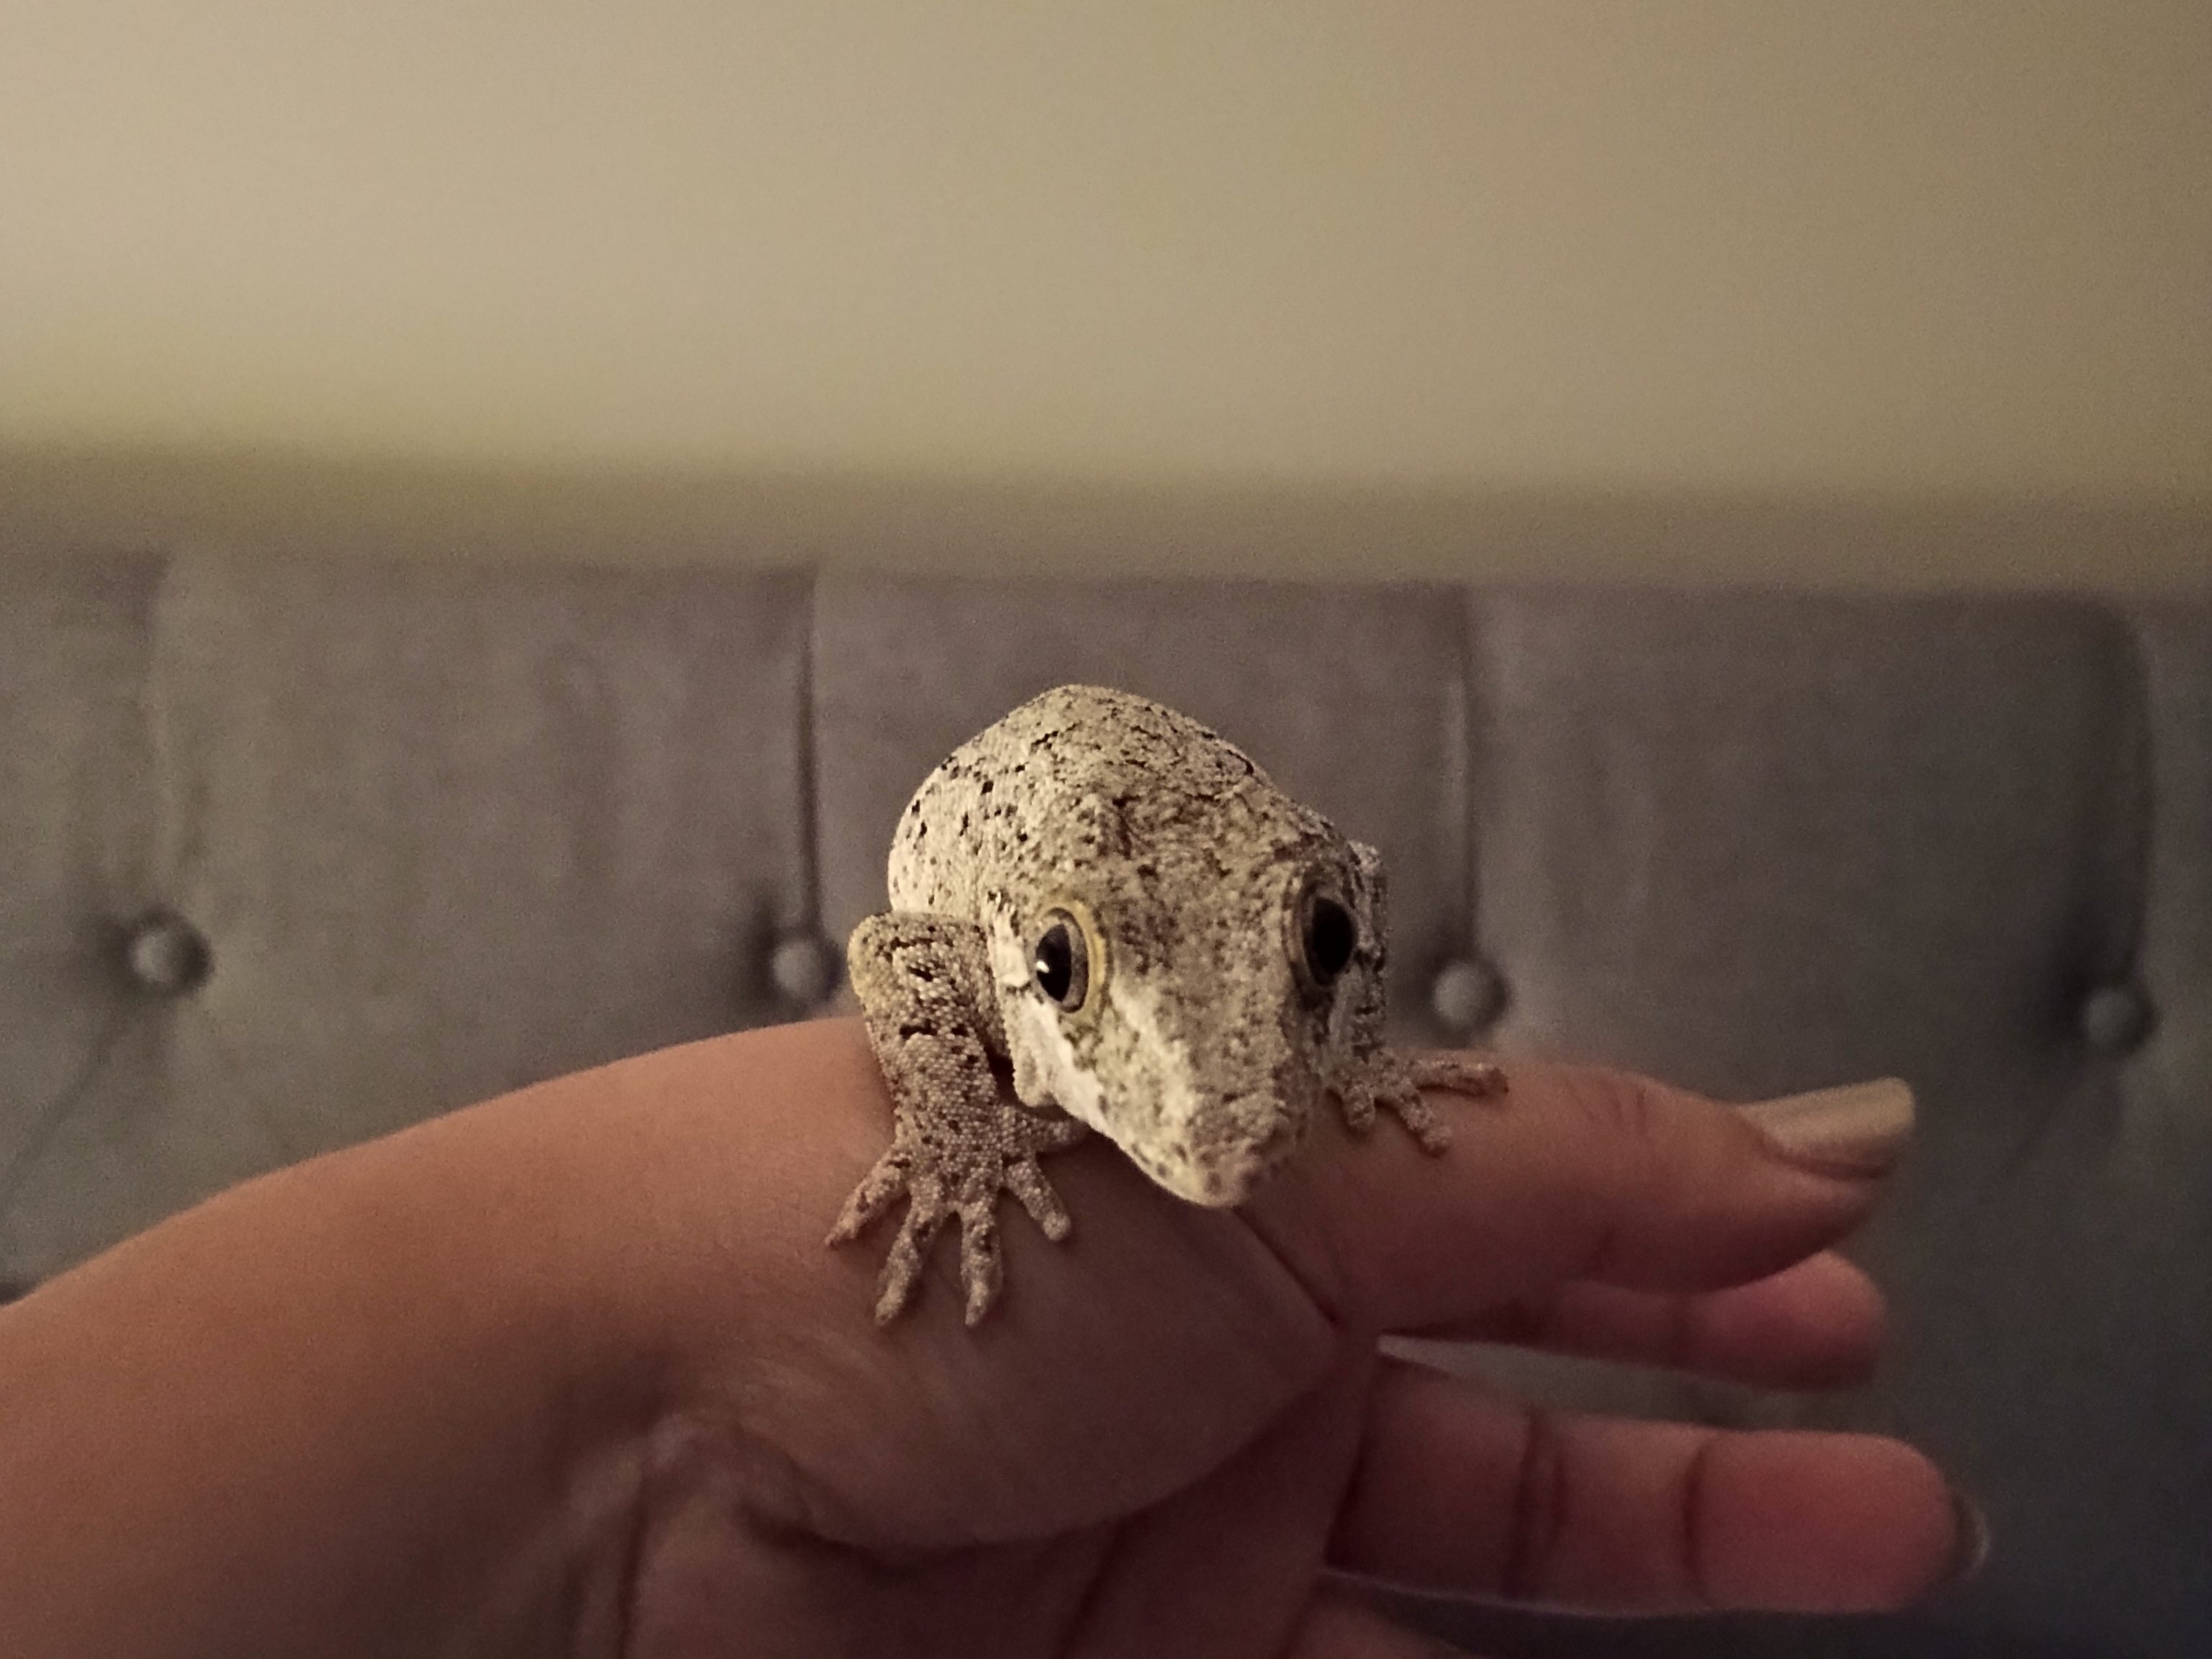

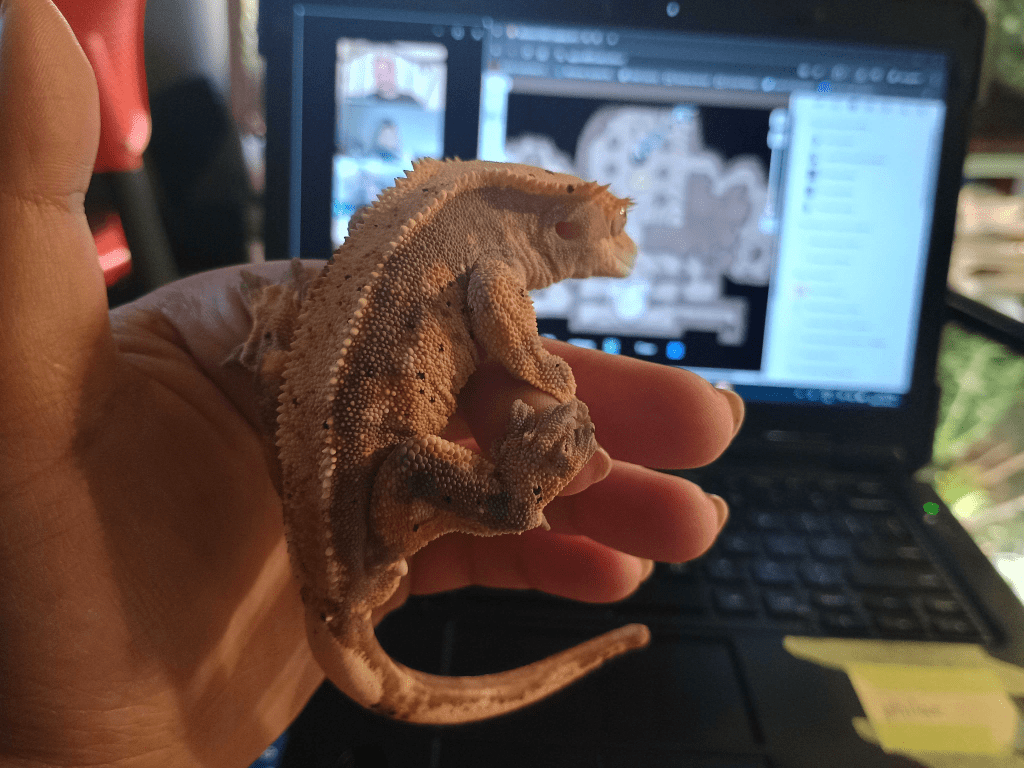
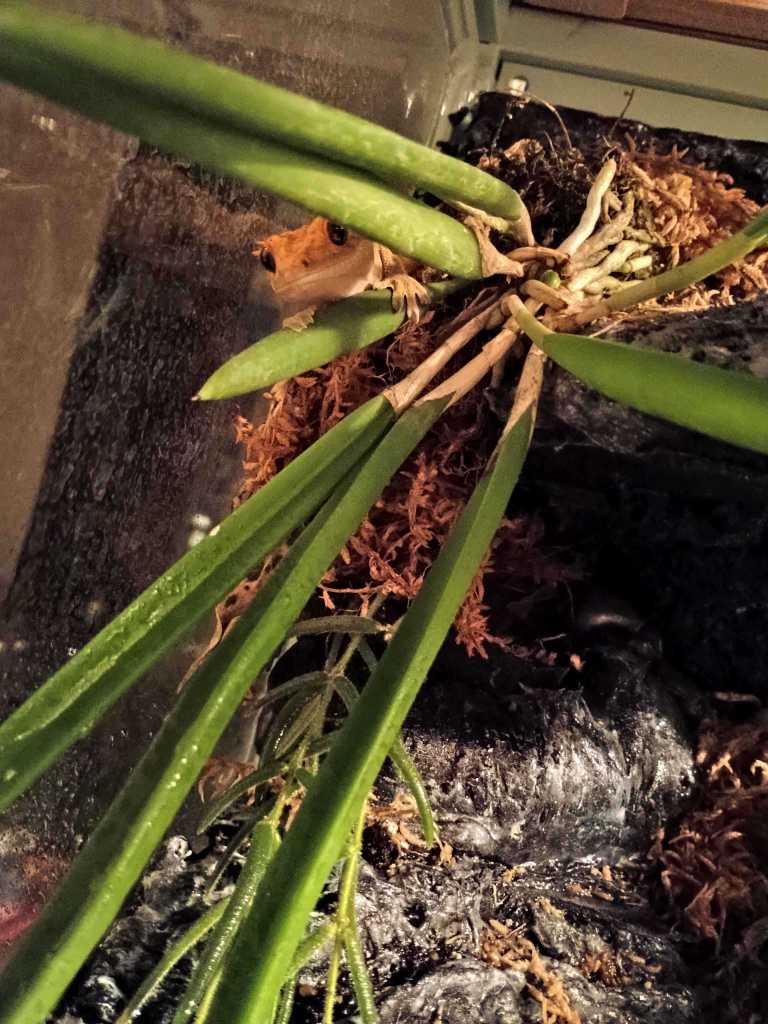
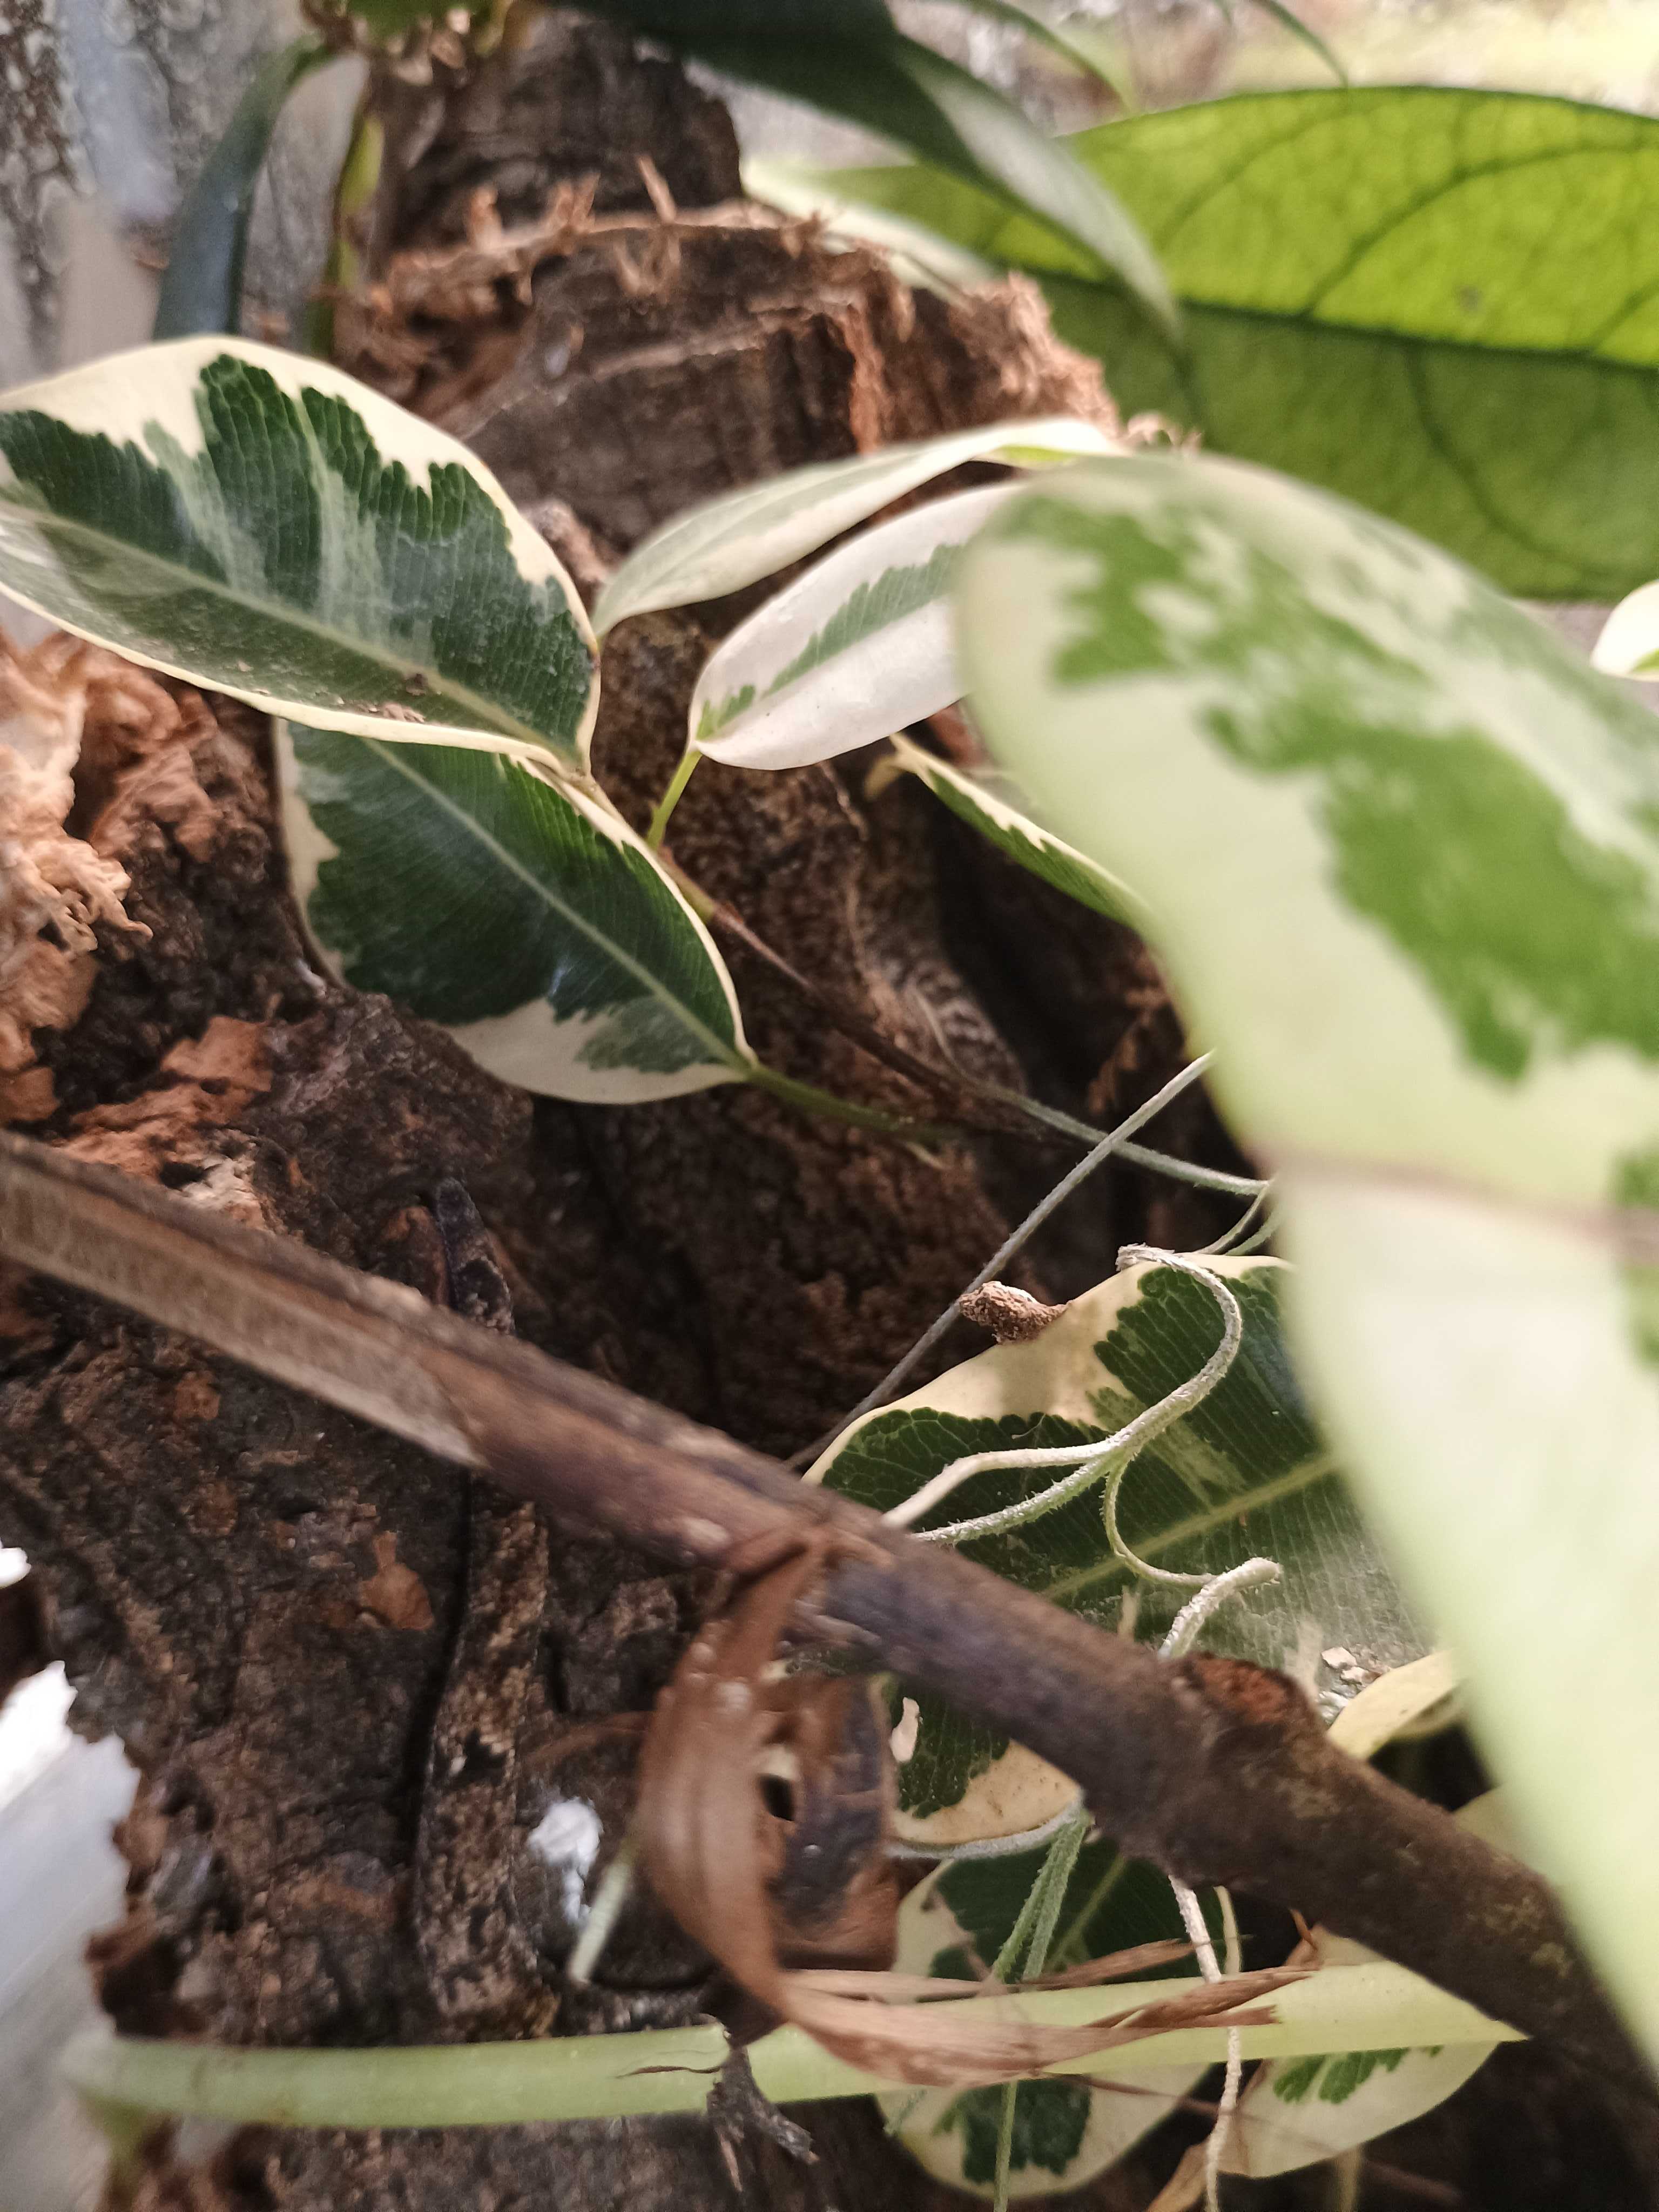
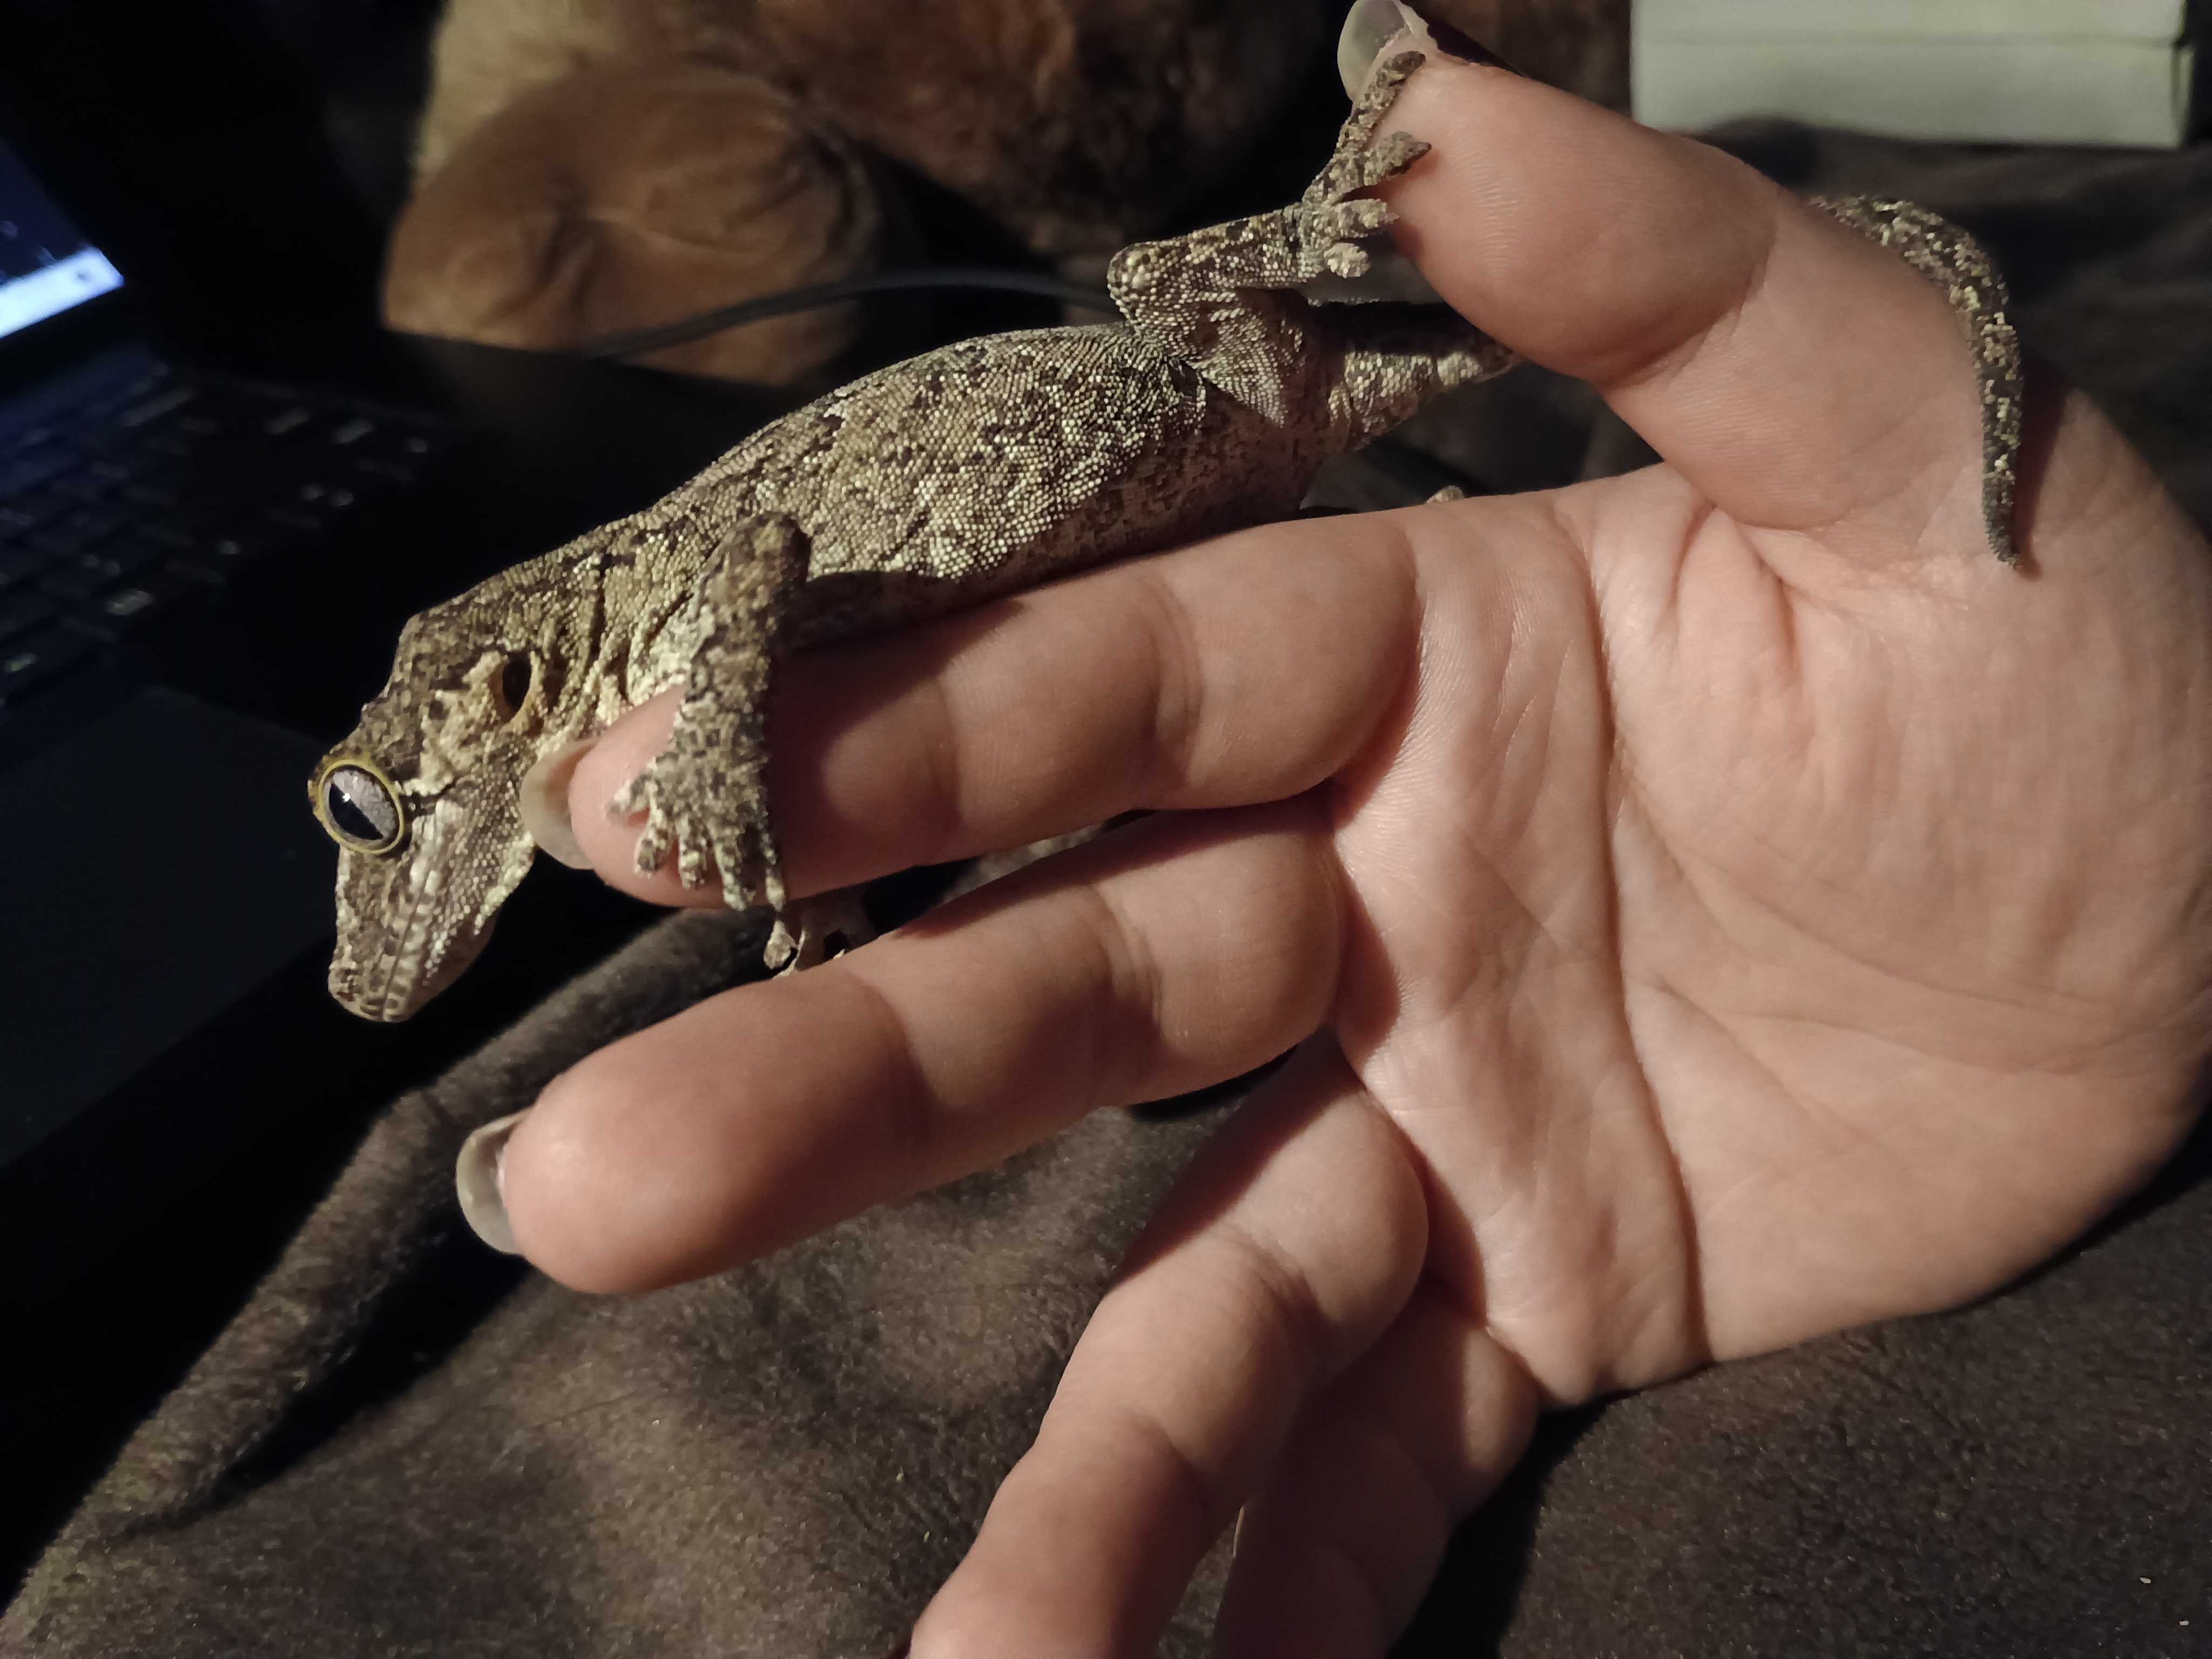
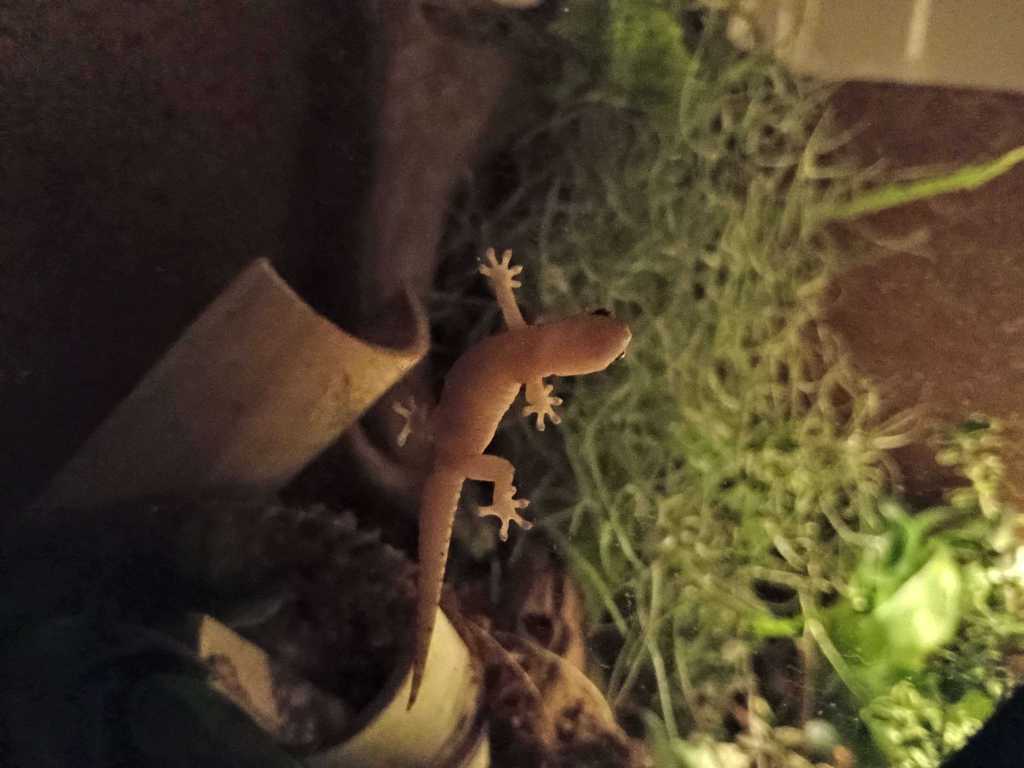
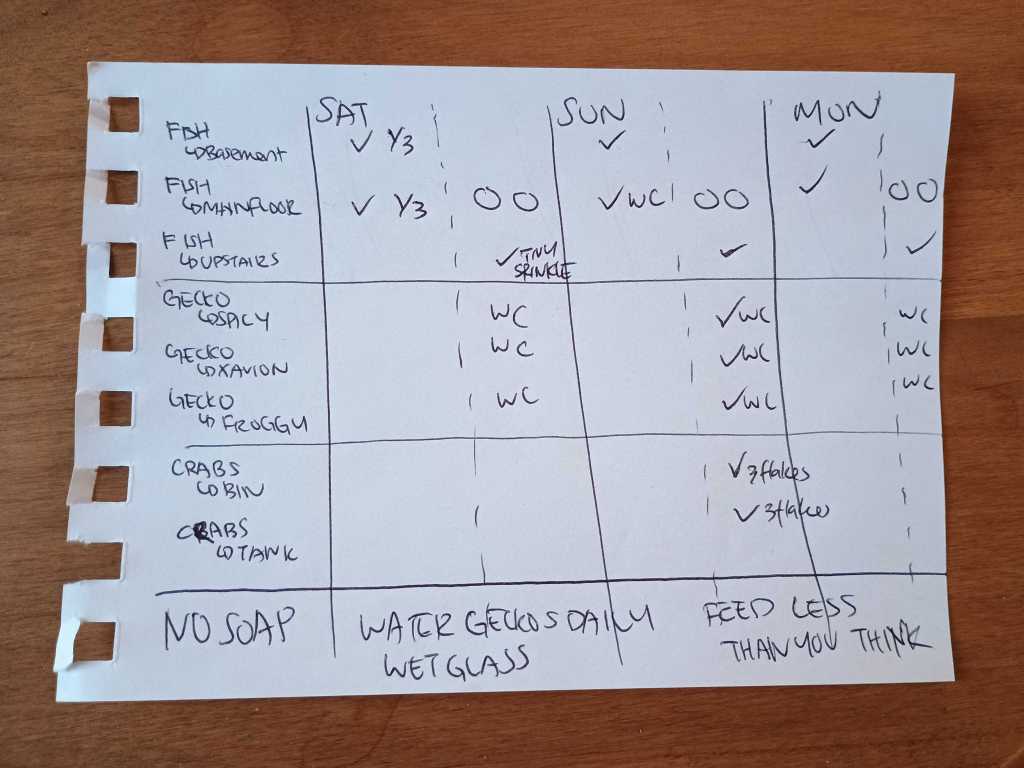
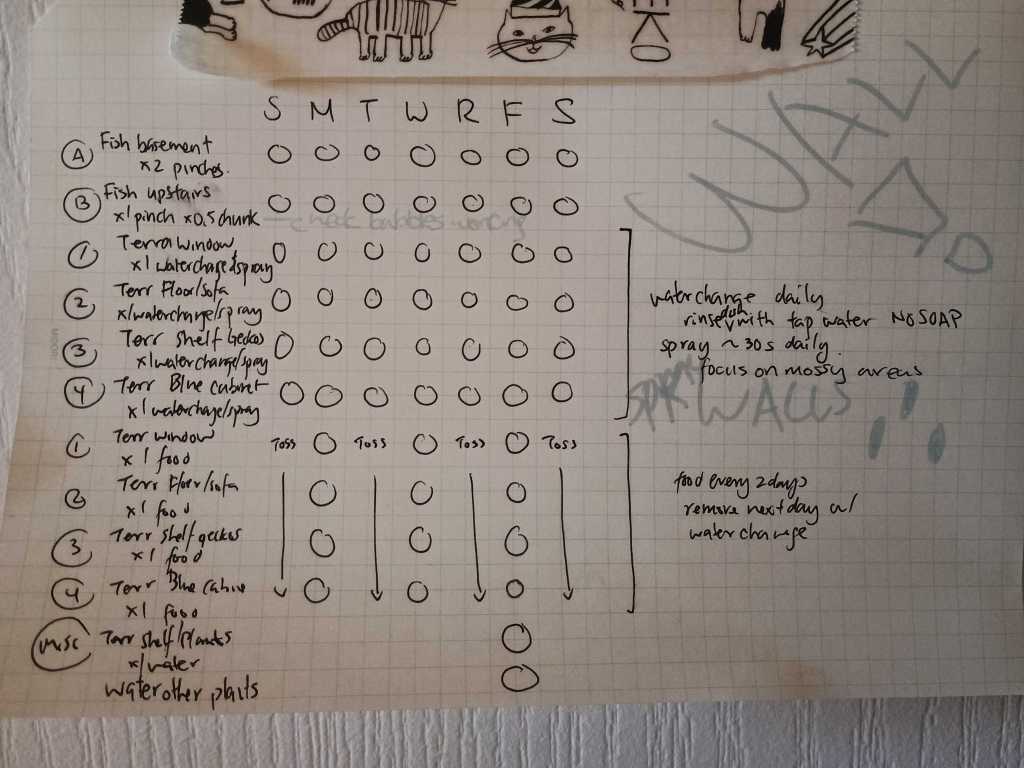
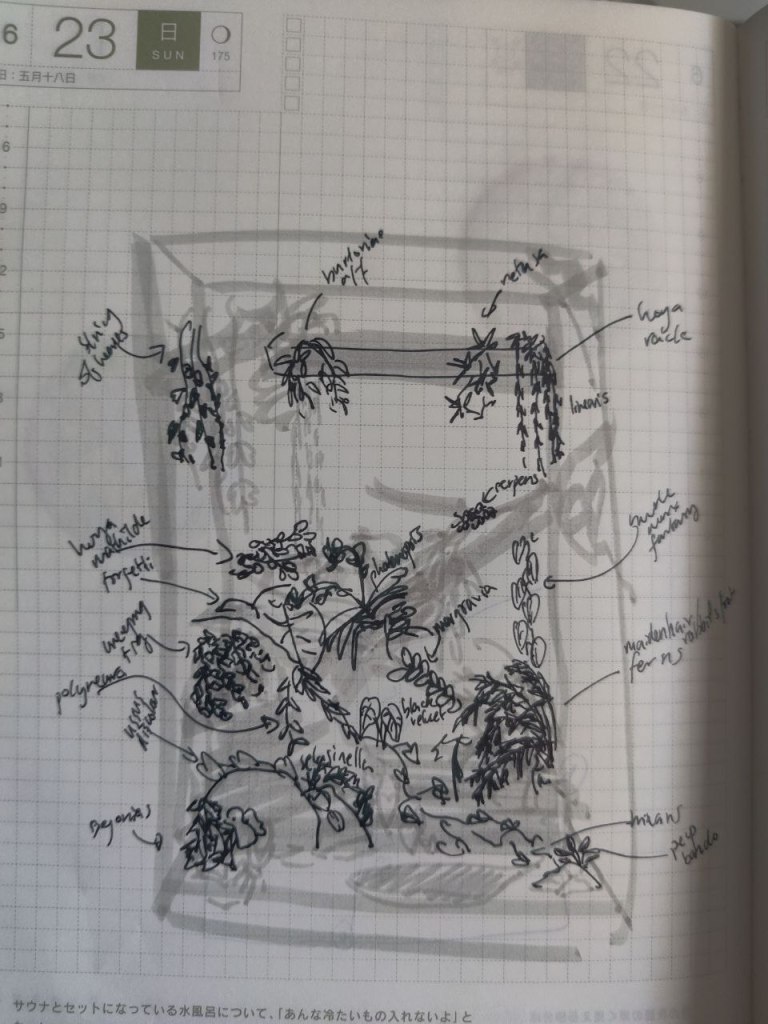
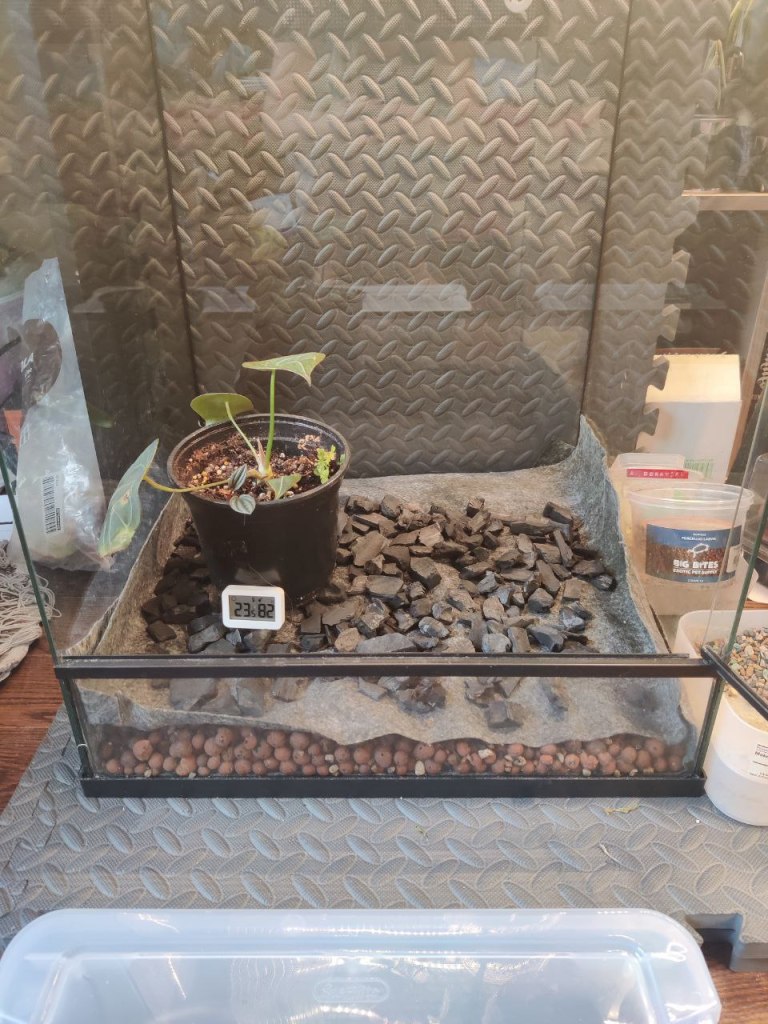
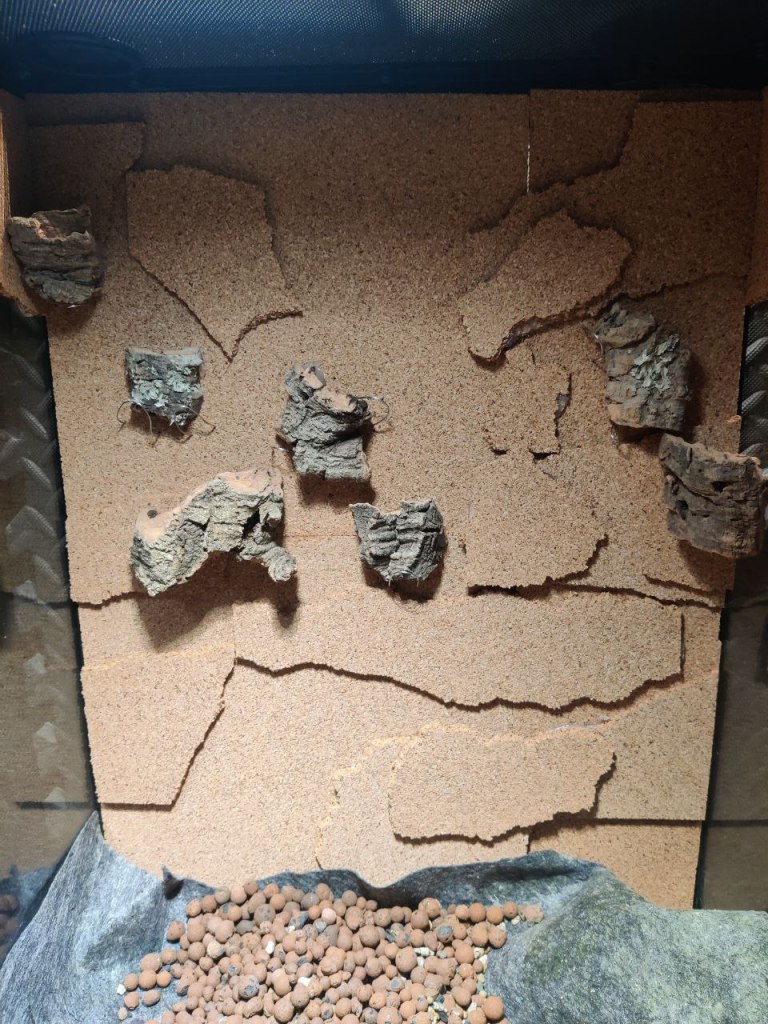
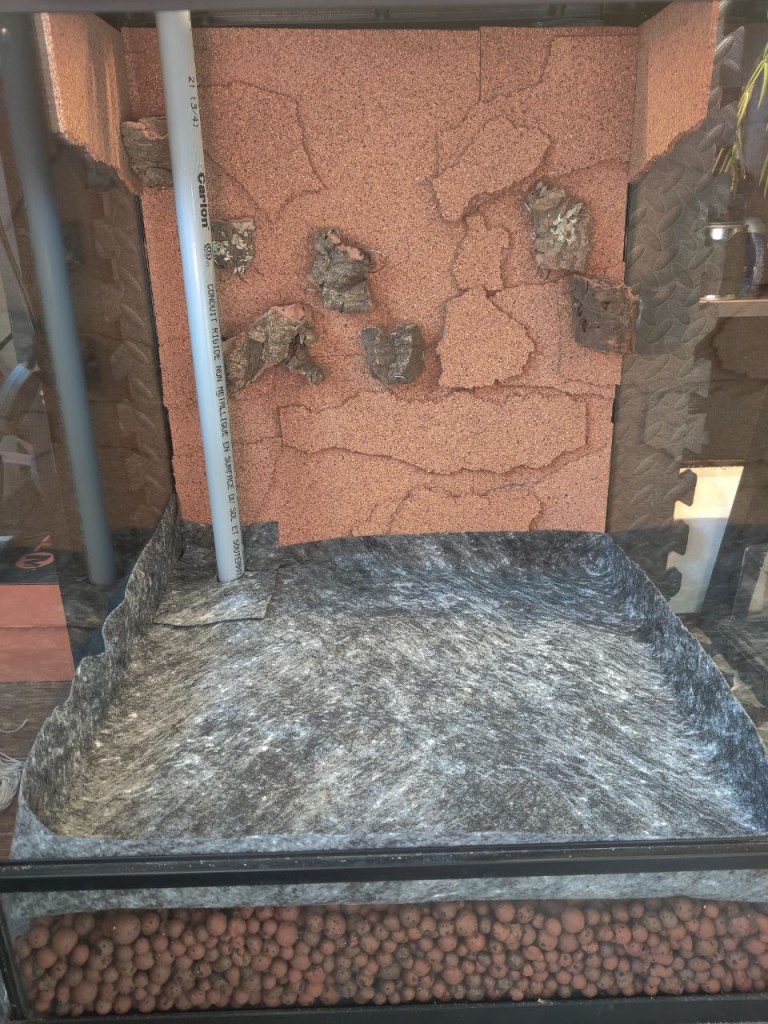
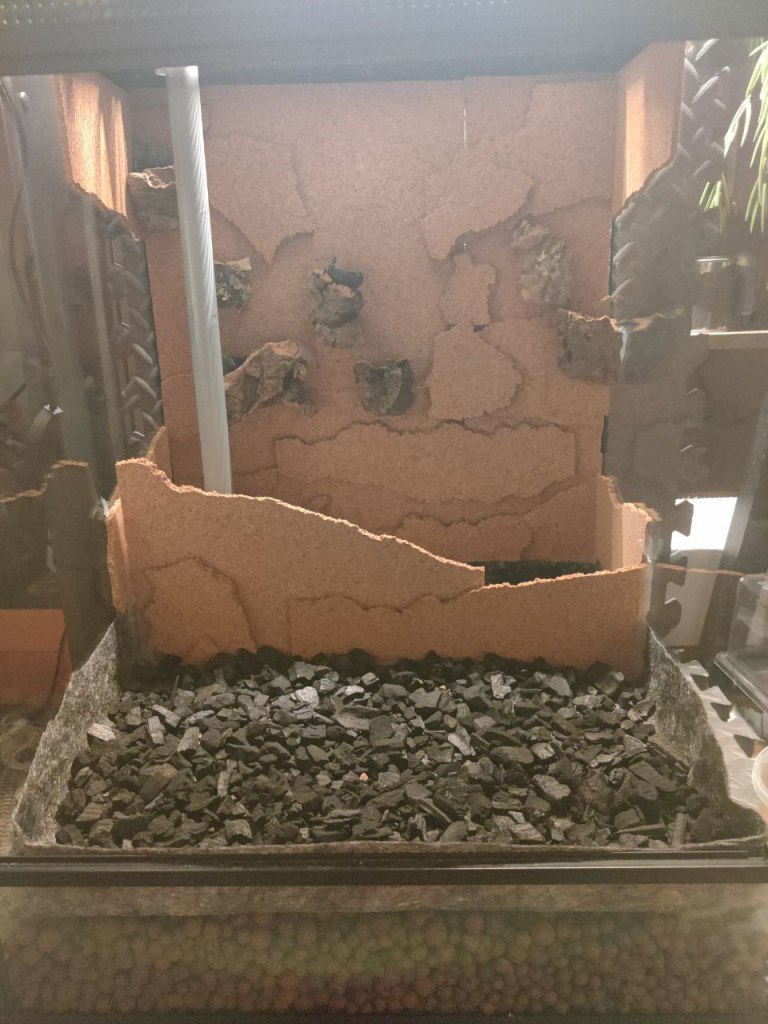
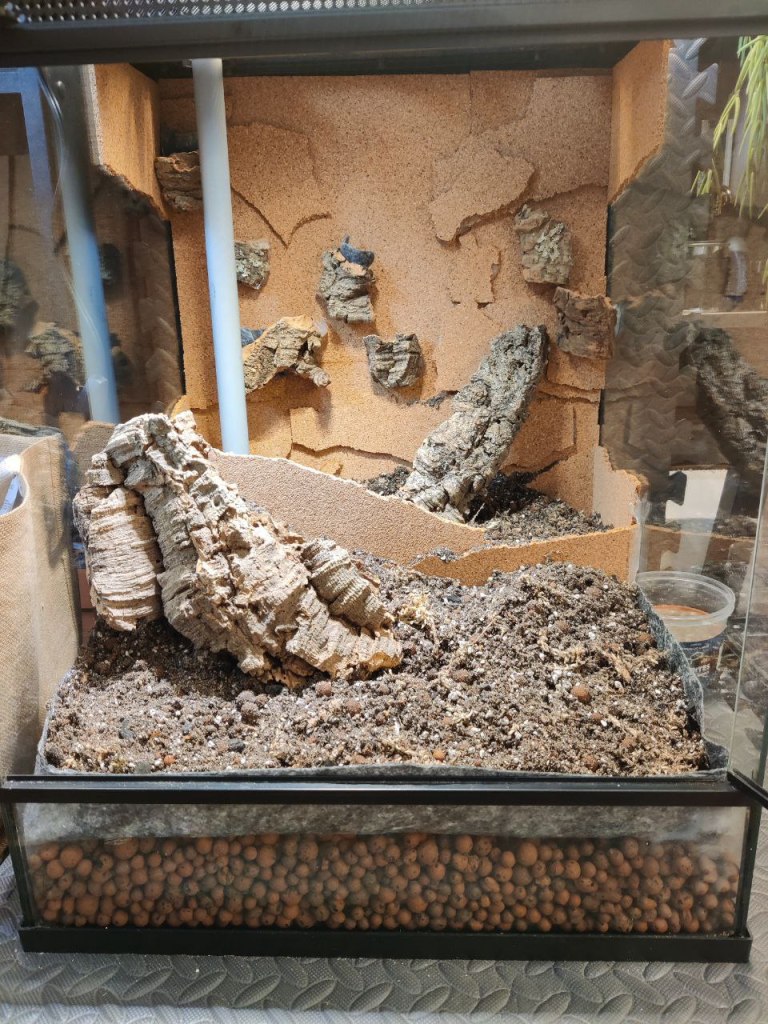
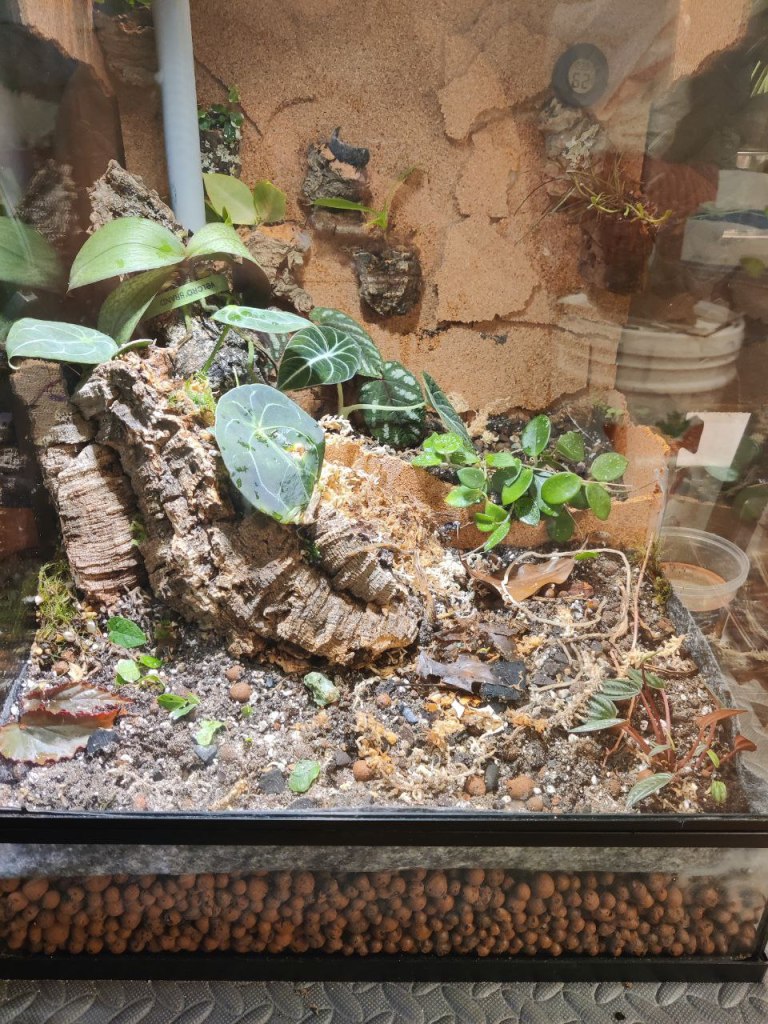
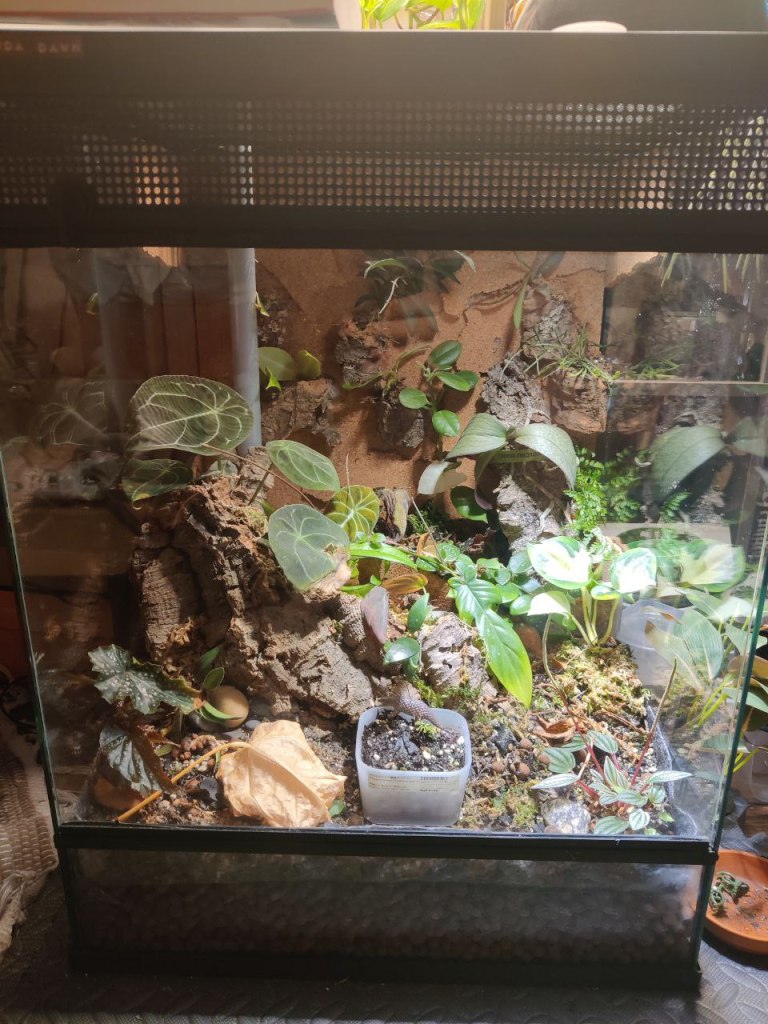
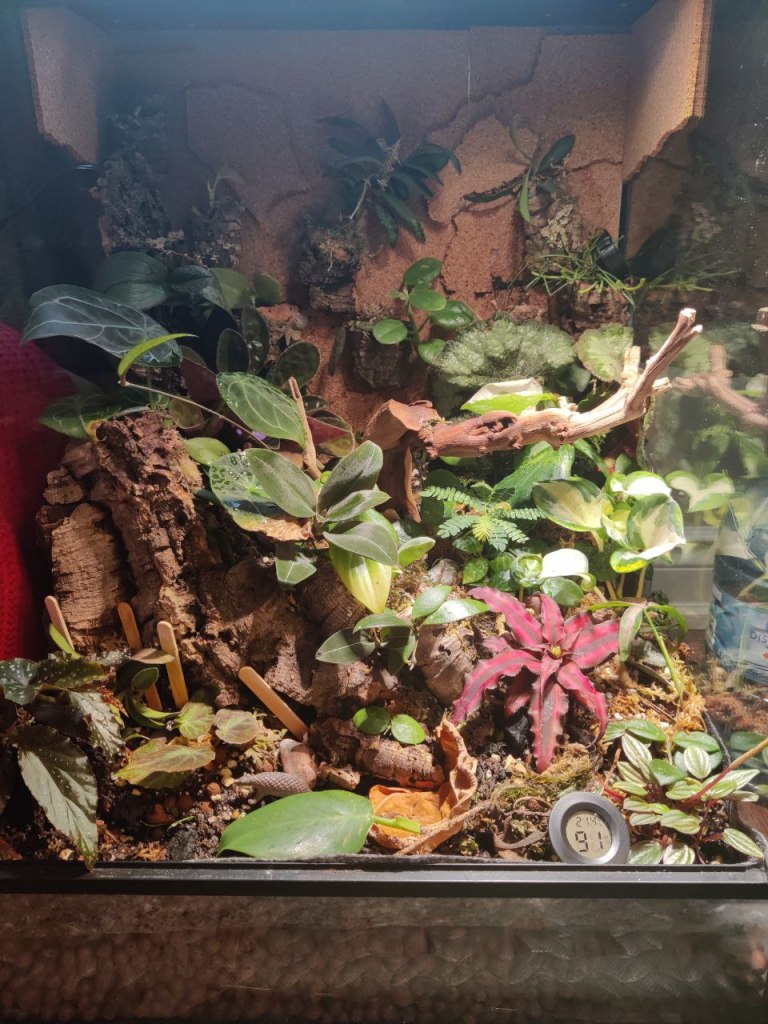
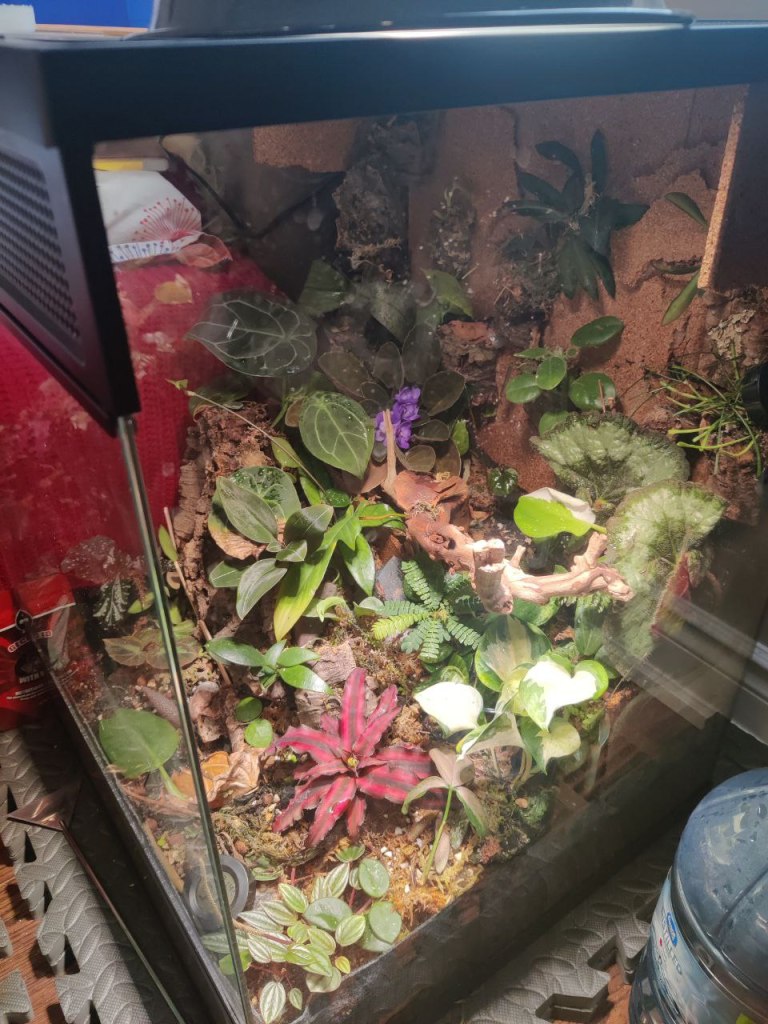
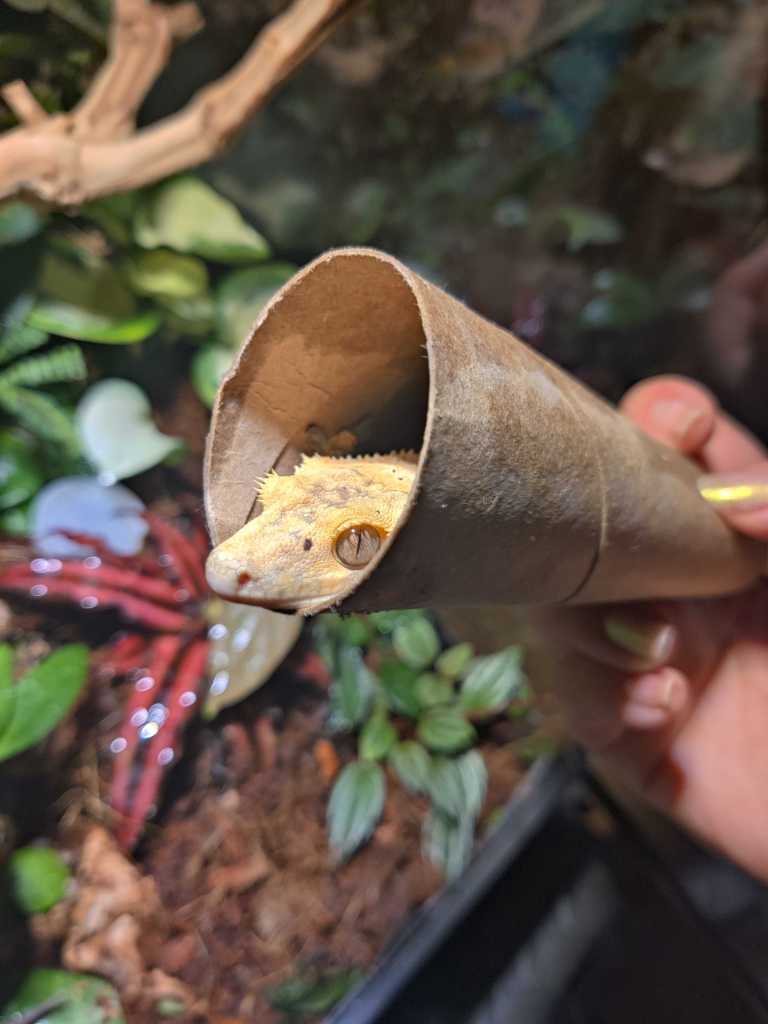
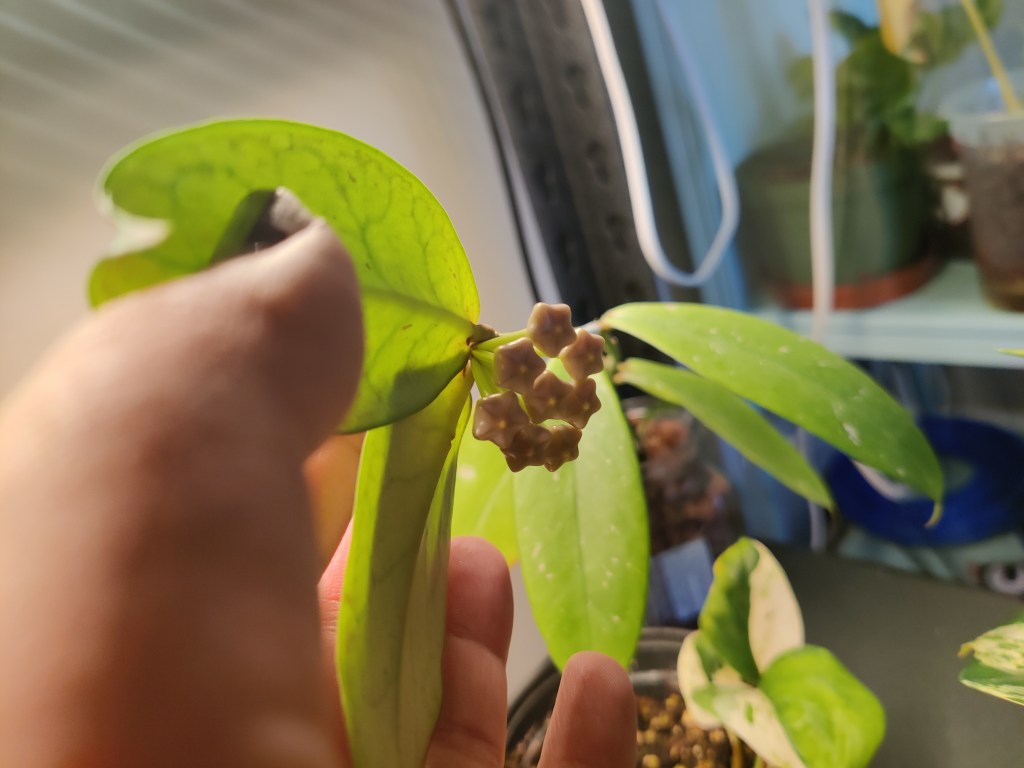
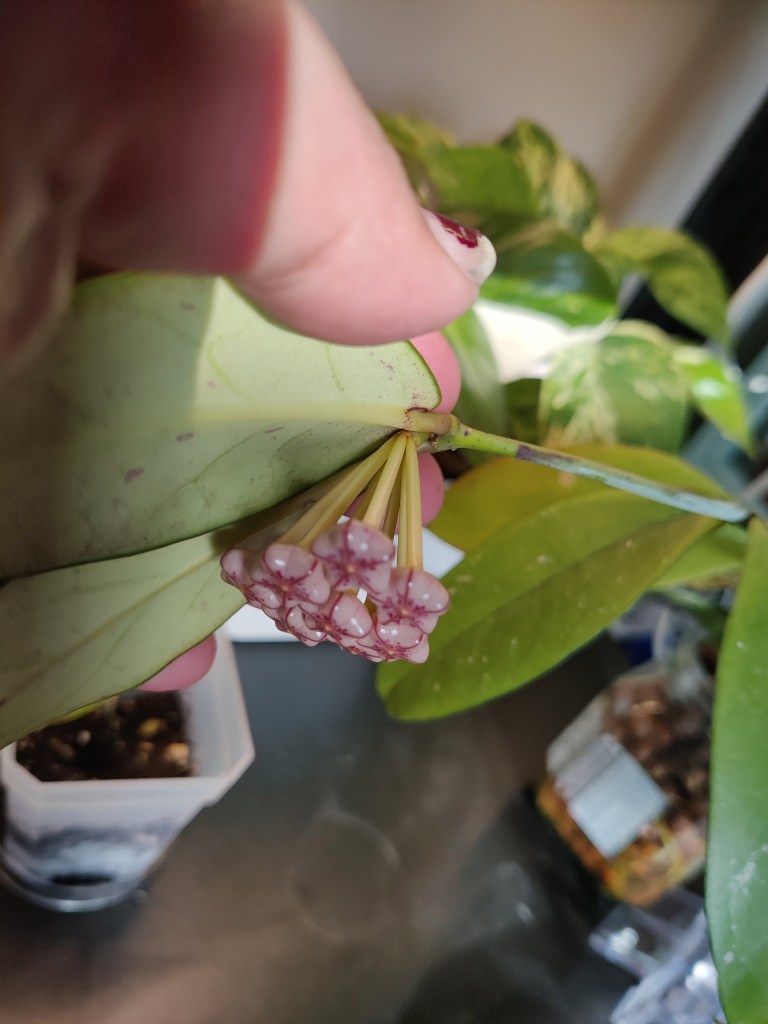
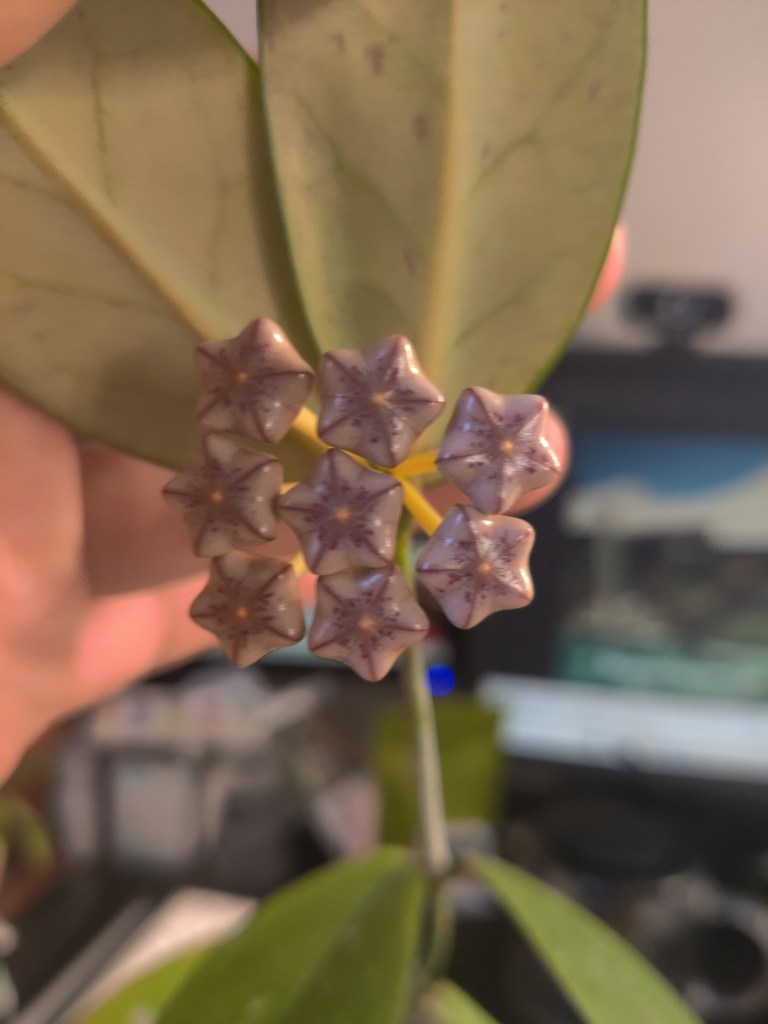
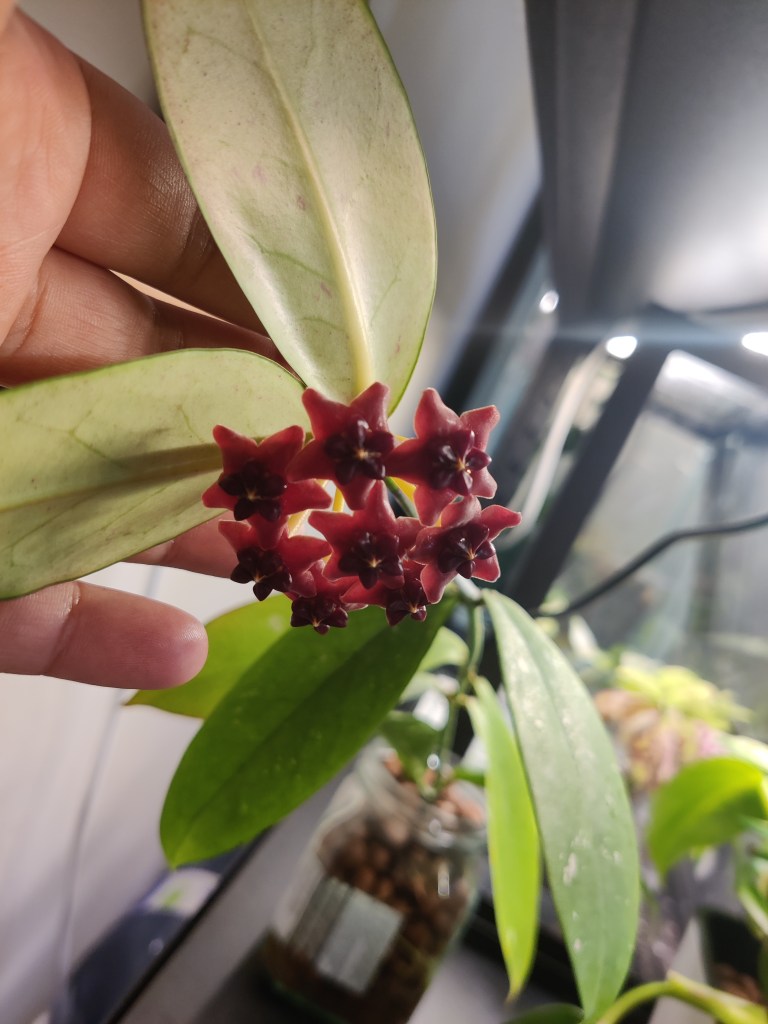
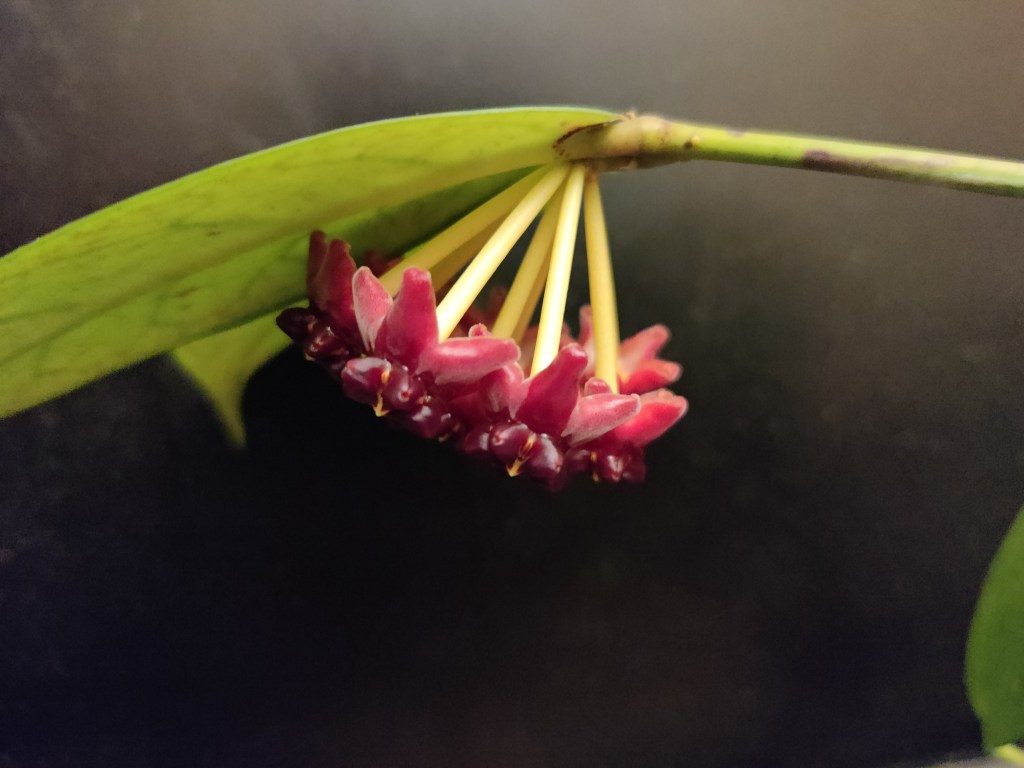

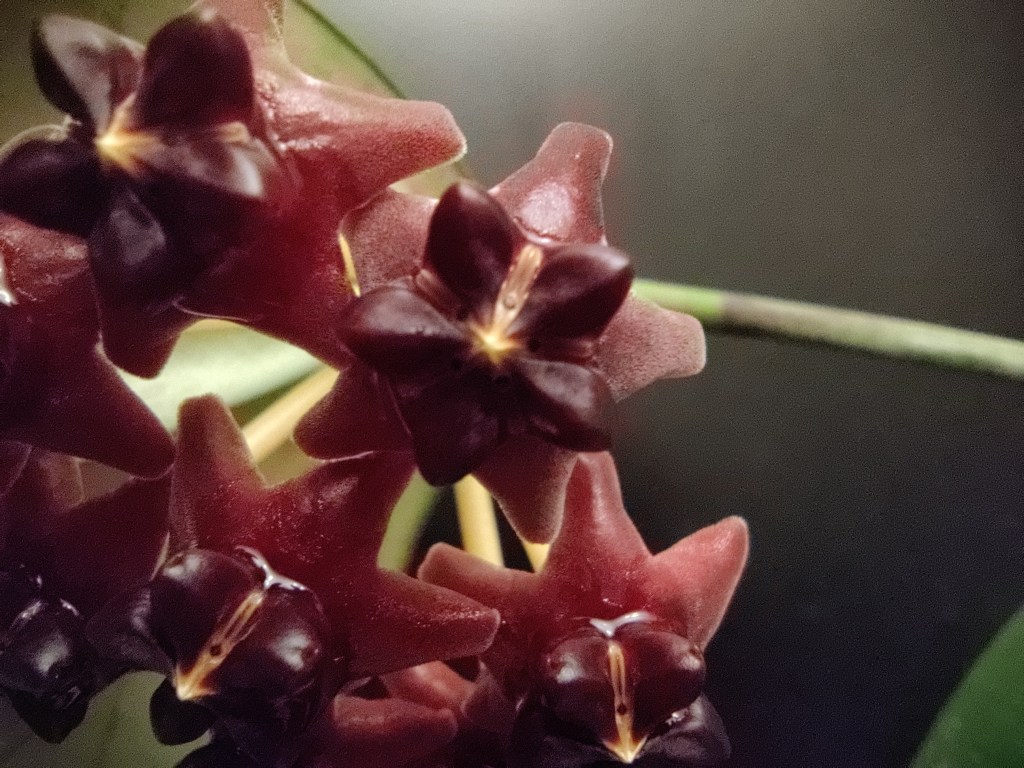
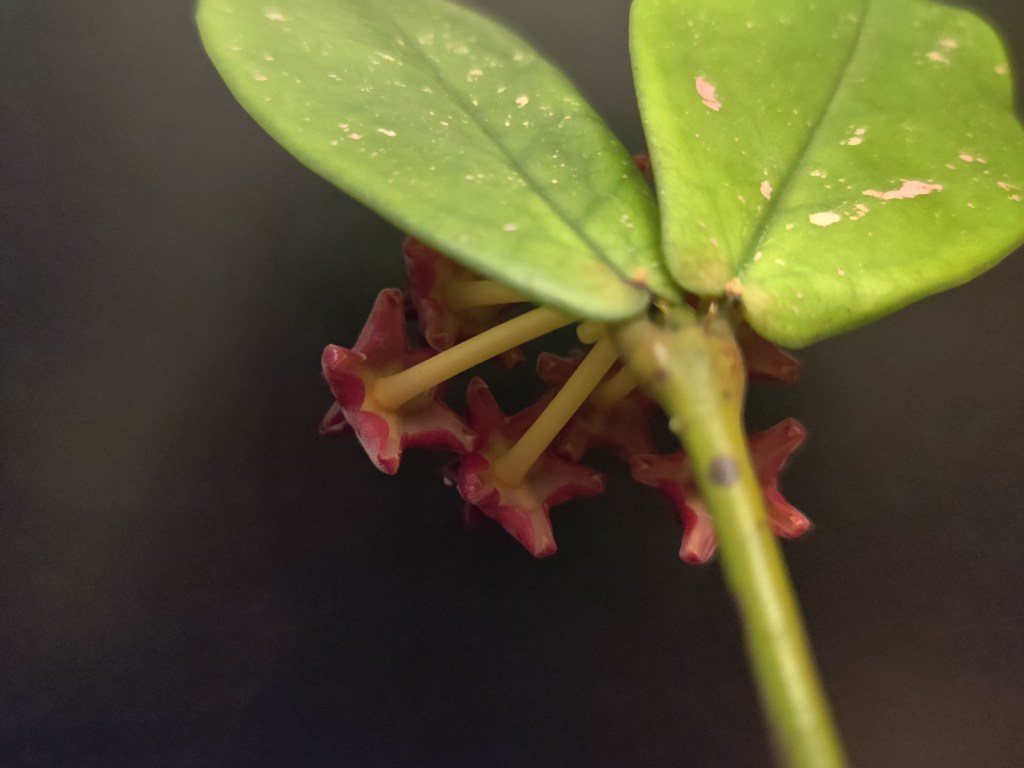
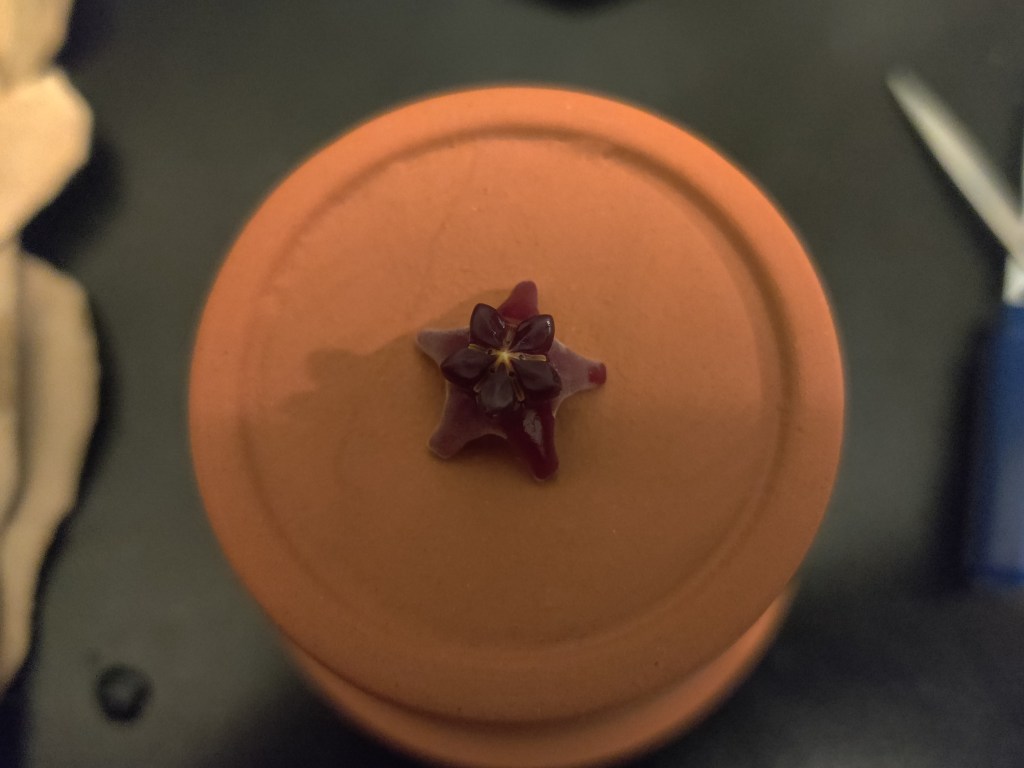
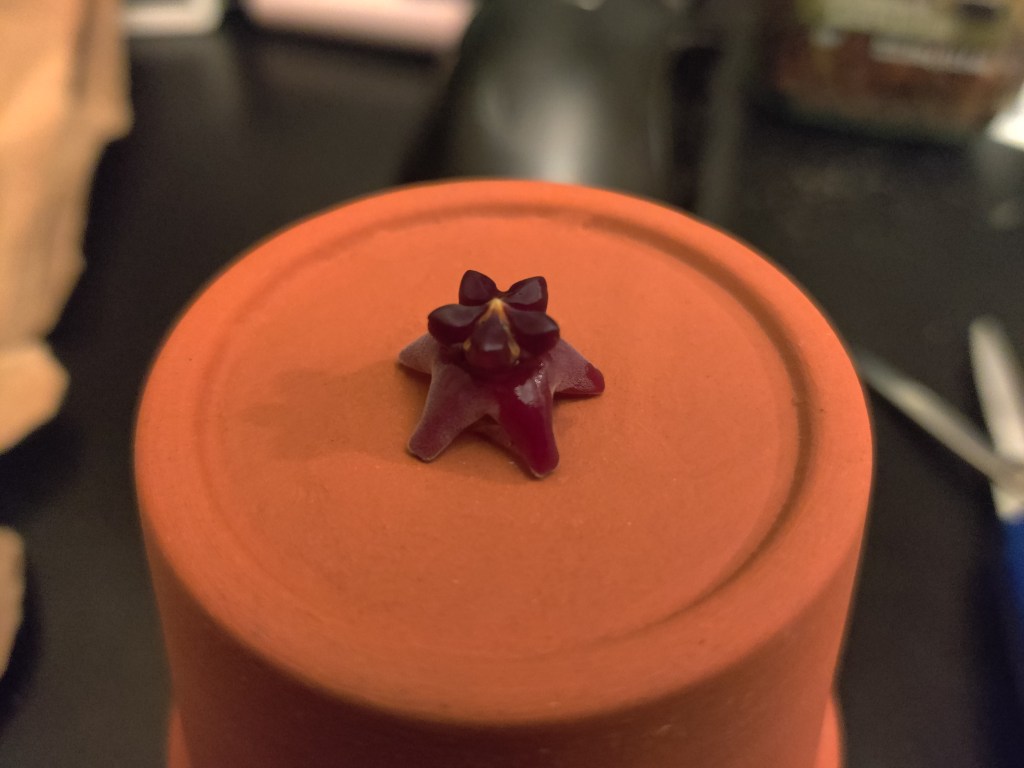
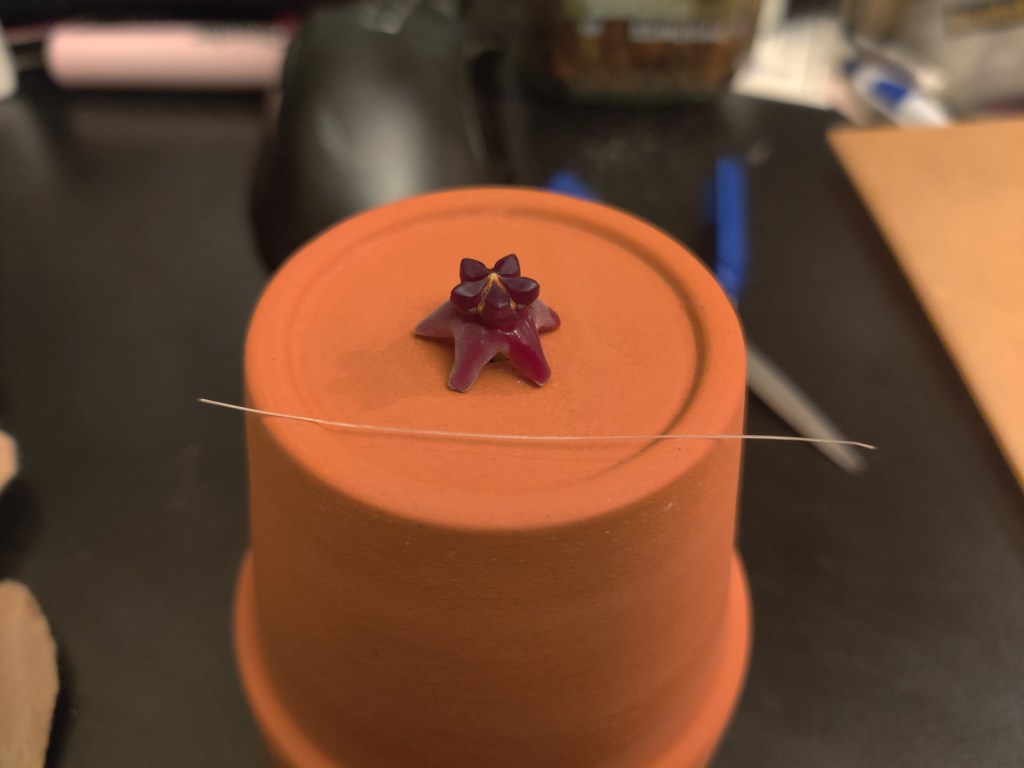
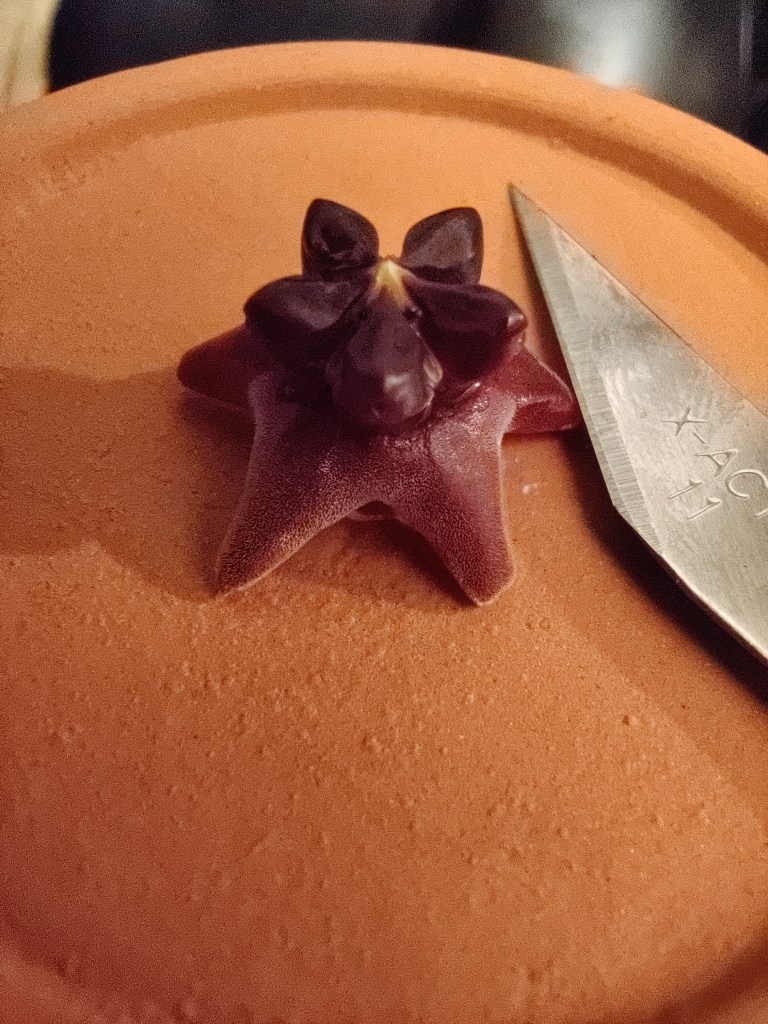
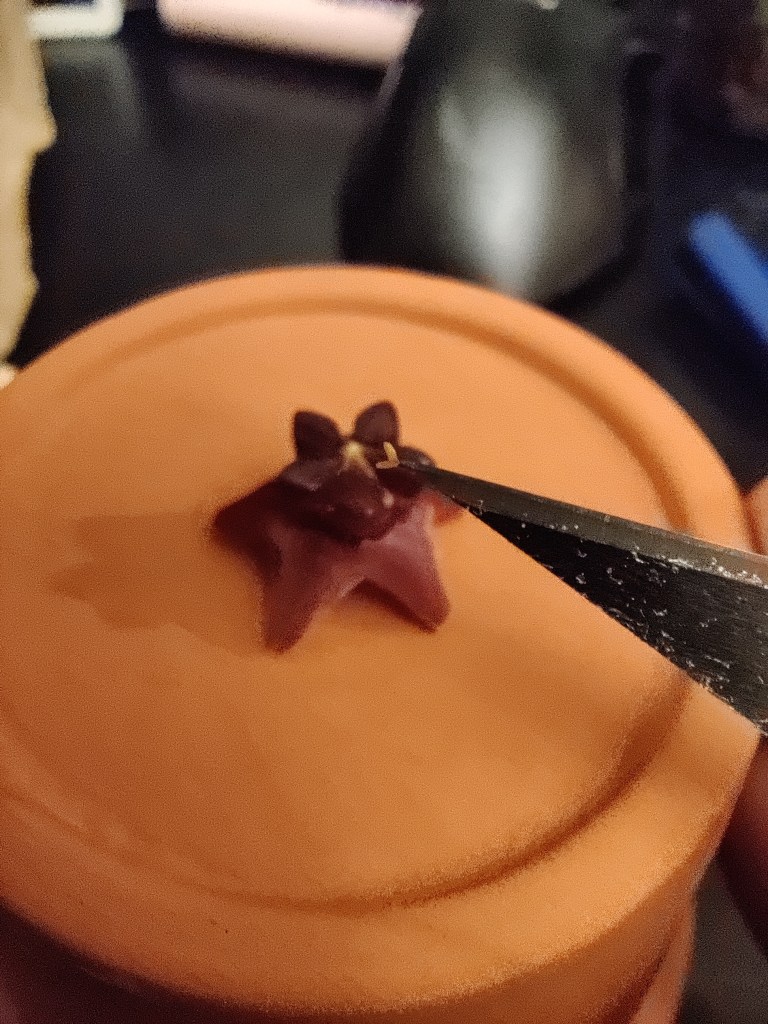
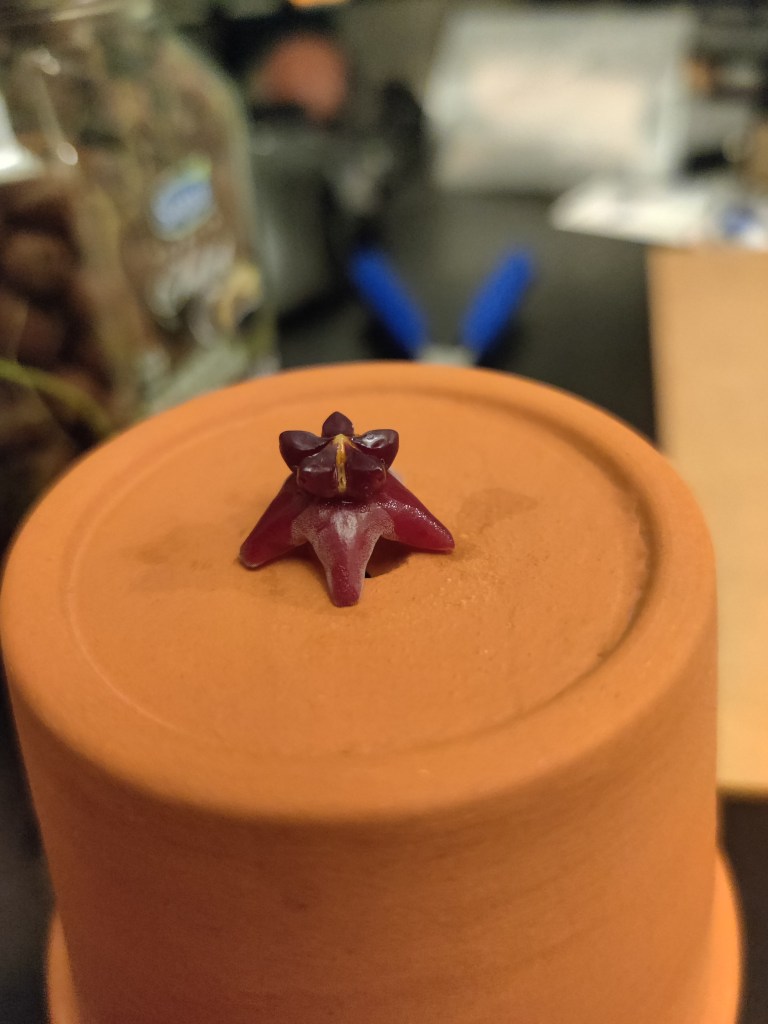
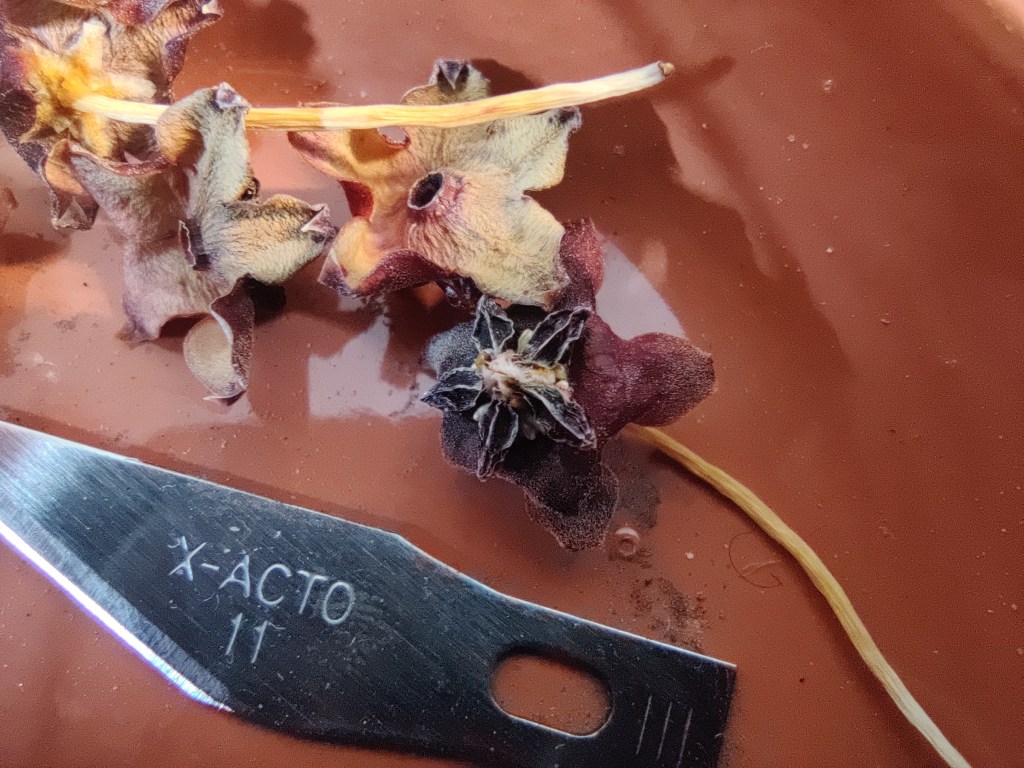

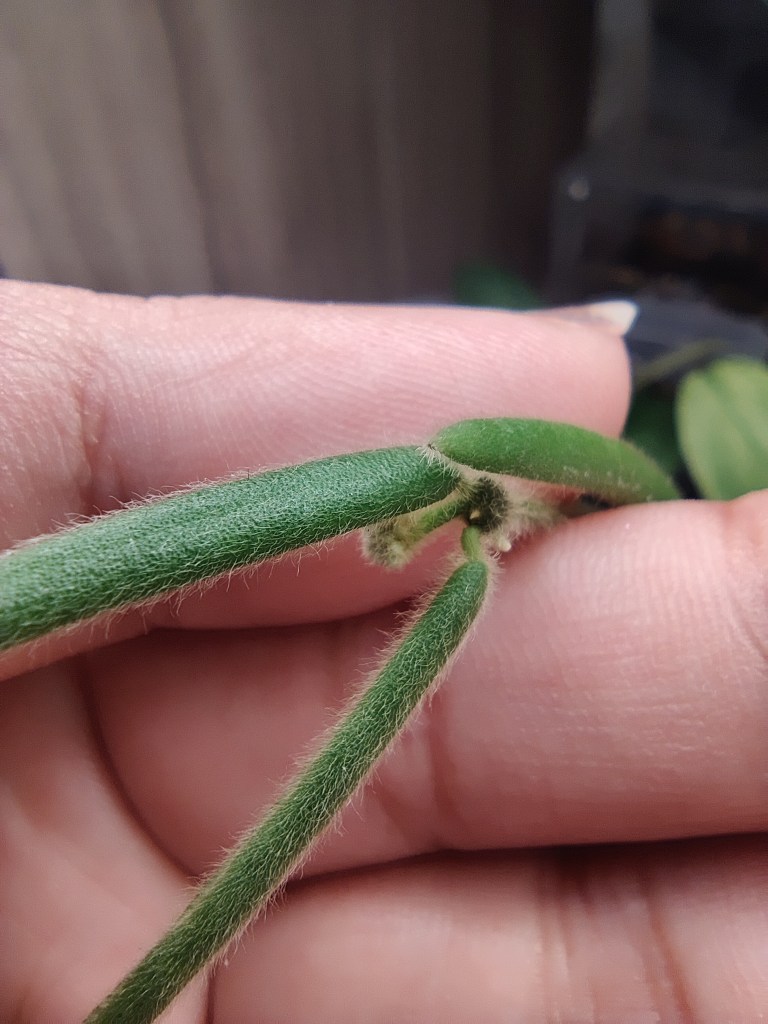
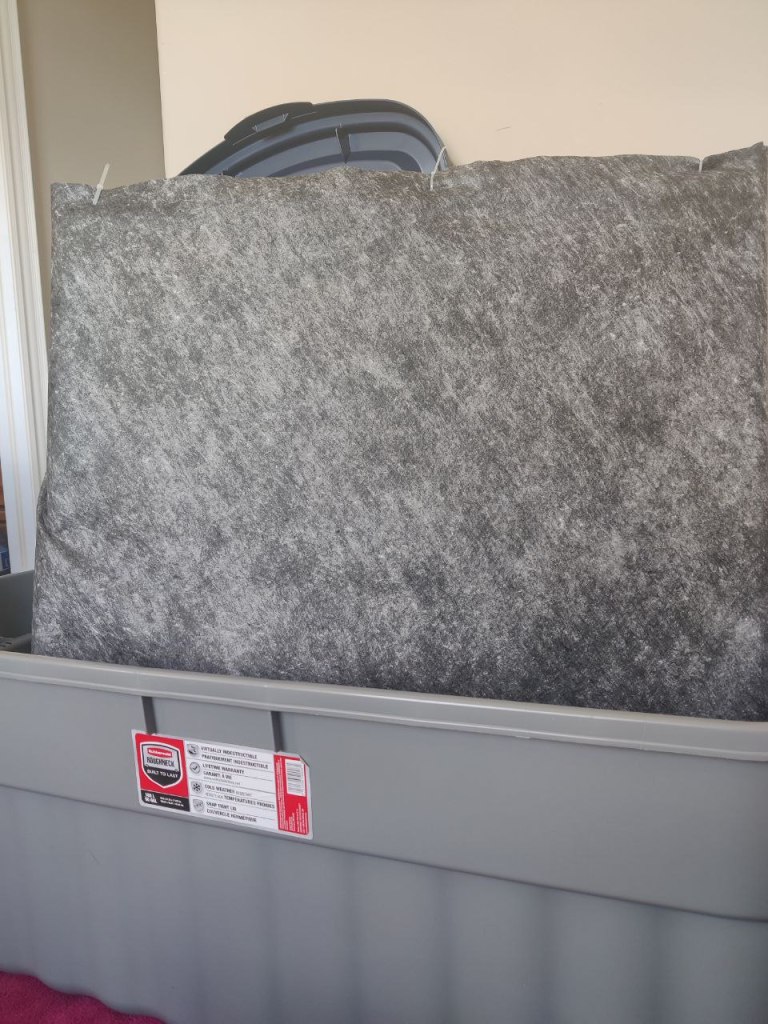
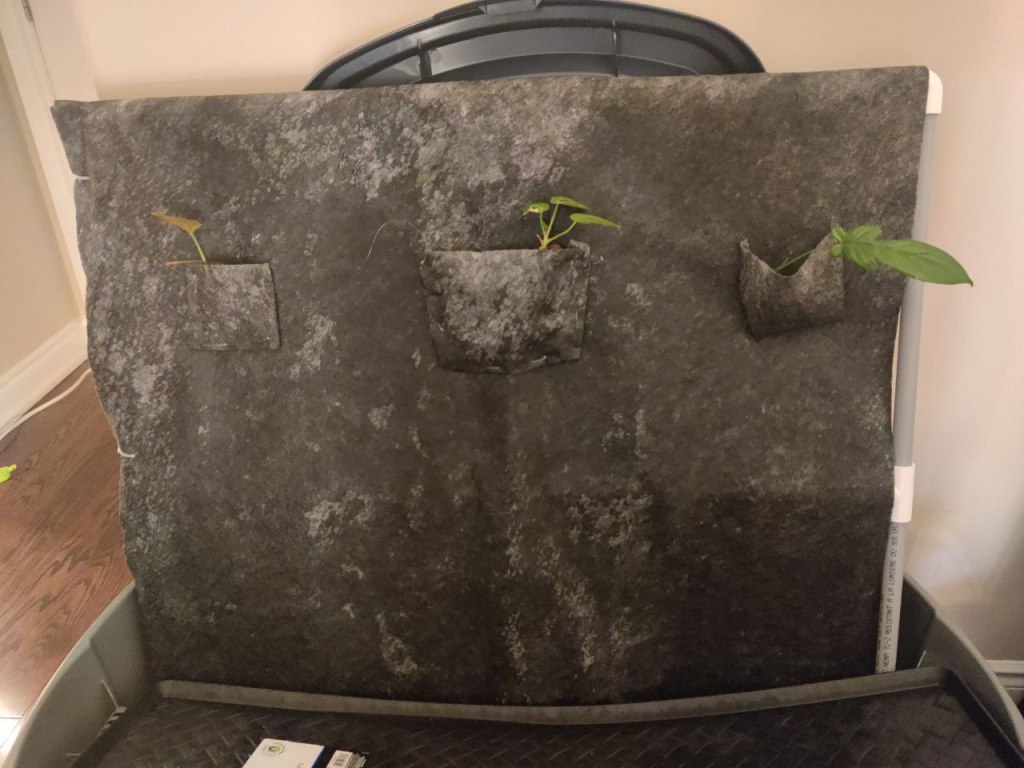

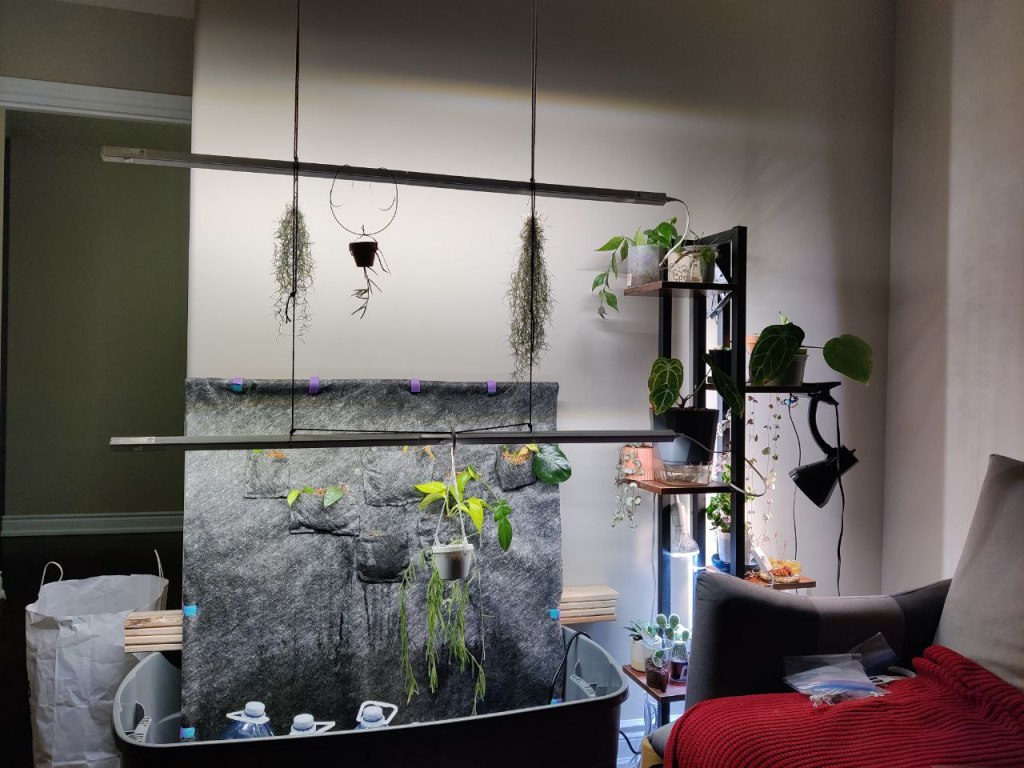
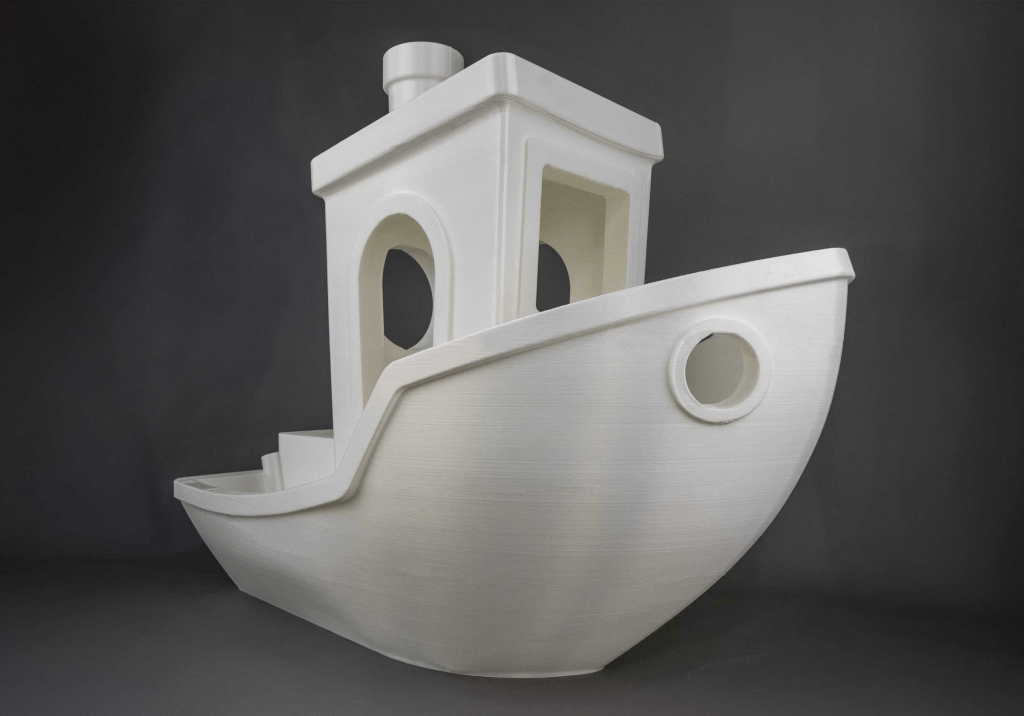
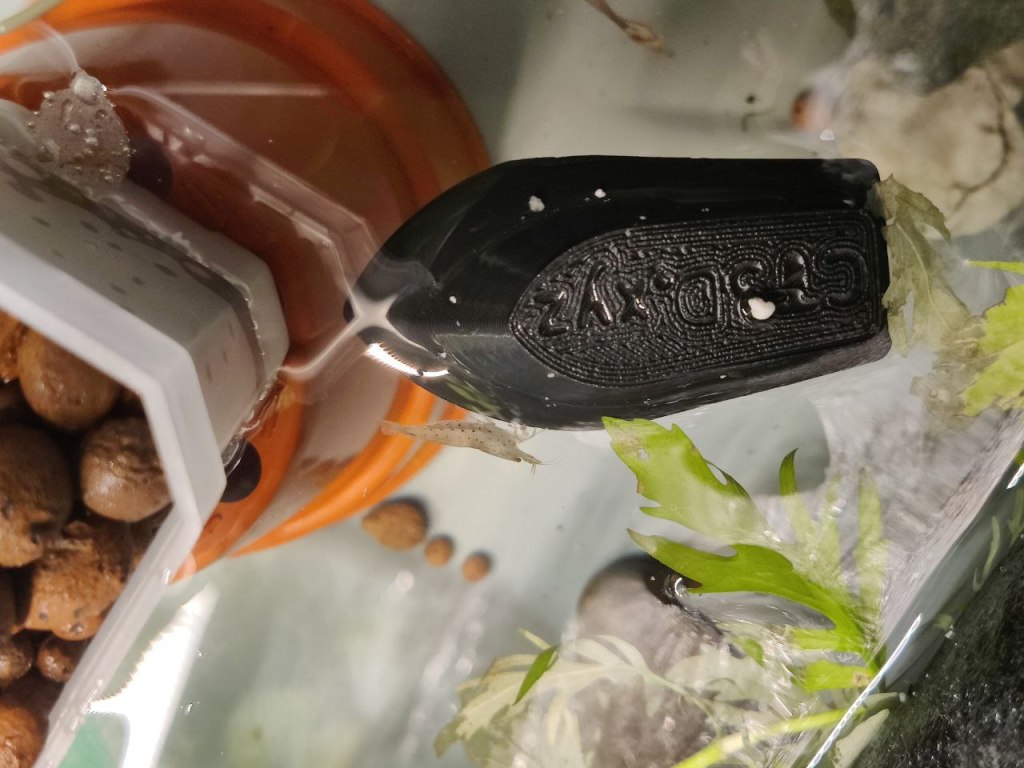
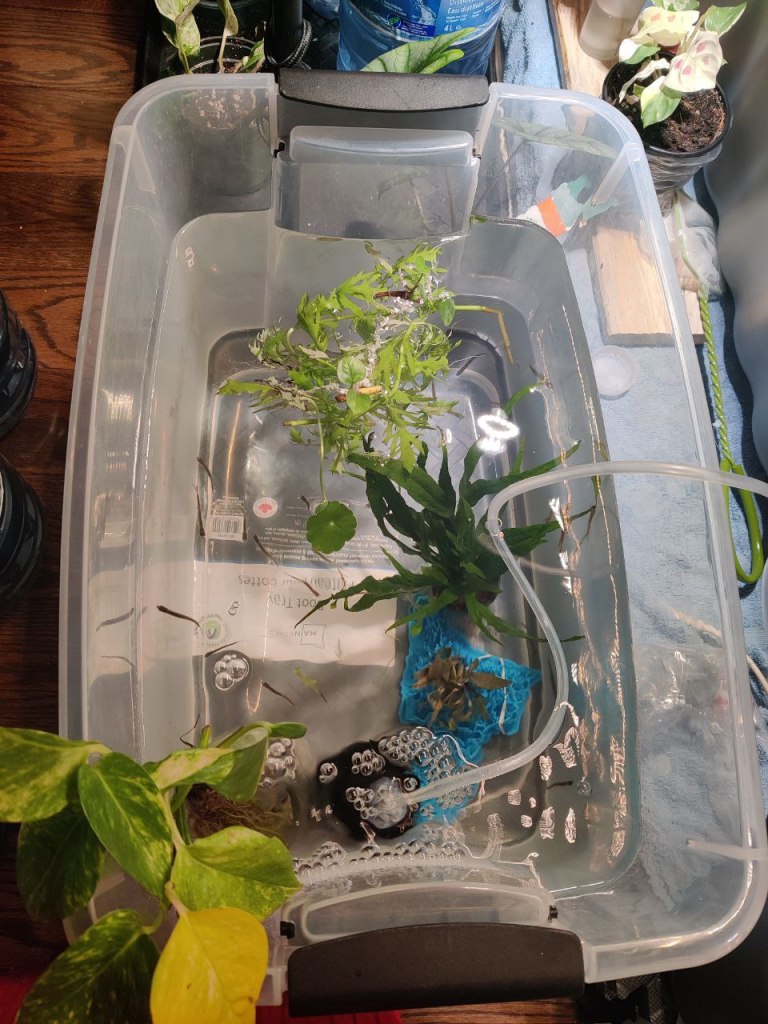
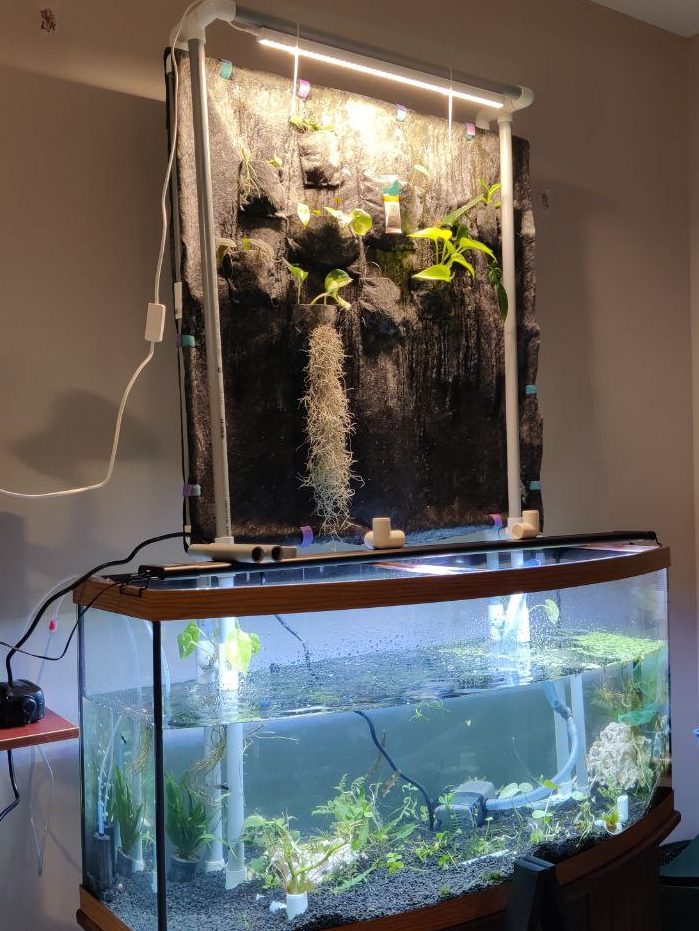

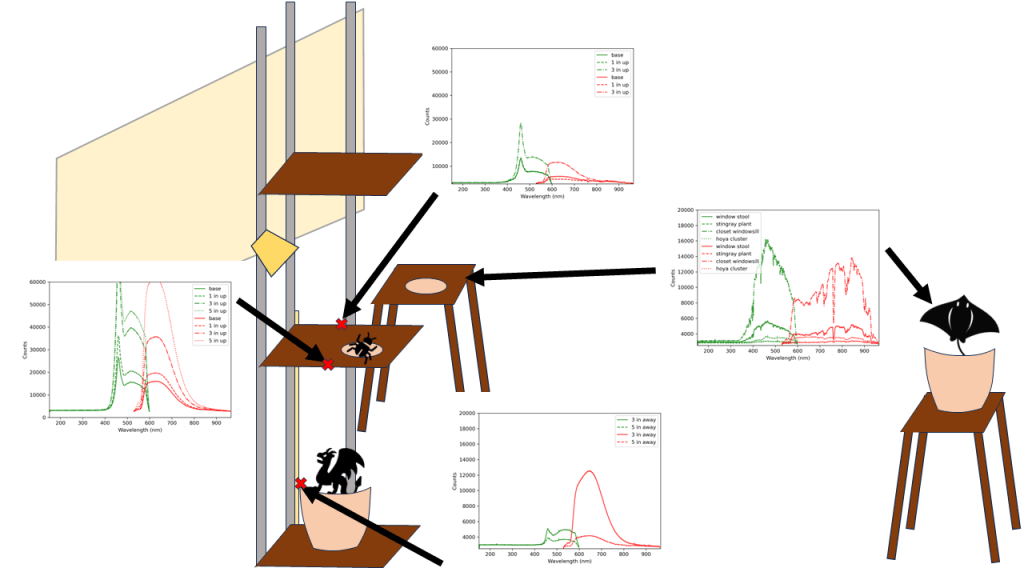
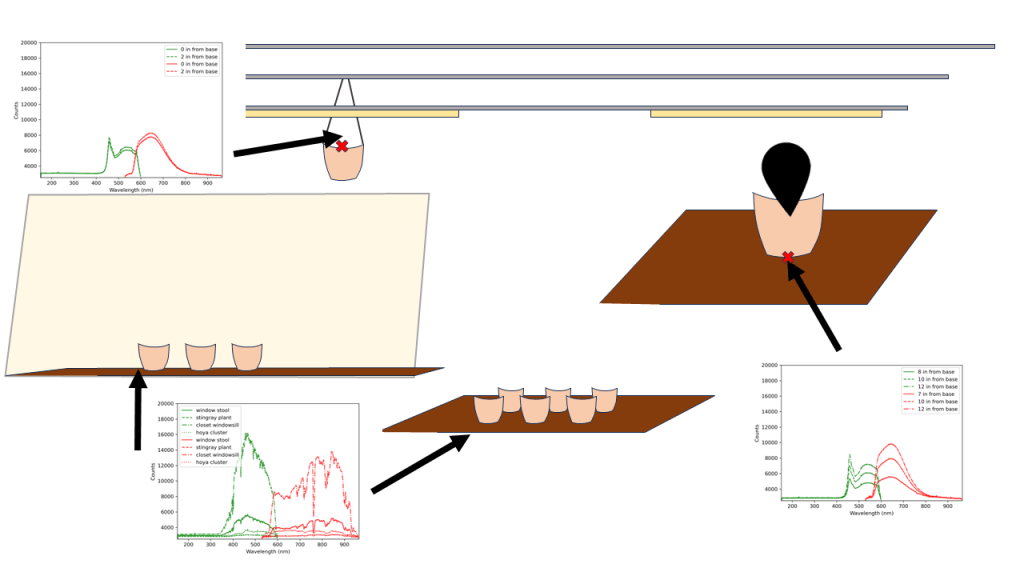
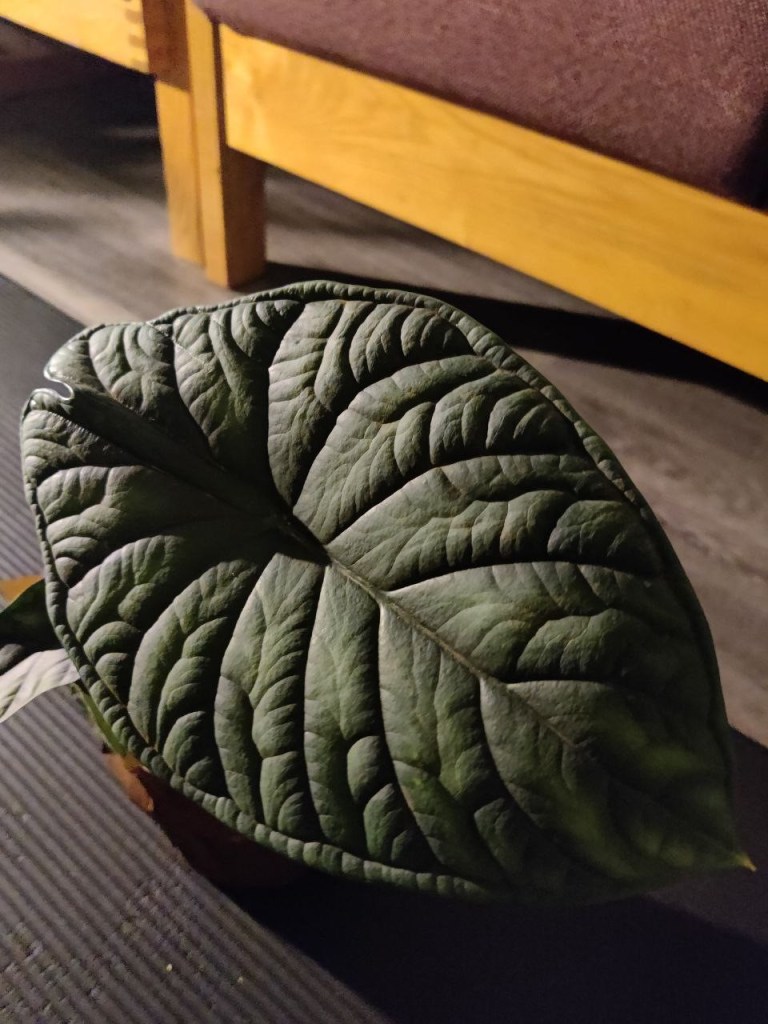


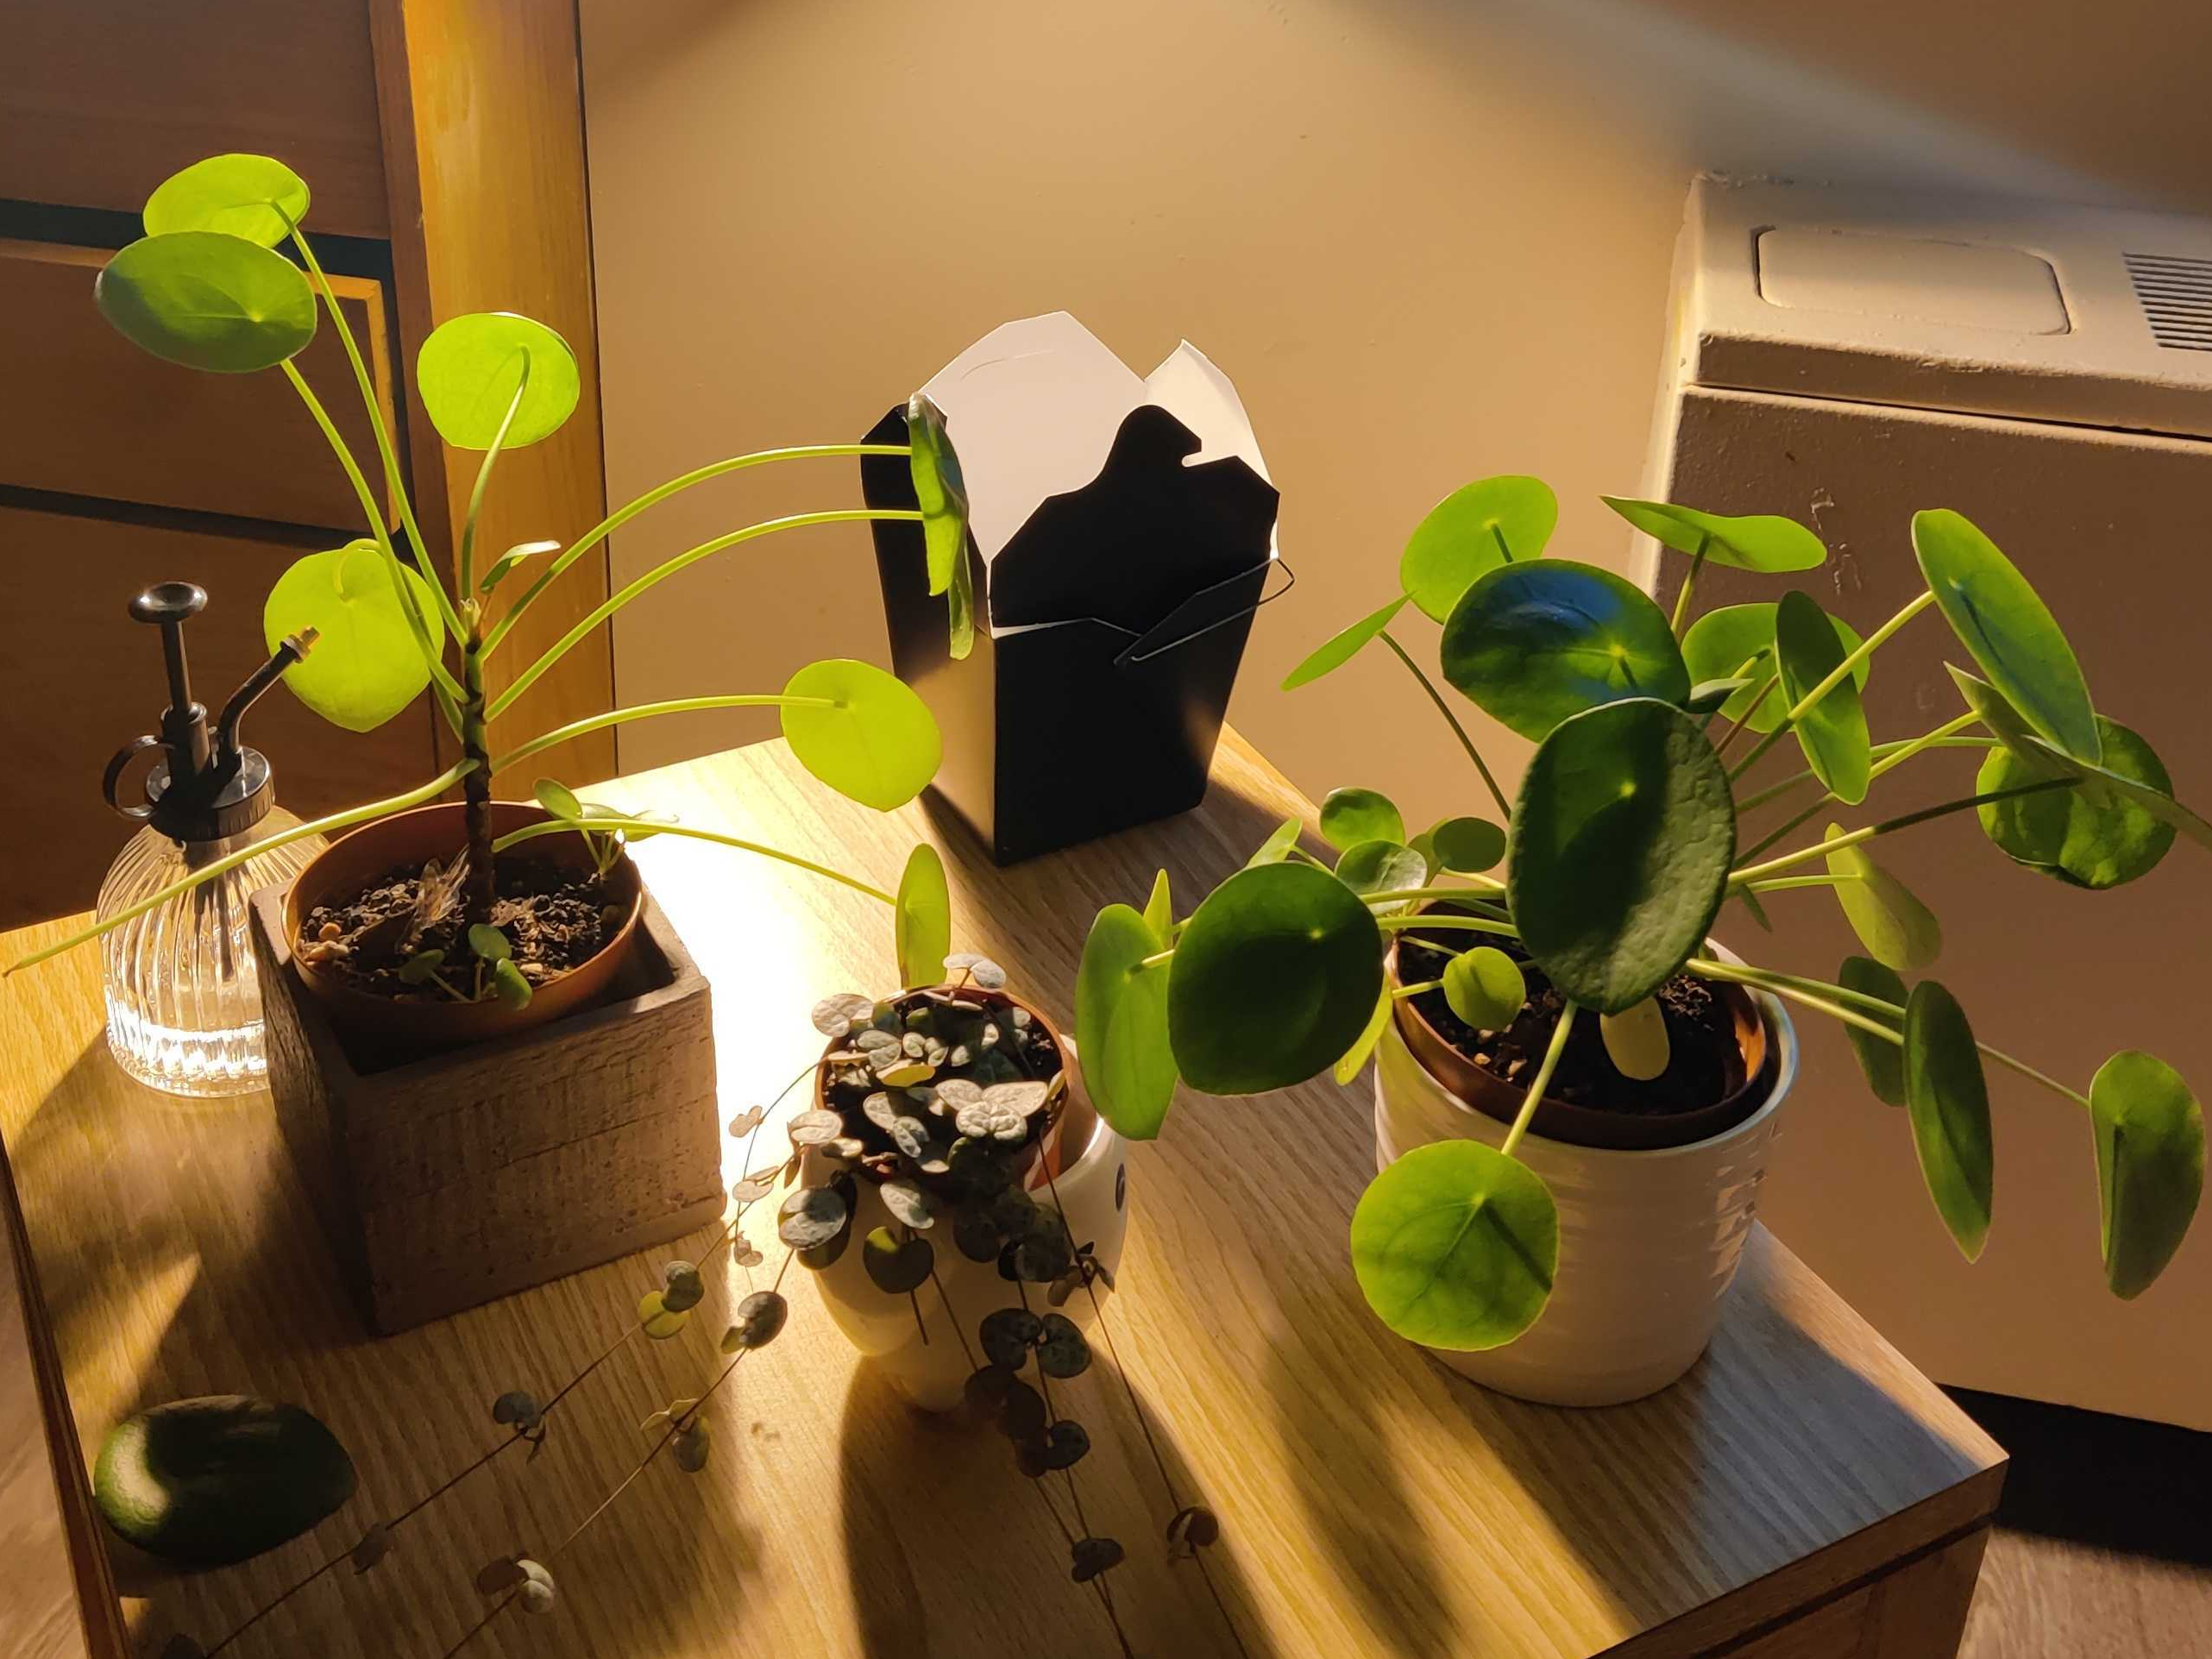
